Annual Leave Provision to General Ledger
Overview
Annual Leave is accrued on the employee record as part of the Post process of the pay run. This leave accrual is not reflected in the Posting transaction and does not update the General Ledger. To accrue for Annual Leave you will need to create a Journal Entry and this can be done using the /wiki/spaces/SUP/pages/32768118 which can be found on the Payroll Administration > Payroll Setup tab.
License
Journal Generator is included in your Payroll License at no charge for up to 10 definitions. Contact sales@infinetcloud.com if you have more complex requirements.
Leave Balances
The Annual Leave balances can be reviewed using one of the reports found under Payroll Administration > Leave Reports > PR-Leave Liability by Type Results OR PR-Leave Liability Detail Results. The Annual Leave Balance on the employee record is the hours that have been accrued up to the Period End date on the last payslip for the employee. The Annual Leave Balance is multiplied by the employees Hourly Rate to calculate the liability.
NZ Note
The reports are based on the Annual Leave Balance field, not than the Annual Leave Available field.
Journal Entry
The annual leave accrual that will be created will be based on the total leave balances and should be a reversing journal. This is to ensure that the accrual takes into account pay increases and the should equal the total of the above reports. Before you use the Journal Generator you will need to journal the balance in your liability GL account to $0.
Setup Mapping
These instructions will create the journal for the full annual leave liability, if you need anything to be different to the journal that is created as a result, you can refer to the instructions for the /wiki/spaces/SUP/pages/32768118.
Navigate to Payroll Administration > Payroll Setup > ICS Journal Mapping then tick the "Show Inactives" checkbox in the header section. You will see there are a few mappings, next to "Reversal Annual Leave Liability Journal Template" click on view. Once open go to Actions > Make Copy.
Main Section
Enter a name to reflect the type of journal that is going to be created when you run the journal generator and unmark the Inactive checkbox. The Posting Search is the source for your journal. The default Posting Search does not need to be changed unless your requirements on your journal include custom segments or other settings that are particular to your company. If you do need to change this search, you will need to edit the default search and Save As your own search, then set this in the Posting Search field.

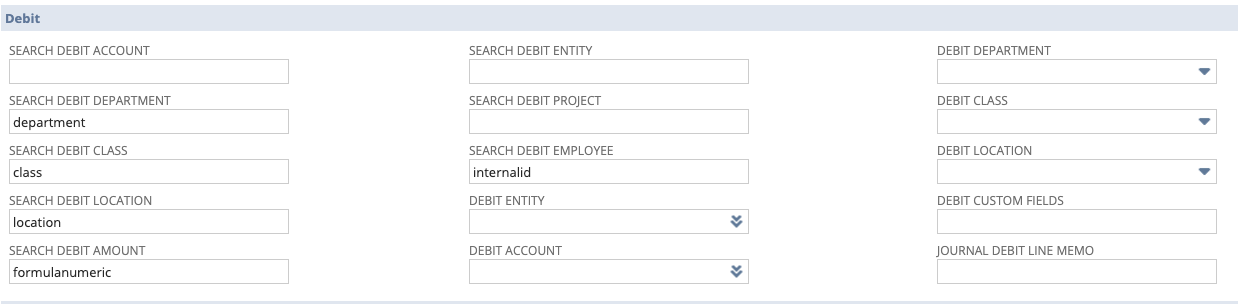
Debit Section
The debit section of the form will determine how the debit entries on your journal will be populated. By default the Department, Class and Location are going to be set on the journal, based on the classification set on the employee. If you do not want to break your journal down by any of these classifications, you need to clear the relevant field (Search Debit Department/Class/Location).
If you would rather set a particular Department, Class and/or Location then you can clear the Search Debit Department/Class/Location field and set the desired classification in the drop downs (Debit Department/Class/Location)
In the Debit Account field you need to select your GL Expense Account that you want to debit.
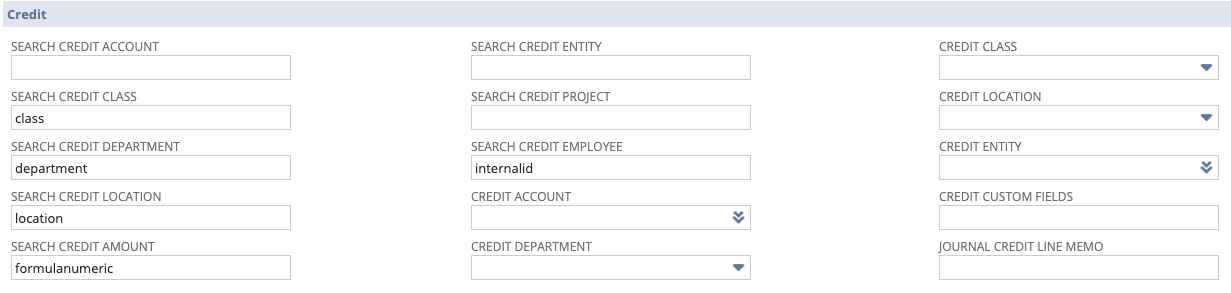
Credit Section
The credit section of the form will determine how the credit entries on your journal will be populated. By default the Department, Class and Location are going to be set on the journal, based on the classification set on the employee. If you do not want to break your journal down by any of these classifications, you need to clear the relevant field (Search Credit Department/Class/Location).
If you would rather set a particular Department, Class and/or Location then you can clear the Search Credit Department/Class/Location field and set the desired classification in the drop downs (Credit Department/Class/Location)
In the Credit Account field you need to select your GL Liability Account that you want to credit.
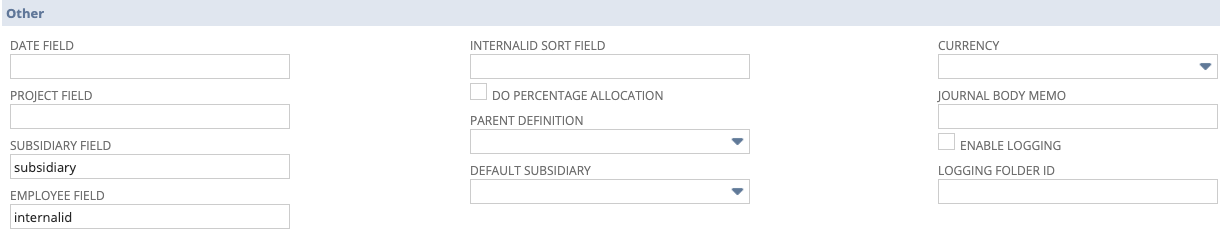
Other Section
By default you should not need to change the fields in this section of the Journal Mapping. You can add the "Default Subsidiary" if you have one subsidiary that you are running payroll in.
Source Records
This section is not required for Annual Leave Accruals

Click on Save
ICS Journal Generator
Once you have created the mapping, navigate to Payroll Administration > Payroll Setup > ICS Journal Generator (you may want to add this to your shortcuts)
Select the journal definition you created above.
Period Start Date – leave blank
Period End Date – leave blank
Filter by Subsidiary if required
Dates
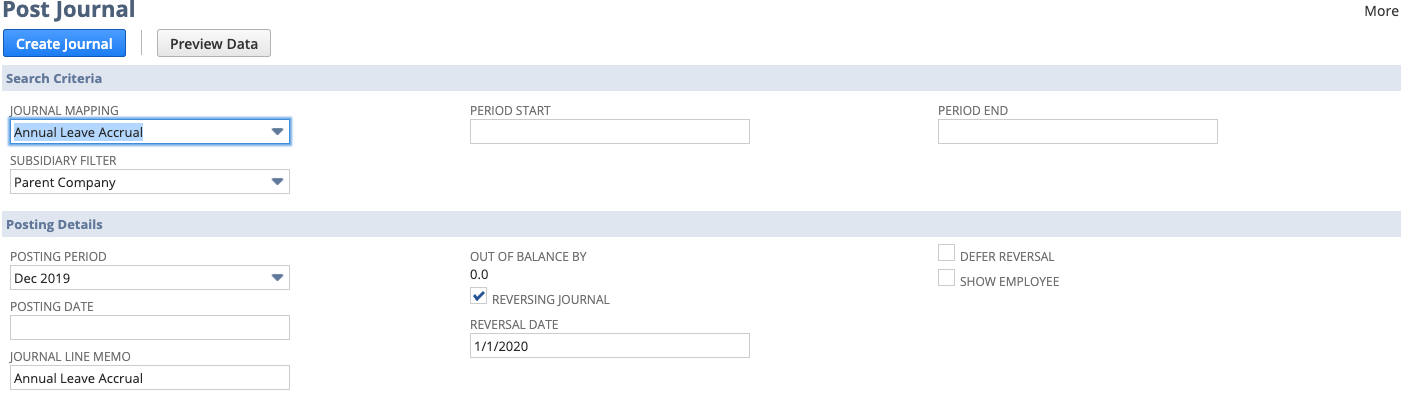
In the Posting Details select posting date and period and enter a journal line memo.
Select the Reversing Journal checkbox and enter a reversing date.
Then click on Preview Data.
If you want to check it by employee, you can mark the “Show Employee” checkbox and then click on “Preview Data”. However, we do not recommend you post the journal this way as the employee name will appear in the journal, so once you have checked this by employee, you can unmark the “Show Employee” checkbox and then click on “Preview Data”.
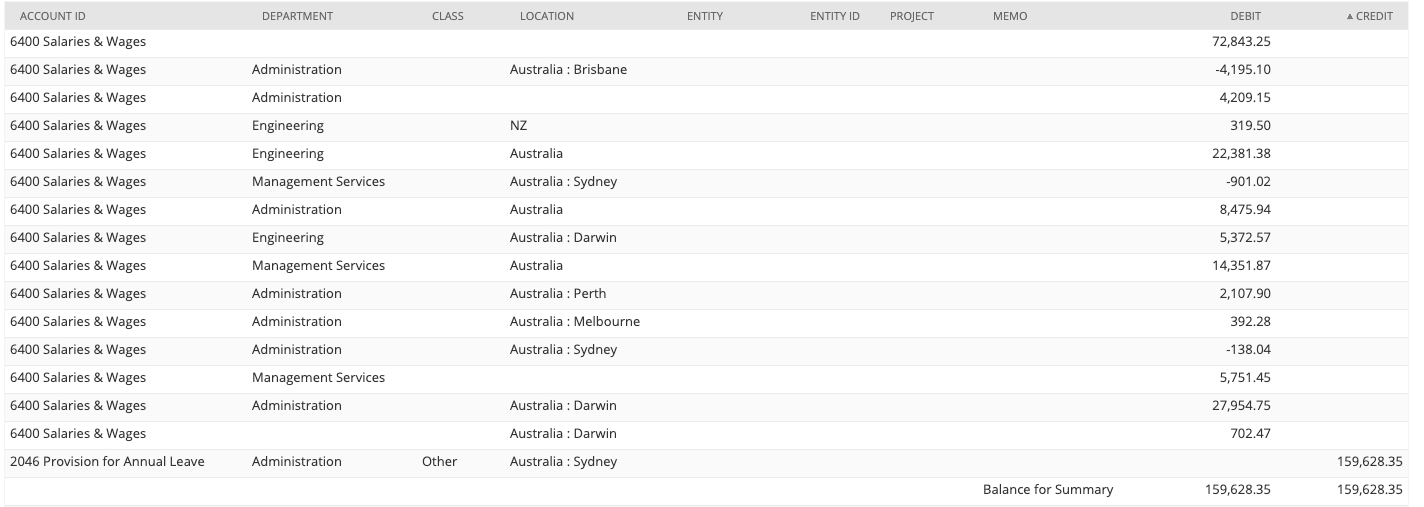
You should review the totals and ensure they match the PR-Leave Liability by Type OR PR-Leave Liability Detail report.
Once you have reviewed the journal that is displayed on the screen, you can click on Create Journal.
The leave liability reports are based on the employee data, so it is recommended that you run these on a monthly basis and keep a copy of them.