Setting Up Attachment of Earnings - UK
If you wish to use Vendors to record the deductions against, or pay the deductions to the recipient in the Net Wages file, you must first create a Vendor record.
Check your configuration
If you pay your Net wages by uploading a bank file you can elect to include these deductions in the Net Wages file. You must ensure that "Pay Vendors in Payroll EFT" is enabled in Payroll Configuration
Setting Up a Payroll Vendor
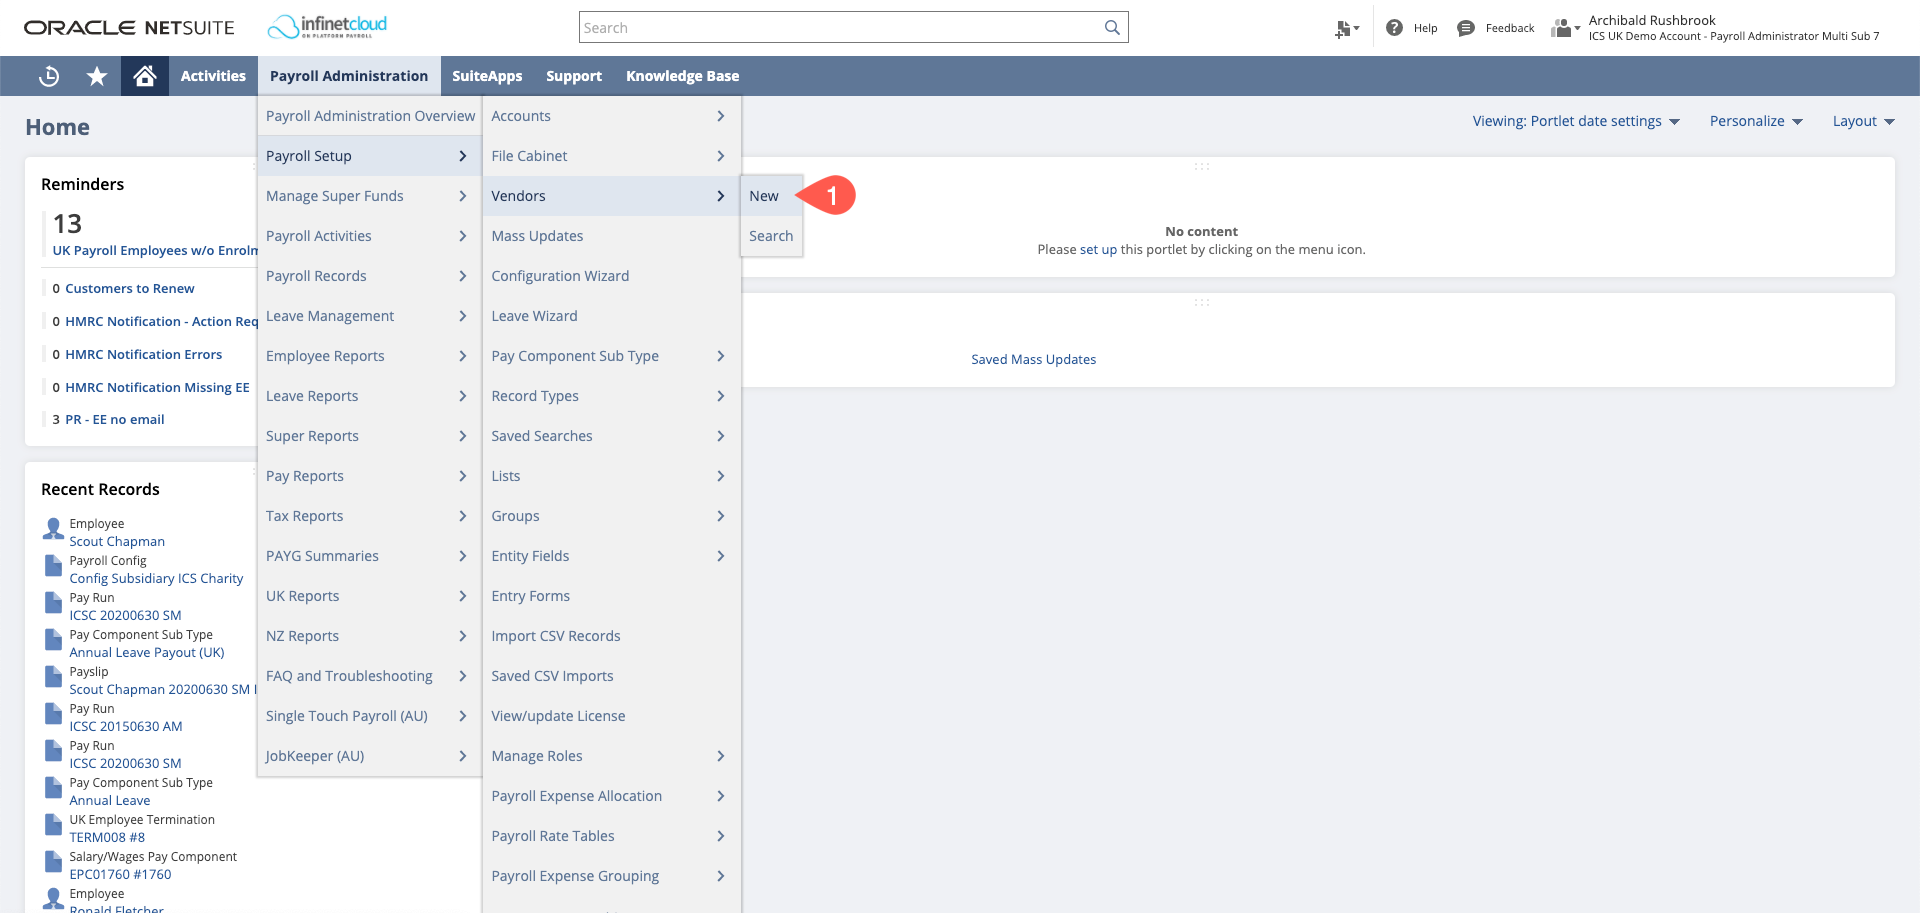
- Navigate to Payroll Administration > Payroll Setup > Vendors > New
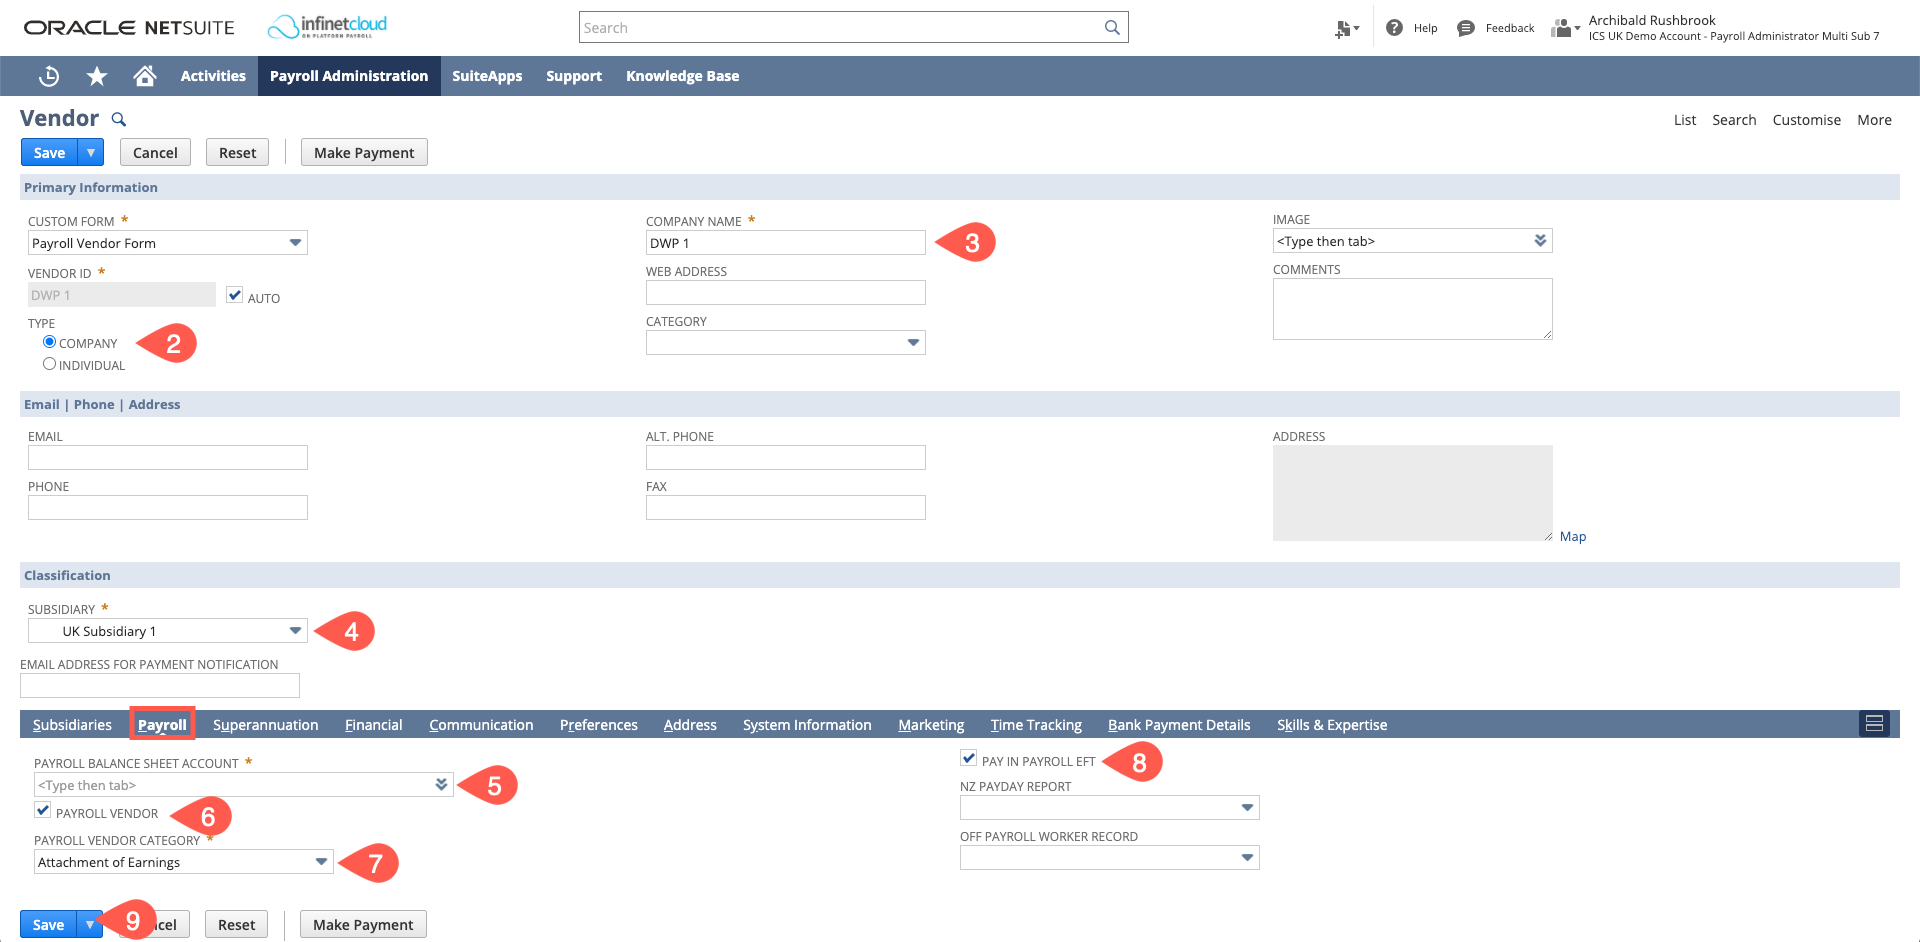
- Confirm if it is a company or an Individual you are paying
- Put in the vendor’s name
- Select the subsidiary this vendor needs to be linked to
- On the Payroll Tab Select the payroll balance sheet account that will be linked to the Vendor
- Ensure that there is a tick in the payroll vendor box
- Select a Payroll Vendor Category – if the type of vendor you need is not available in the drop down you are able to create a new one by hovering over Payroll Vendor Category and a + will appear
- If paying the vendor via the payroll file, please ensure that there is a tick in the “Pay in Payroll EFT” box
- Save
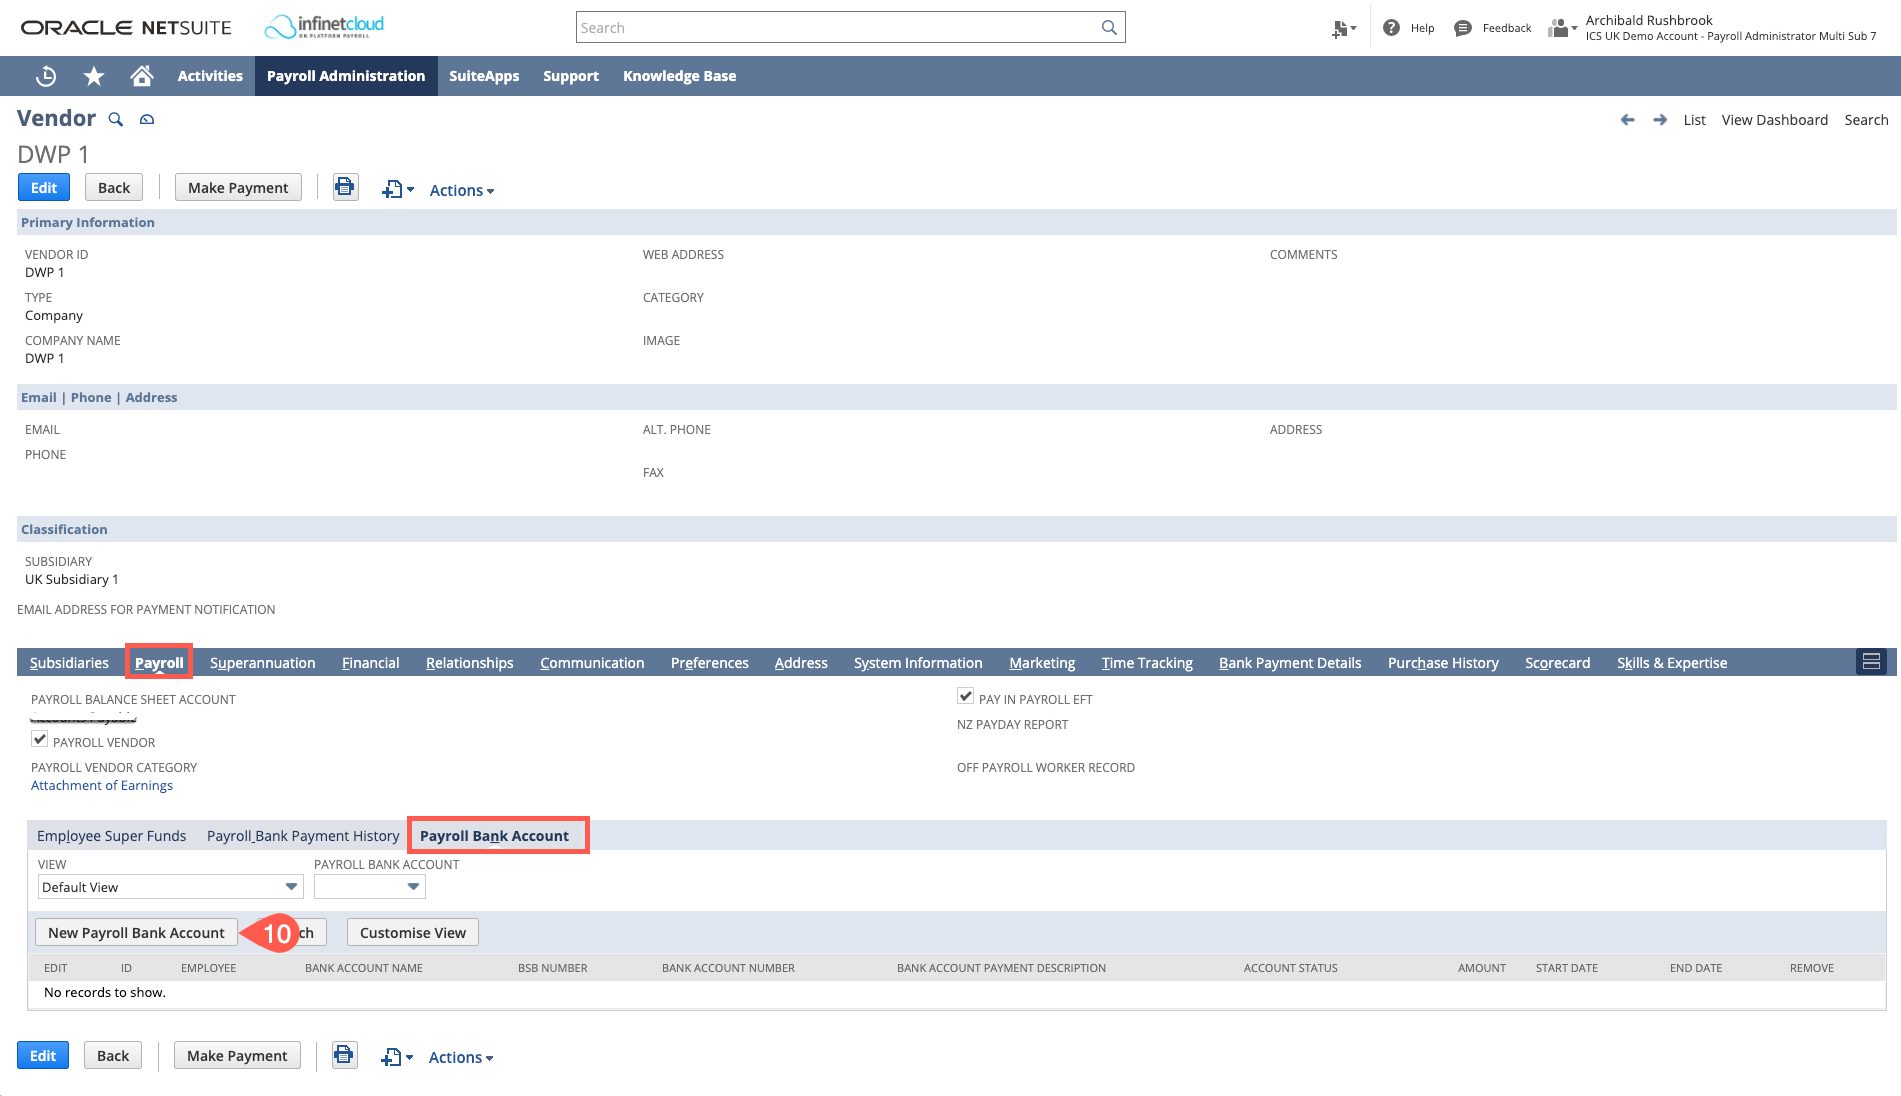
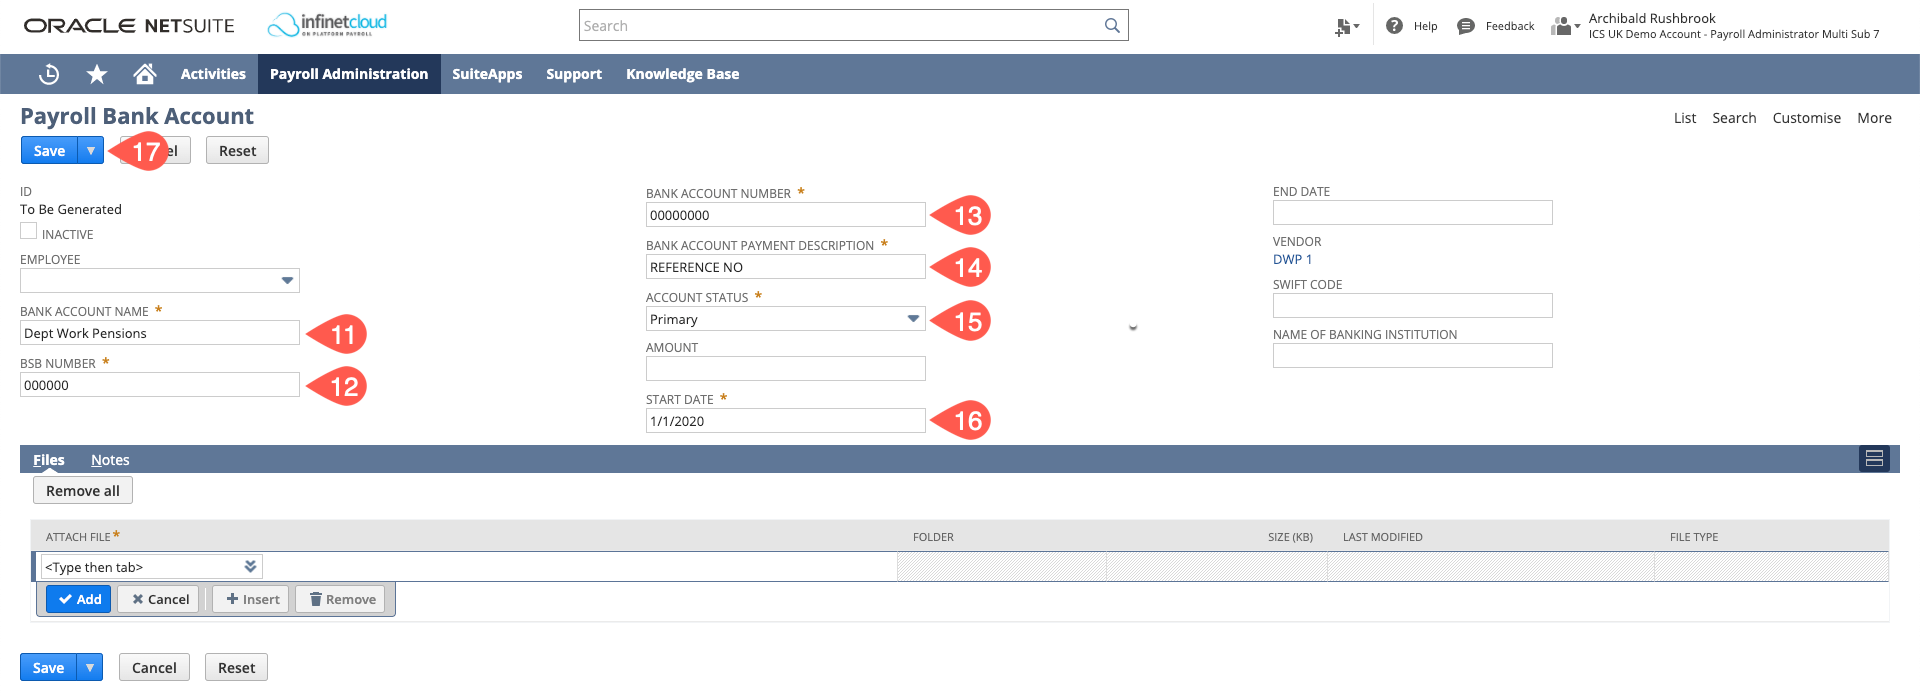
- Navigate to the Payroll tab – you will be able to see now there are more options to select from - then go to the Payroll Bank Details Subtab and click the New Payroll Bank Account button
- Please use the bank name provided by the vendor, if not supplied use a contextual name. Do not complete the "Employee Field".
- BSB number – is where you will add the sort code of the vendor
- Bank account number of the vendor
- Payment description will be the reference that the Vendor will see when they receive the payment
- For account status please select Primary
- Ensure you set up the start date at the earliest date that you are going to need to use it.
- Save
You can only have 1 vendor per attachment of earnings. So if you have multiple employees with DWP deductions, you would need to set up a DWP vendor for each attachment of earnings with a number and increment +1 for each set up. E.g DWP1, DWP2, DWP3 etc.
Setting up an Attachment of Earnings Pay Component Sub Type
There is no Attachment of Earnings pay component sub type as defualt in the bundle so this will need to be created before you can create the pay component on the employee record.
Do do this you will need to:
- Navigate to Payroll Administration > Payroll Setup > Pay Component Sub Types > New
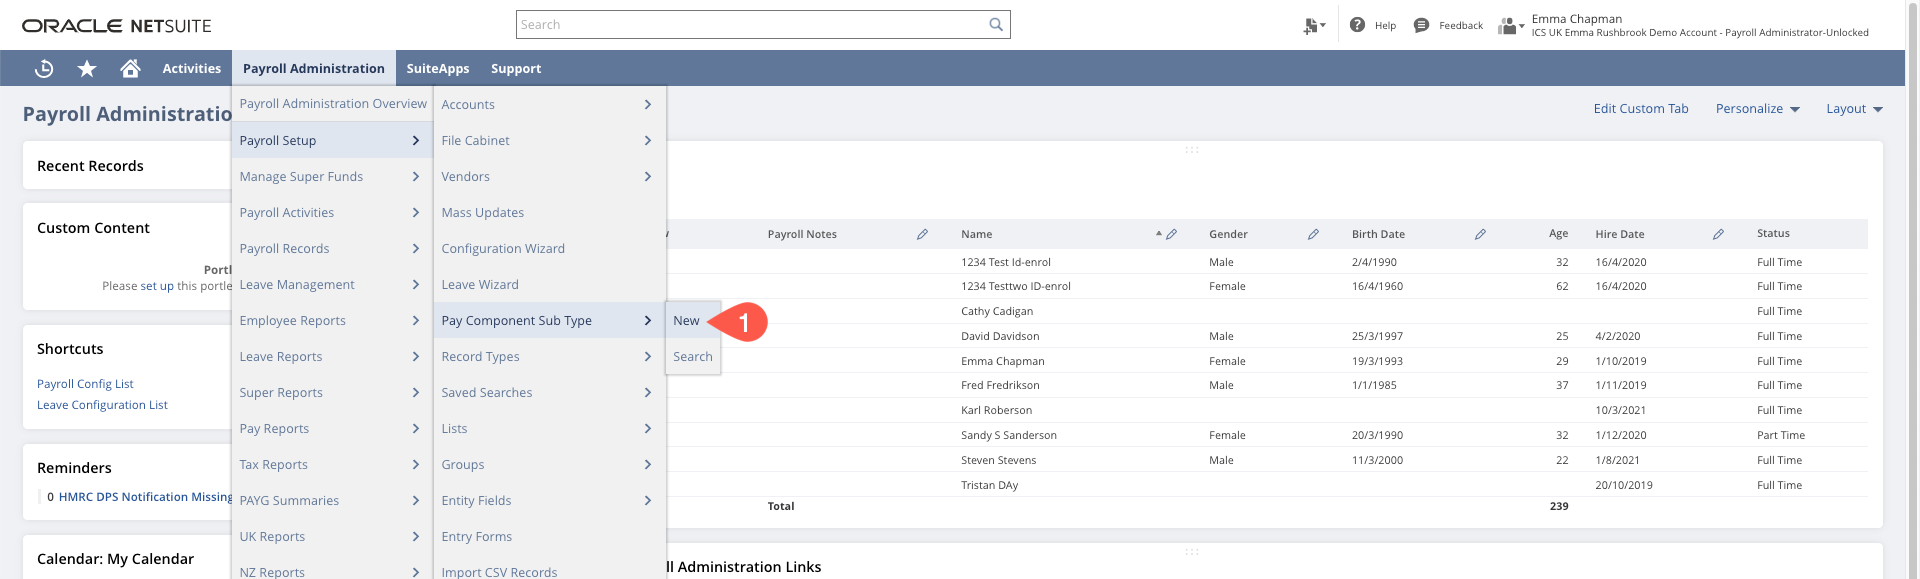
- Give the Pay Component Sub Type a name e.g. Attachment of Earnings
- Select the Pay Component Type = Deduction
- Pay Component Category = Deduction
- Have "Show in Pay Components" checked
- Payslip Group - where you want the payslip details to show on the PDF e.g. Other Deductions
- Select the Percent Types you wish to be available if you are going to be using the percentage function e.g Gross Pay
- Select the Jurisdictions you want this available in = UK
- Set a Payment Summary Location (this is required as a mandatory field but is not referenced for UK payrolls)
- Save
Setting Up an Attachment of Earnings Pay Component
Not supported out of the box
We do not currently support:
- Threshold calculations (where a different percentage is taken based on net / gross earnings).
- Cascading calculations (where one deduction must be calculated after another)
- Priority deductions (where one must be taken before another)
- Minimum / Guaranteed earnings (where deductions cannot take pay below a certain level and are accrued to a future period).
Accounts can be customised to achieve most of the above in the meantime, please contact uksupport@infinetcloud.com for further details.
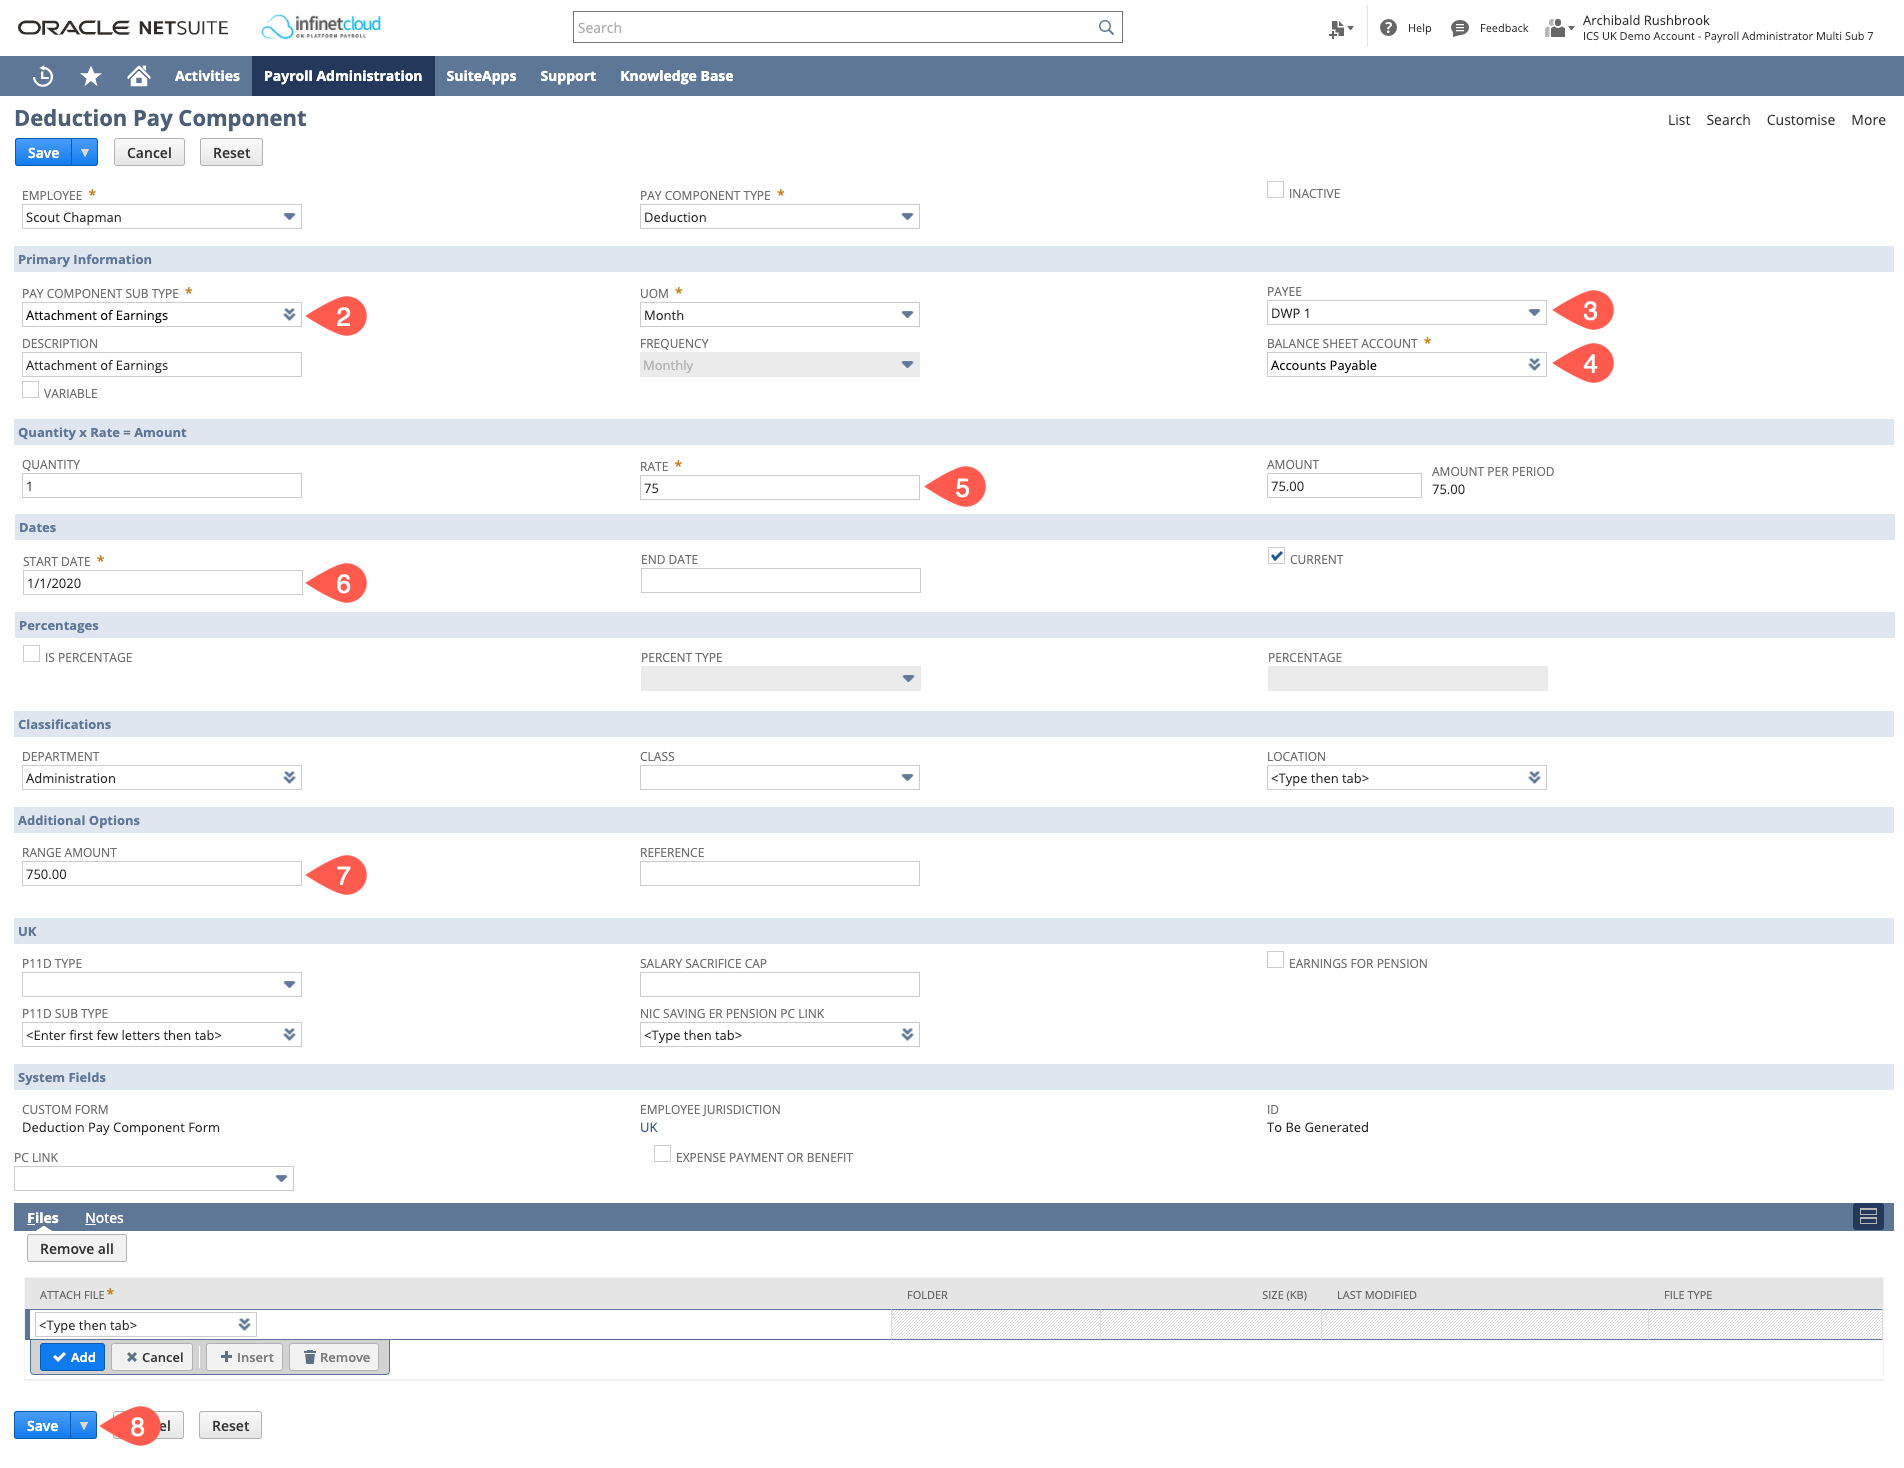
- Navigate to the Employee Record > Payroll Tab > Pay Components Sub Tab and click on the "Create Deduction" button
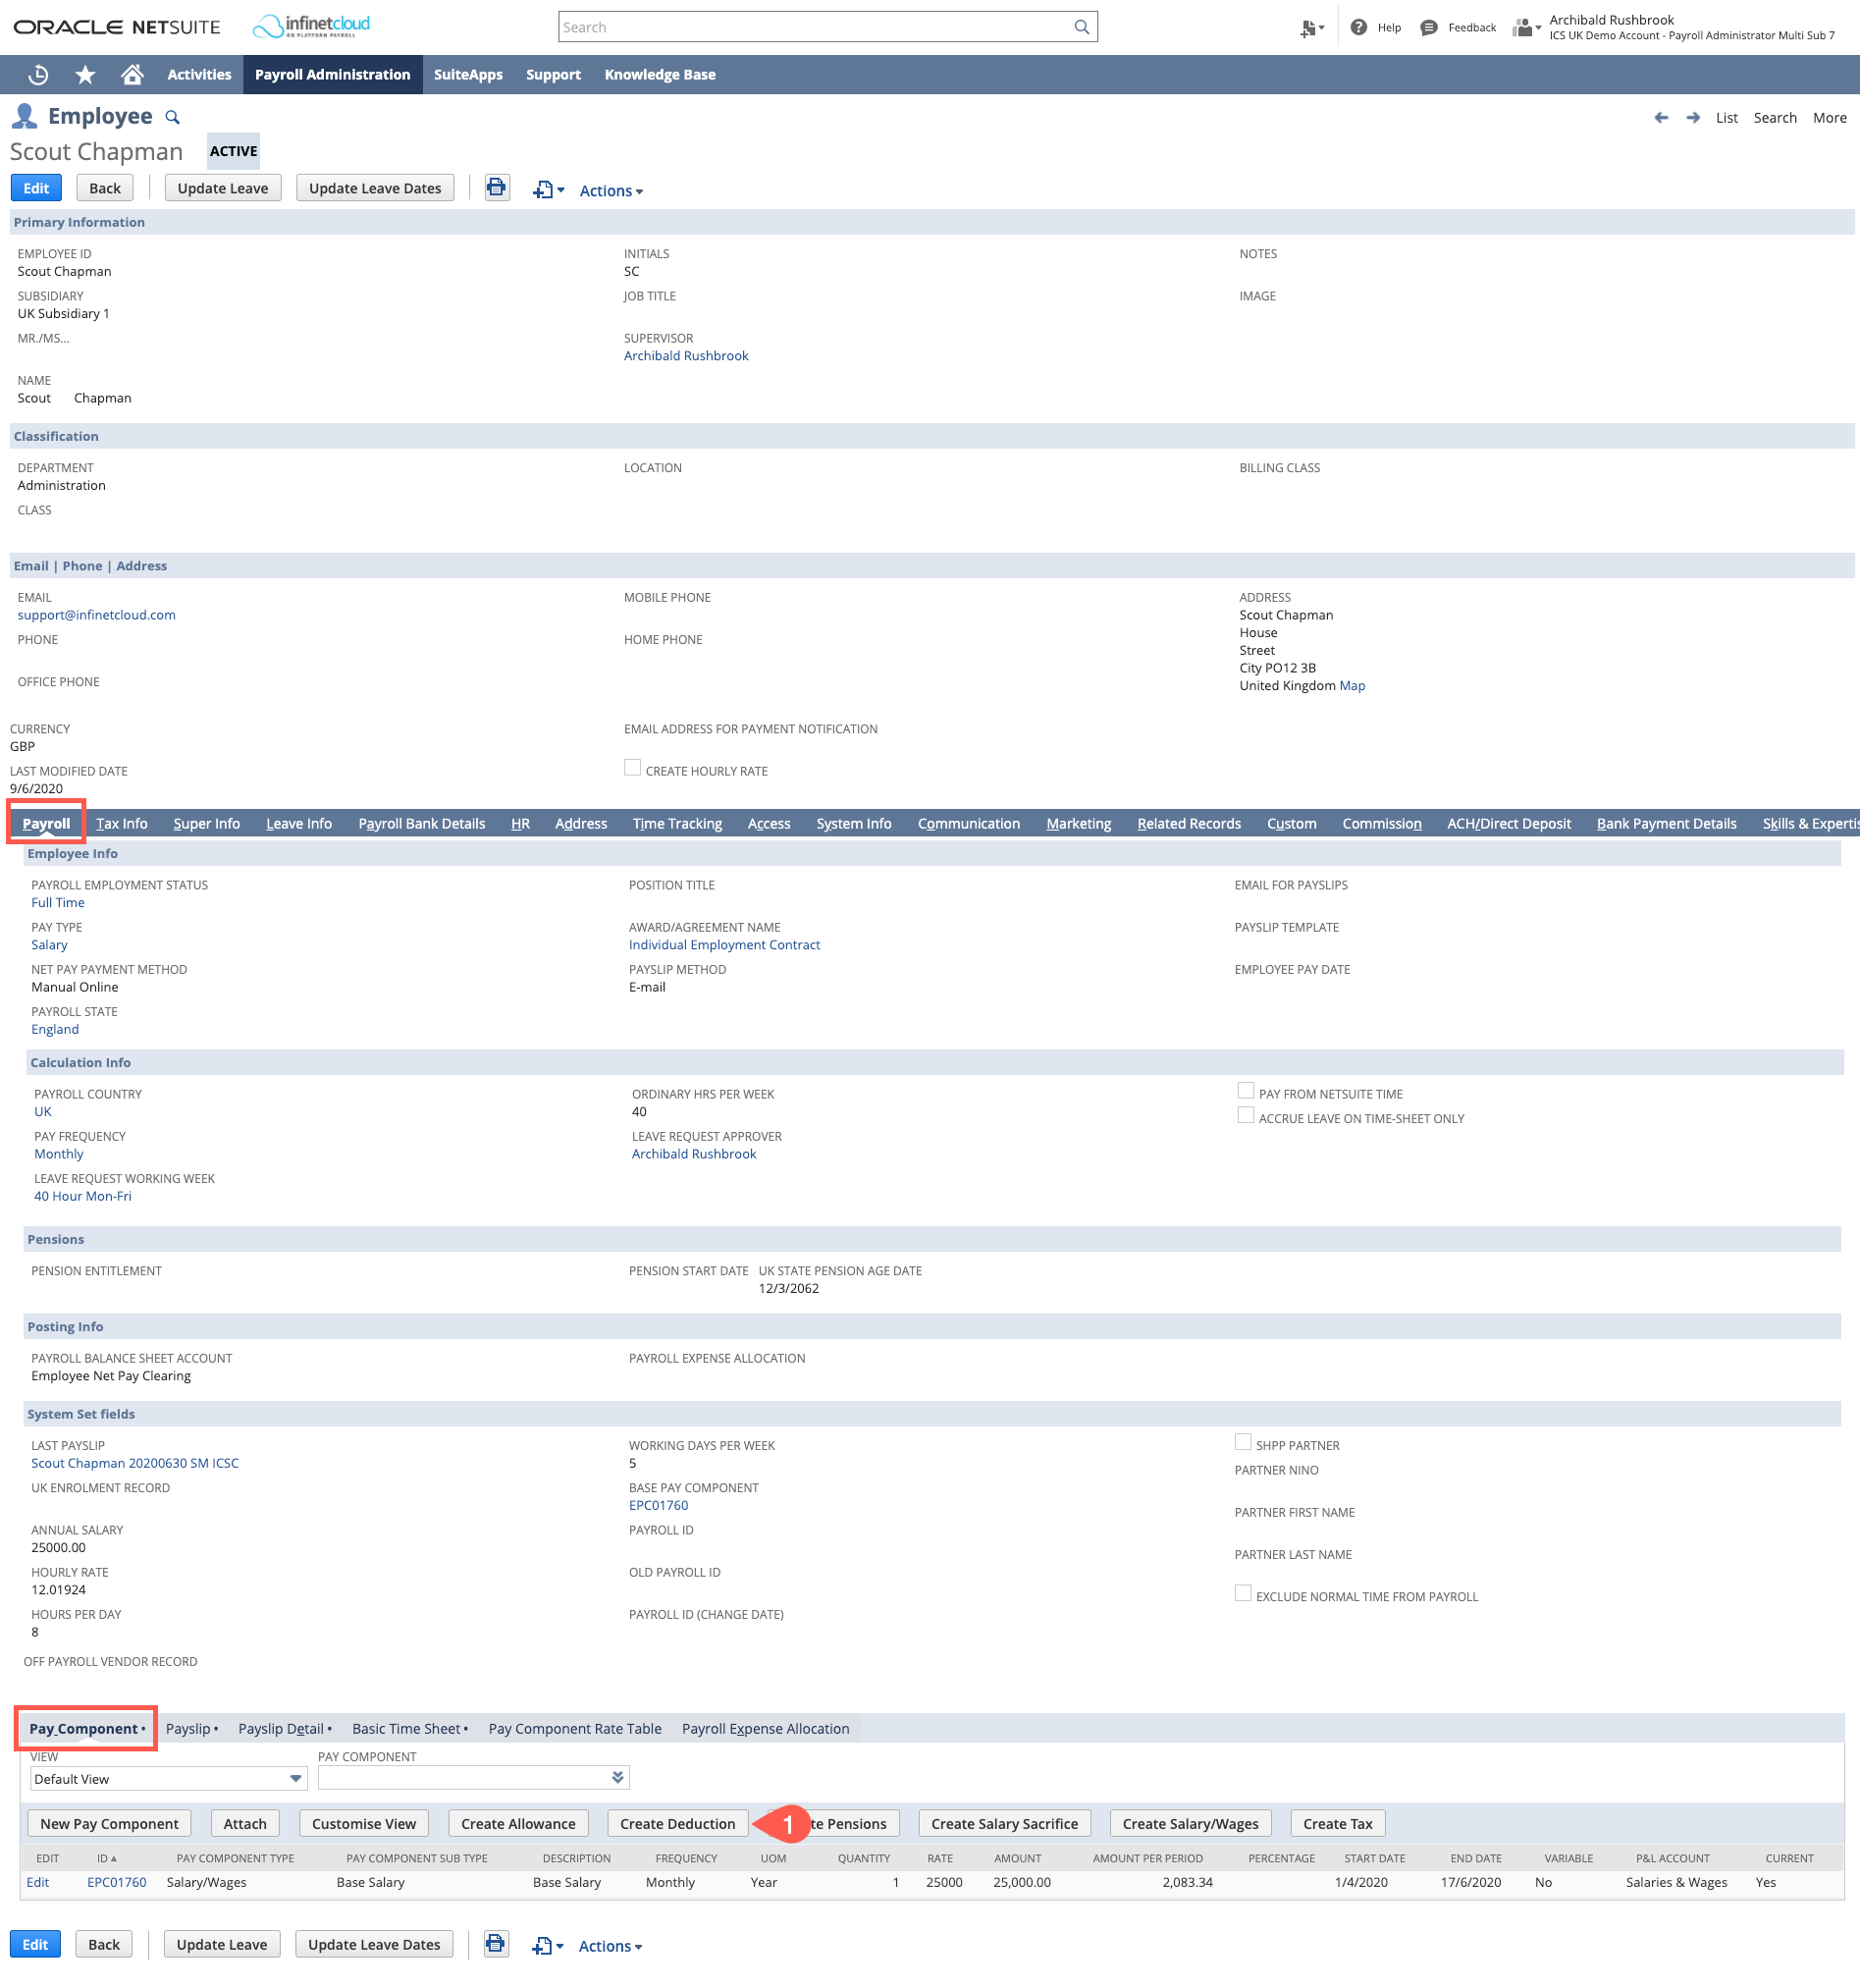
- Select the Pay Component Subtype of Attachment of Earnings
- If you are using Vendors, select the Payee you have just created (Payroll Vendor)
- The Balance Sheet Account will auto-source, you can override this if needed.
- The Rate is set at the amount that will be deducted per UOM
- Enter the Start Date as the date you want the deduction to start
- The Range Amount will be the total amount to be repaid - the Attachment of Earnings will stop when the range balance is 0
- Click Save