Payroll Expense Re-allocation
ICS Journals can be created to allocate the payroll cost by classification (Department, Class and/or Location). This is set in the configuration. There is also a separate process you can run to re-allocate expenses - this page describes both
Classification setup
To set up classifications and default expense allocations:
- Go to Payroll Administration > Payroll Setup > Configuration Wizard
- Select the relevant Subsidiary or Config Default to update and click on Next
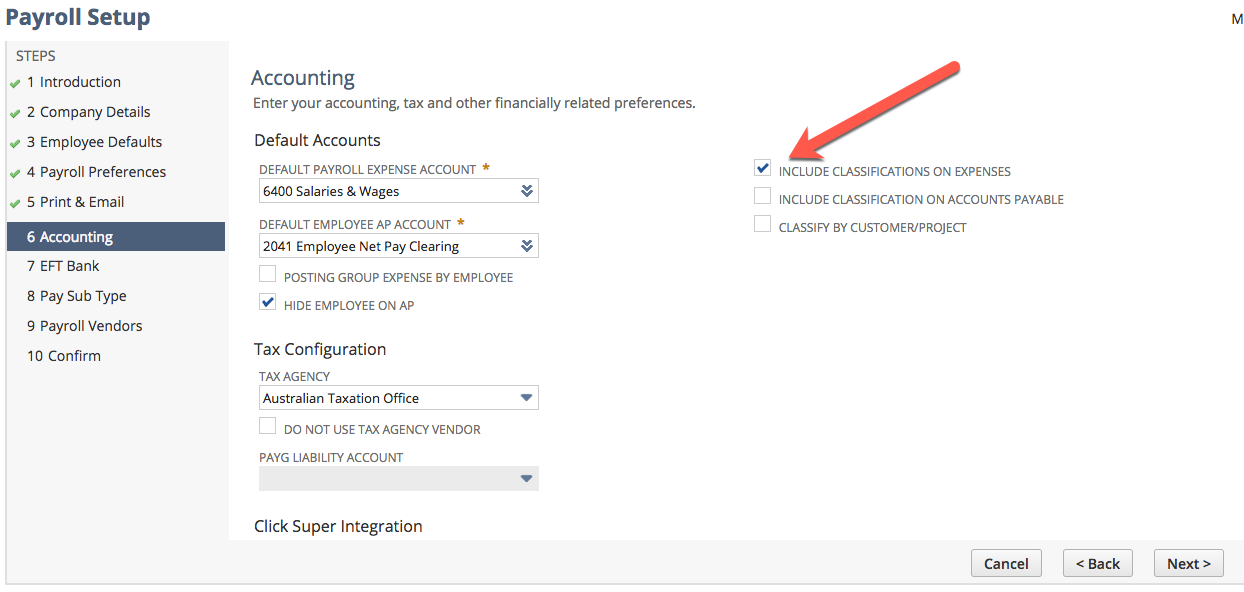
- Click Next until you get to the Accounting screen.
- On the Accounting screen, mark the Include Classifications on Expenses checkbox
- Click on Next until you get to the end of the wizard and get the screen with all the green ticks.
The employee record will hold their "home" Department, Class and/or Location.

These classifications will default onto the pay components when you create them but can be changed as required.

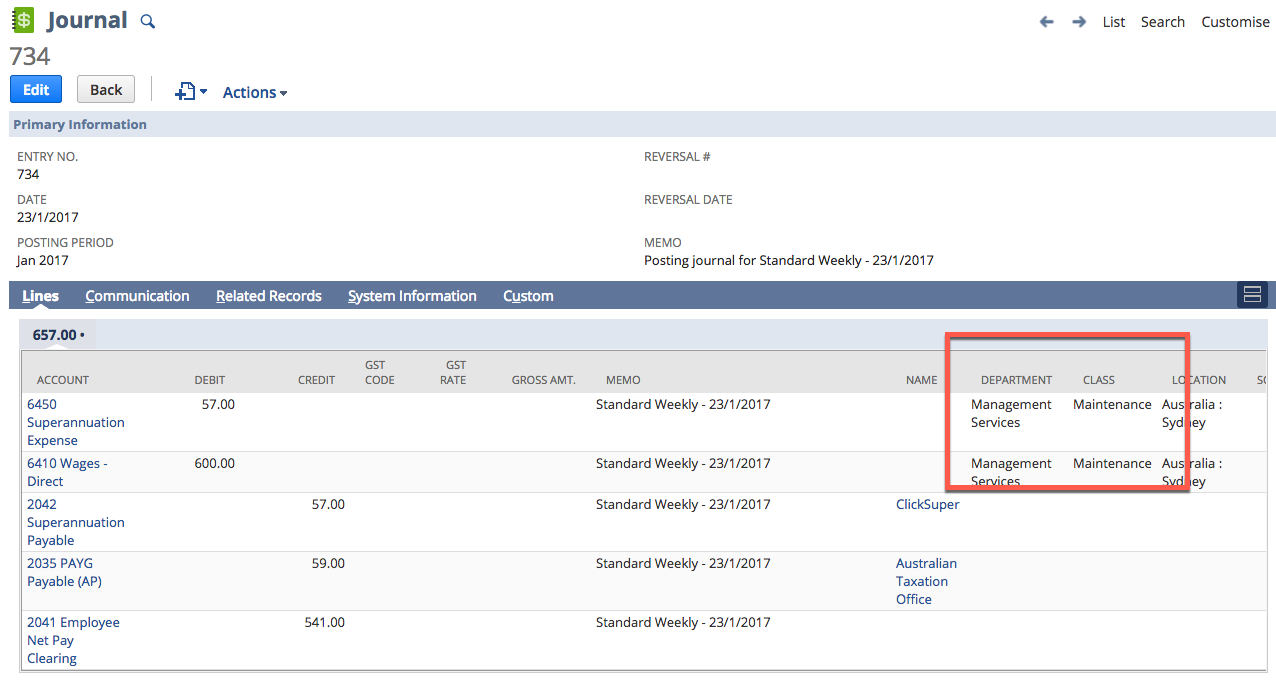
By default, ICS payroll creates the journals with the classifications set on the employee record.
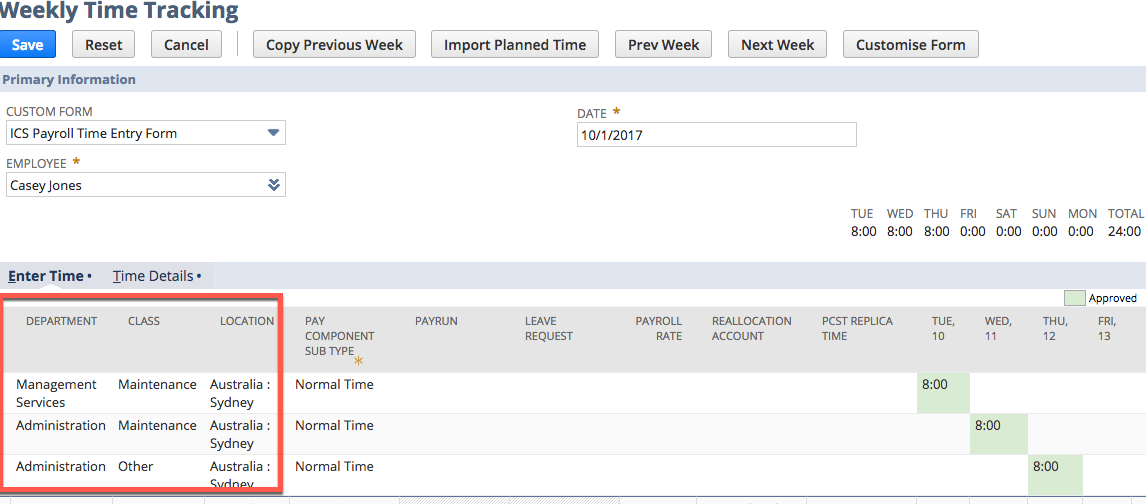
The timesheets that are entered/imported may have different classifications than on their employee record.
Expense Re-allocation
If you need to re-allocate your costs to the classifications on the timesheet then you can run a re-allocation process.
To re-allocate the cost to the classifications on the timesheet we have a separate process that you need to run for each pay run.
- Go to Payroll Administration > Payroll Setup > Payroll Expense Re-allocation Journal
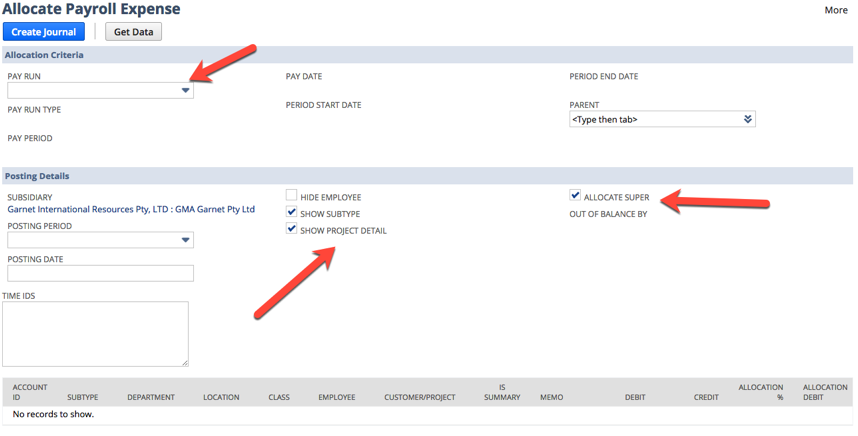
Select the relevant Pay Run.
Note
This process cannot be run more than once for a Pay Run. If you select the same Pay Run again, you will get the following message:

- Unmark the Hide Employee checkbox and mark the Show Subtype checkbox.
- Check the amounts that appear at the bottom part of the screen You can alsoAllocate Super if you want to ensure the superannuation cost is allocated as well.
- When the data appears at the bottom of the screen, it is recommended that you check the amounts per employee / sub type against the payslips in the pay run you have chosen.

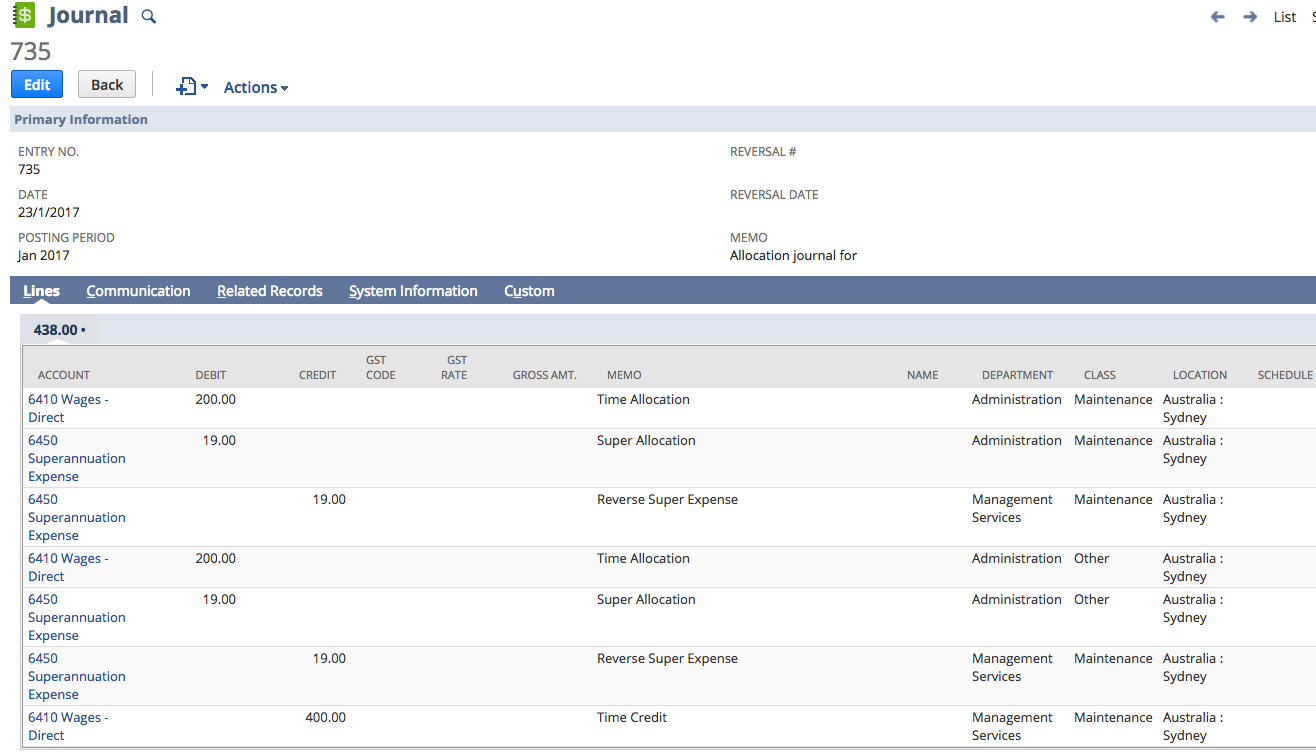
- You will see an entry similar to the one above. It shows the hours in the Memo field which you can reconcile against the timesheets for the employee and check that the amounts match back to your payslips.
- If you are OK with the calculations above and want to create the journal then you should remove the employee and sub type. To do this, mark the Hide Employee checkbox and unmark the Show Subtype checkbox. If the screen does not refresh automatically, click on Get Data.
- Check/set set the Posting Period and Posting Date fields.The journal will not post if the accounting period is closed.
- To create the Journal, click on Create Journal. The resulting journal will re-allocate the cost between the classifications with an offsetting Debit/Credit in and out of the same account.
- The re-allocation should be run directly after your pay run has been completed. This will ensure that there are no changes to the classifications on the employee record.
- The resulting journal will be linked to your pay run on the Transaction Tab.

Note
You may need to have the re-allocation configured for you if the amounts on the re-allocation are not correct. This may be because you are not using the employees hourly rate. If you do have these more complex cost re-allocation requirements then you should Contact Support to discuss your requirements.