TFN Declarations
Creating a TFN Declaration record
If you are transcribing a TFN Declaration form received from an employee follow these steps:
- Payroll Administration Tab > Tax Reports > TFN Declaration.
- Click on New TFN Declaration button.
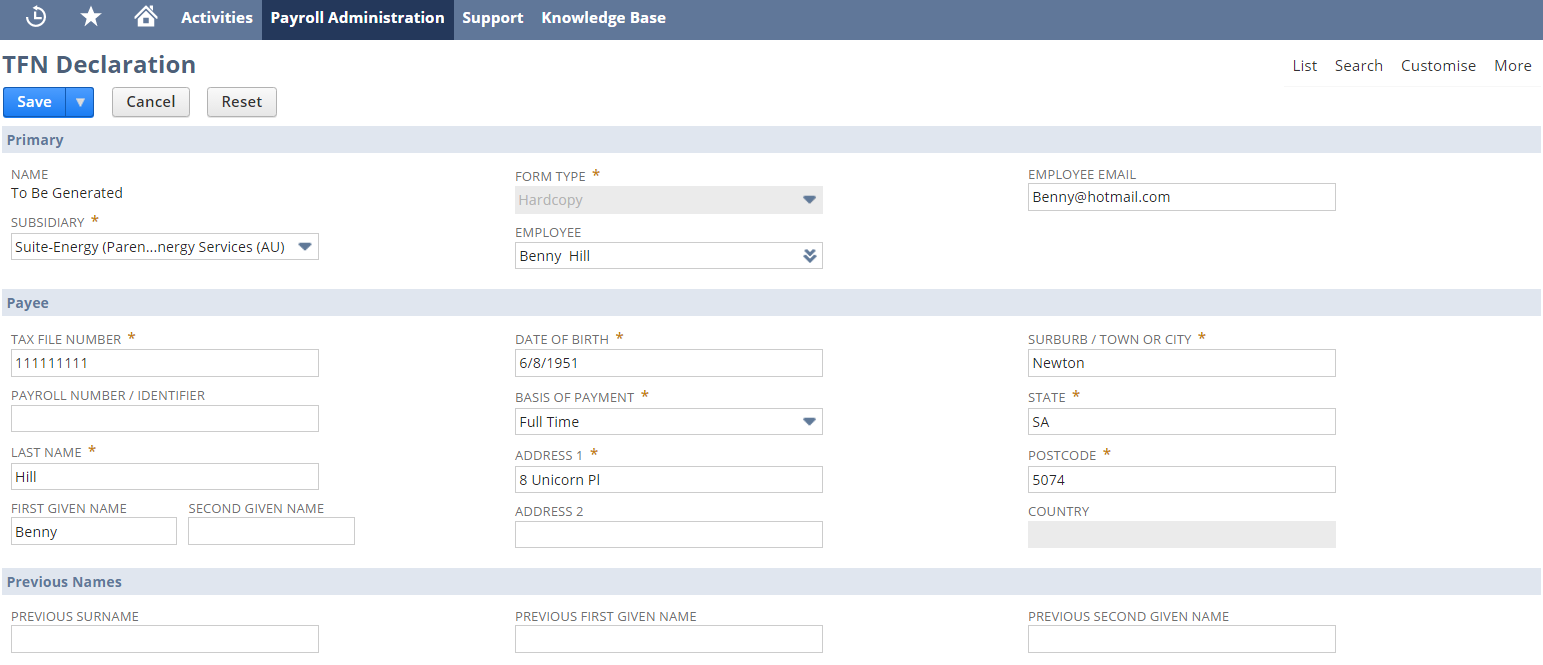
- In the Primary Section select a Subsidiary (One World Only) this is used to group submissions.
- If a NetSuite employee already exists select the Employee in the drop down, a message box will appear to auto populate fields from the employee record, click OK.
Populate the remaining fields from the TFN declaration form ensuring that the fields marked mandatory are complete.
Note: State field must be one of ACT, NSW, NT, QLD, SA, TAS, VIC, WA, if employee address is outside of Australia enter OTH, this will default the Postcode field and the Country becomes mandatory.- Complete the Declaration section.
Once complete Save the record which will mark the TFN declaration ready to be included on a submission. Repeat this process for all other employee declarations.

Submitting Employee TFN Declarations
To prepare one or more declarations for submission you can either:
- View a pending TFN declaration Payroll Administration Tab > Tax Reports> TFN Declaration and then click the Submit button, OR create a new TFN submission via Payroll Administration Tab > Tax Reports > TFN Declaration Submission > New.
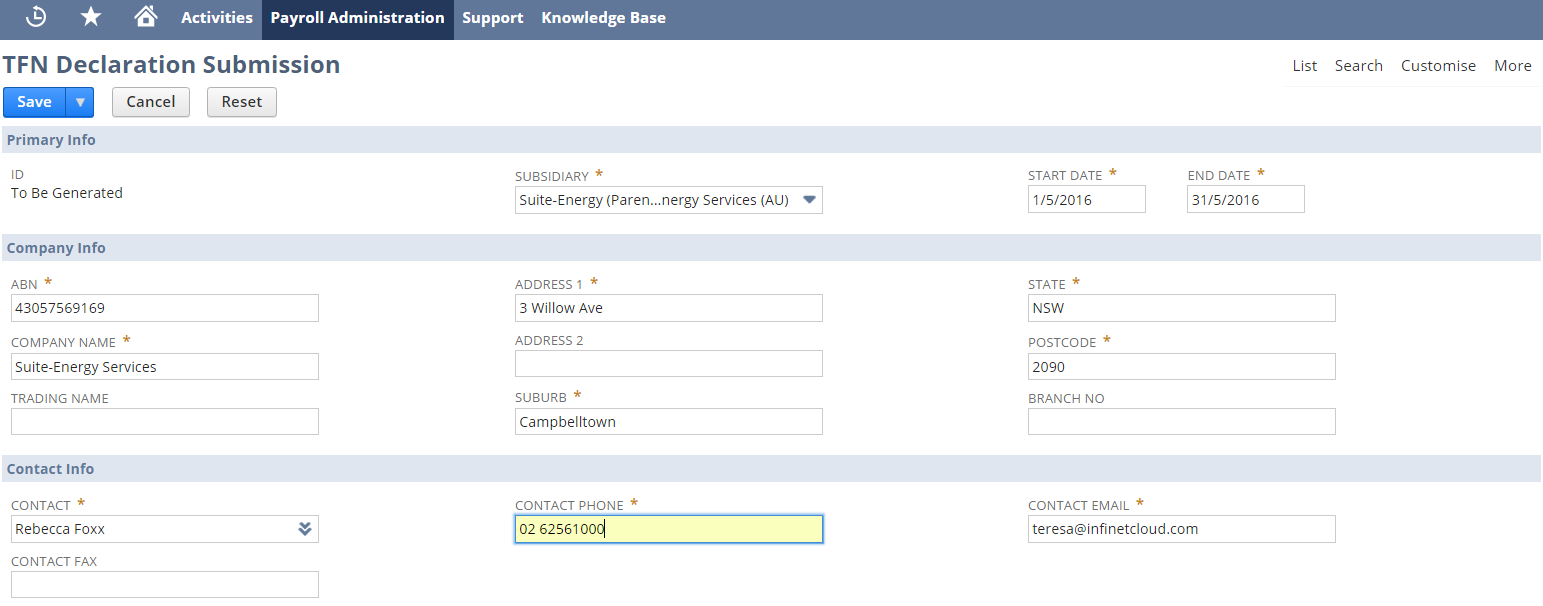
In the Primary Info section select the Subsidiary. Note: If One World, the subsidiary field will default if submitted from the TFN declaration.
- Enter the Start and End Date for the submission.
- Company Info (ABN and Company name will populate from payroll configuration - Please ensure that your ABN field has NO spaces in between the numbers).
- State (must be one of ACT, NSW, NT, QLD, SA, TAS, VIC, WA).
- Branch No - should be left empty or set to a number.
- Contact Info (will default from the current user), ensure that the fields marked mandatory are complete.
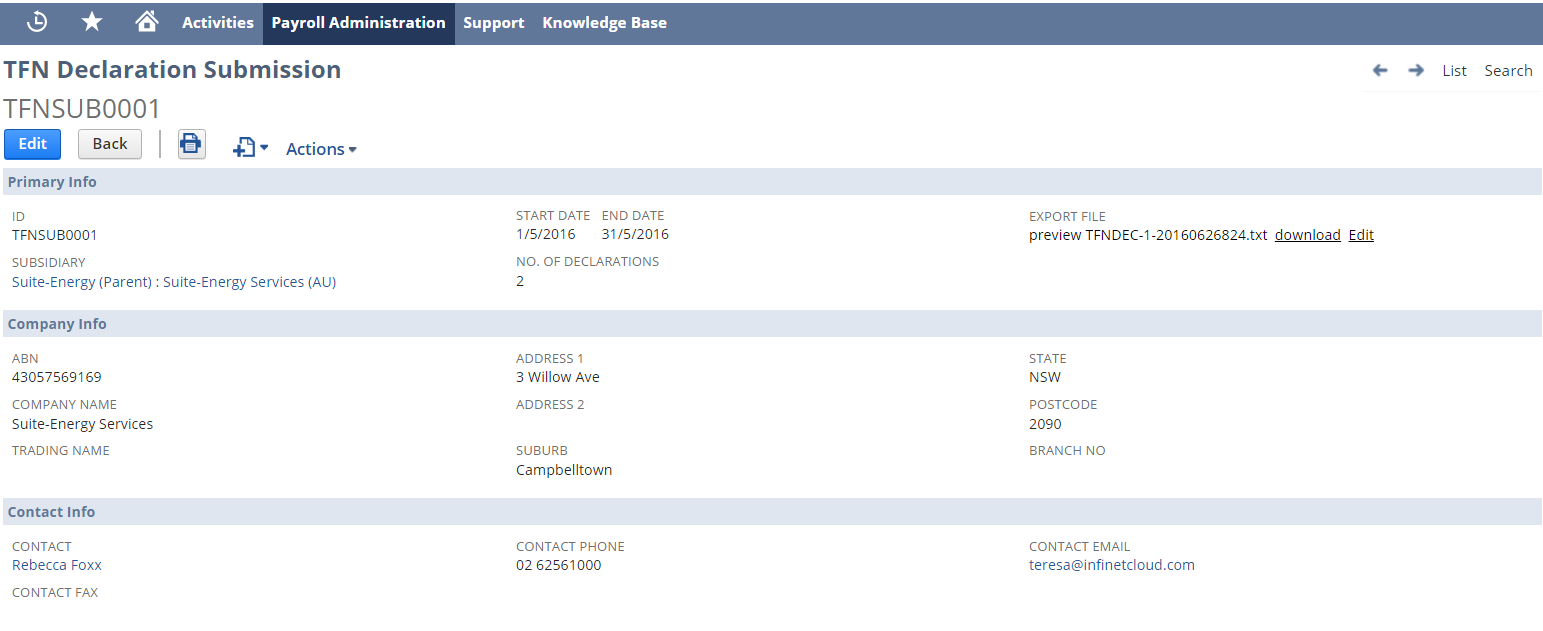
Select one or more declarations from the Declarations Pending Submission tab, click Save.
It is recommended NOT to do more than 100 TFN Declaration records per remittance

On Save of the record a new export file will be generated which can be downloaded, saved and manually uploaded to the ATO.
Uploading To ATO
Log into the ATO Portal.
To test and lodge files, select File transfer > Lodge file in the portal left menu. This will display the Lodge screen, which gives you the option to test or lodge your file:
- Test: the file is sent to the ATO, validated and checked for errors, but not lodged.
- Lodge: the file is sent to the ATO, validated and lodged if no errors are detected.
After you submit the file, the File status – in progress screen displays while the file is being validated. It will not be lodged if errors are detected.
When validation is complete the ATO will notify you by email (if you've chosen this option).
You can select File transfer > File status in the portal left menu to view the validation report. If there are errors, you'll need to deal with them before re-submitting the file.
Troubleshooting Rejected Files
The validation process will produce a report showing any Warnings or Errors as per the advice above. The report will generally reference an employee name or a transaction line number with the error detail.
If you are uncertain about the error below is a link to an ATO guide on how to deal with Warnings and Errors.
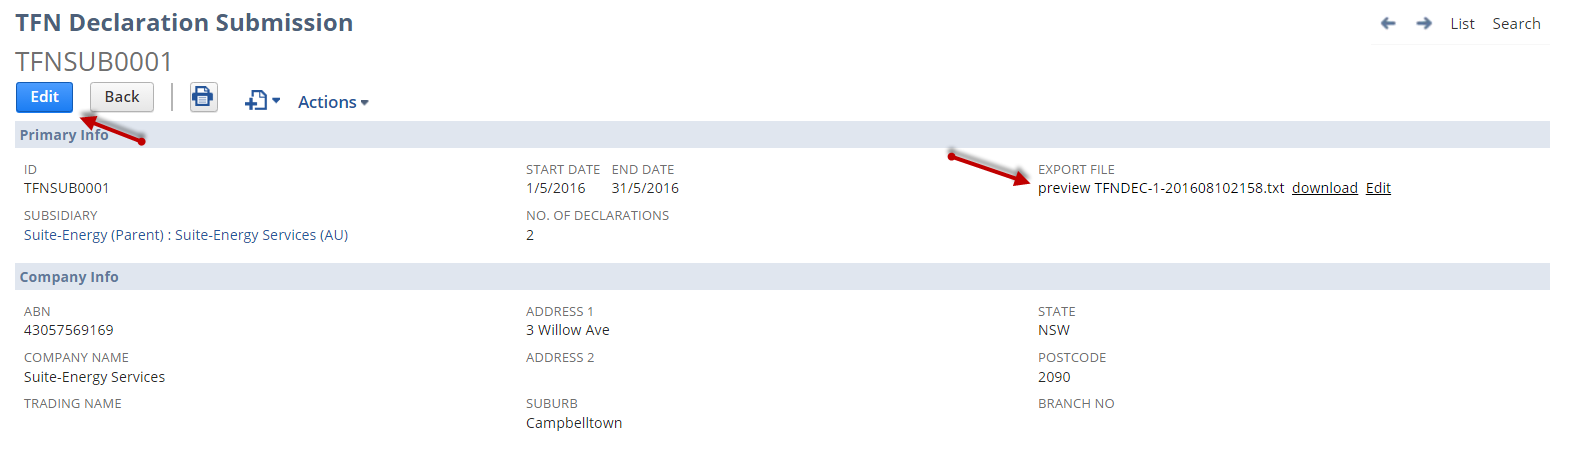
If the file has been rejected you will need to go back into Netsuite and to the TFN Declaration Remittance screen, at the bottom of the page on the TFN Declarations sub tab (see below) you can click Edit against the TFN Declaration record that needs to be corrected and make your changes, then click Save.

Once the error/record has been corrected you will need to generate a new Remittance file to upload again. On this same screen click on the Edit button (see below) and then click on the Save button, click OK on the message that appears saying there are no changes. You will then see that the Export File number (see below) is different to what it was before and is ready to be uploaded again via the ATO Portal.