6. Accounting
Default Accounts
Next we need some details about the way you want to record the financial transactions, how you would like to classify them and some other accounting related defaults.
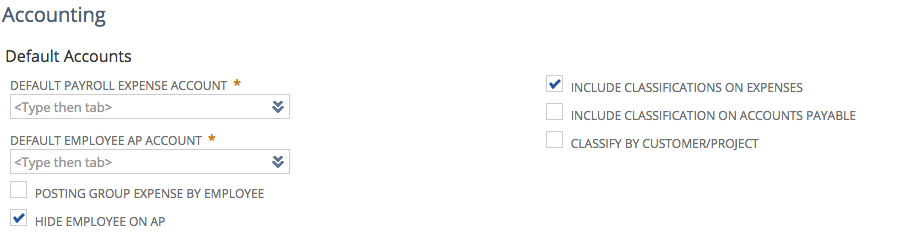
- Default Payroll Expense Account - Select your Salaries and Wages expense account
- Default Employee AP Account - Select your Employee Net Pay Clearing account i.e where the Net Pay will post to on the posting journal
- Posting Group Expense by Employee - Mark this checkbox if you want to see the employee names in the general ledger expense accounts, such as Salaries and Wages. If you have privacy concerns leave this unmarked
- Hide employee on AP- Mark this checkbox if you do not want to show the employees names on Journals - NB this can only be selected if you pay out of Accounts Payable accounts, it is also not recommended as advised in initial setup.
- Include Classifications on Expenses - Mark this checkbox if you do want to update Department, Class and Location classifications on your expense transactions on your payroll journal
- Include Classifications on Accounts Payable - Mark this checkbox if you do want to update Department, Class and Location classifications on your balance sheet transactions on your payroll journal
- Include Classifications on Customer/Project - Mark this checkbox if you do want to update Customer/Project classifications on your expense transactions on your payroll journal
Configuring Payroll Guide
Tax Configuration
You can select to use the Tax Control Account for Tax Liability and populate the PAYG Liability Account OR you can just select your Tax Agency

- Tax Agency - Select the tax agency if you are not using Tax Control Account for Tax Liability
- Do Not Use Tax Agency Vendor - Mark this checkbox if you do not want to use a vendor record for recording your tax liability
- PAYG Liability Account - Select your PAYG Liability Account if you marked the Do Not Use Tax Agency Vendor checkbox
Click Super Integration
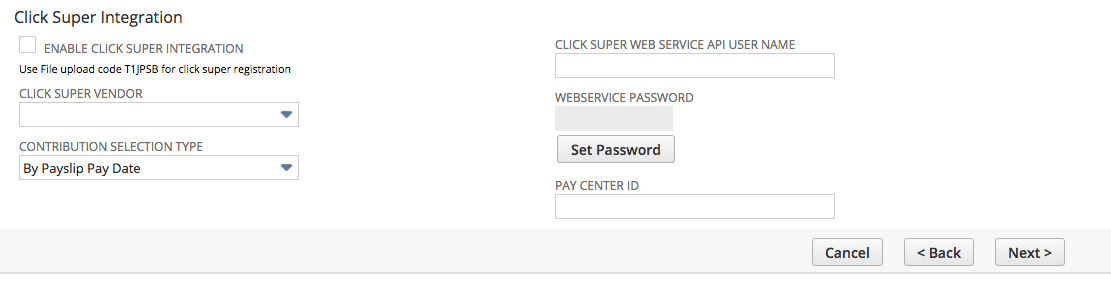
- Enable Click Super Integration - Mark this checkbox if you do want to enable the Click Super Integration feature
- Click Super Vendor - Select the vendor for Click Super
- Contribution Selection Type - Select the option which best reflects when you will update Click Super
- Click Super Webservice API User Name - Enter the Webservice API User Name - this is NOT your ClickSuper login
- Click Super Webservice Password - Enter the Webservice Password
- Set Password - Click this button if you want to update the Click Super password
- Pay Center ID - Identifies the organisational unit responsible for paying the salary and contributions of an employee. Typically used to enable multiple bank accounts for the same credentials. This should be left blank if there are no multiple bank accounts.
Click on Next
, multiple selections available, Use left or right arrow keys to navigate selected items