UK New Starter Setup
- Infinet Support (Unlicensed)
Overview
This guide describes the setup of employees so that you can run payruns for them successfully. You should use this guide when adding a new Employee to your payroll, or when modifying an existing Employee.
You must have ICS Payroll configured for the country/subsidiary prior to adding any payroll Employees. If you have not done then, then you should go through the Configuring Payroll Guide first.
Creating an Employee Record
Logged in as a Payroll Administrator
- Navigate to Payroll Administration > Payroll Records > Employees > New

- Enter in the Primary Information:
Employee ID - If "Auto" is ticked this will auto-populate with the employee's name as set in the name fields
Subsidiary (Required) - if you have a One World account then select the subsidiary the employee belongs to
Name (Required) - The employees first, middle and last name
Enter any other information as necessary - Classification:
None of these fields are required by default however if you require classification information to flow through to the Payroll Journal then complete the Classification fields.
Department
Location
Class - Email | Phone | Address:
None of these fields are required by default but can be completed as necessary for your records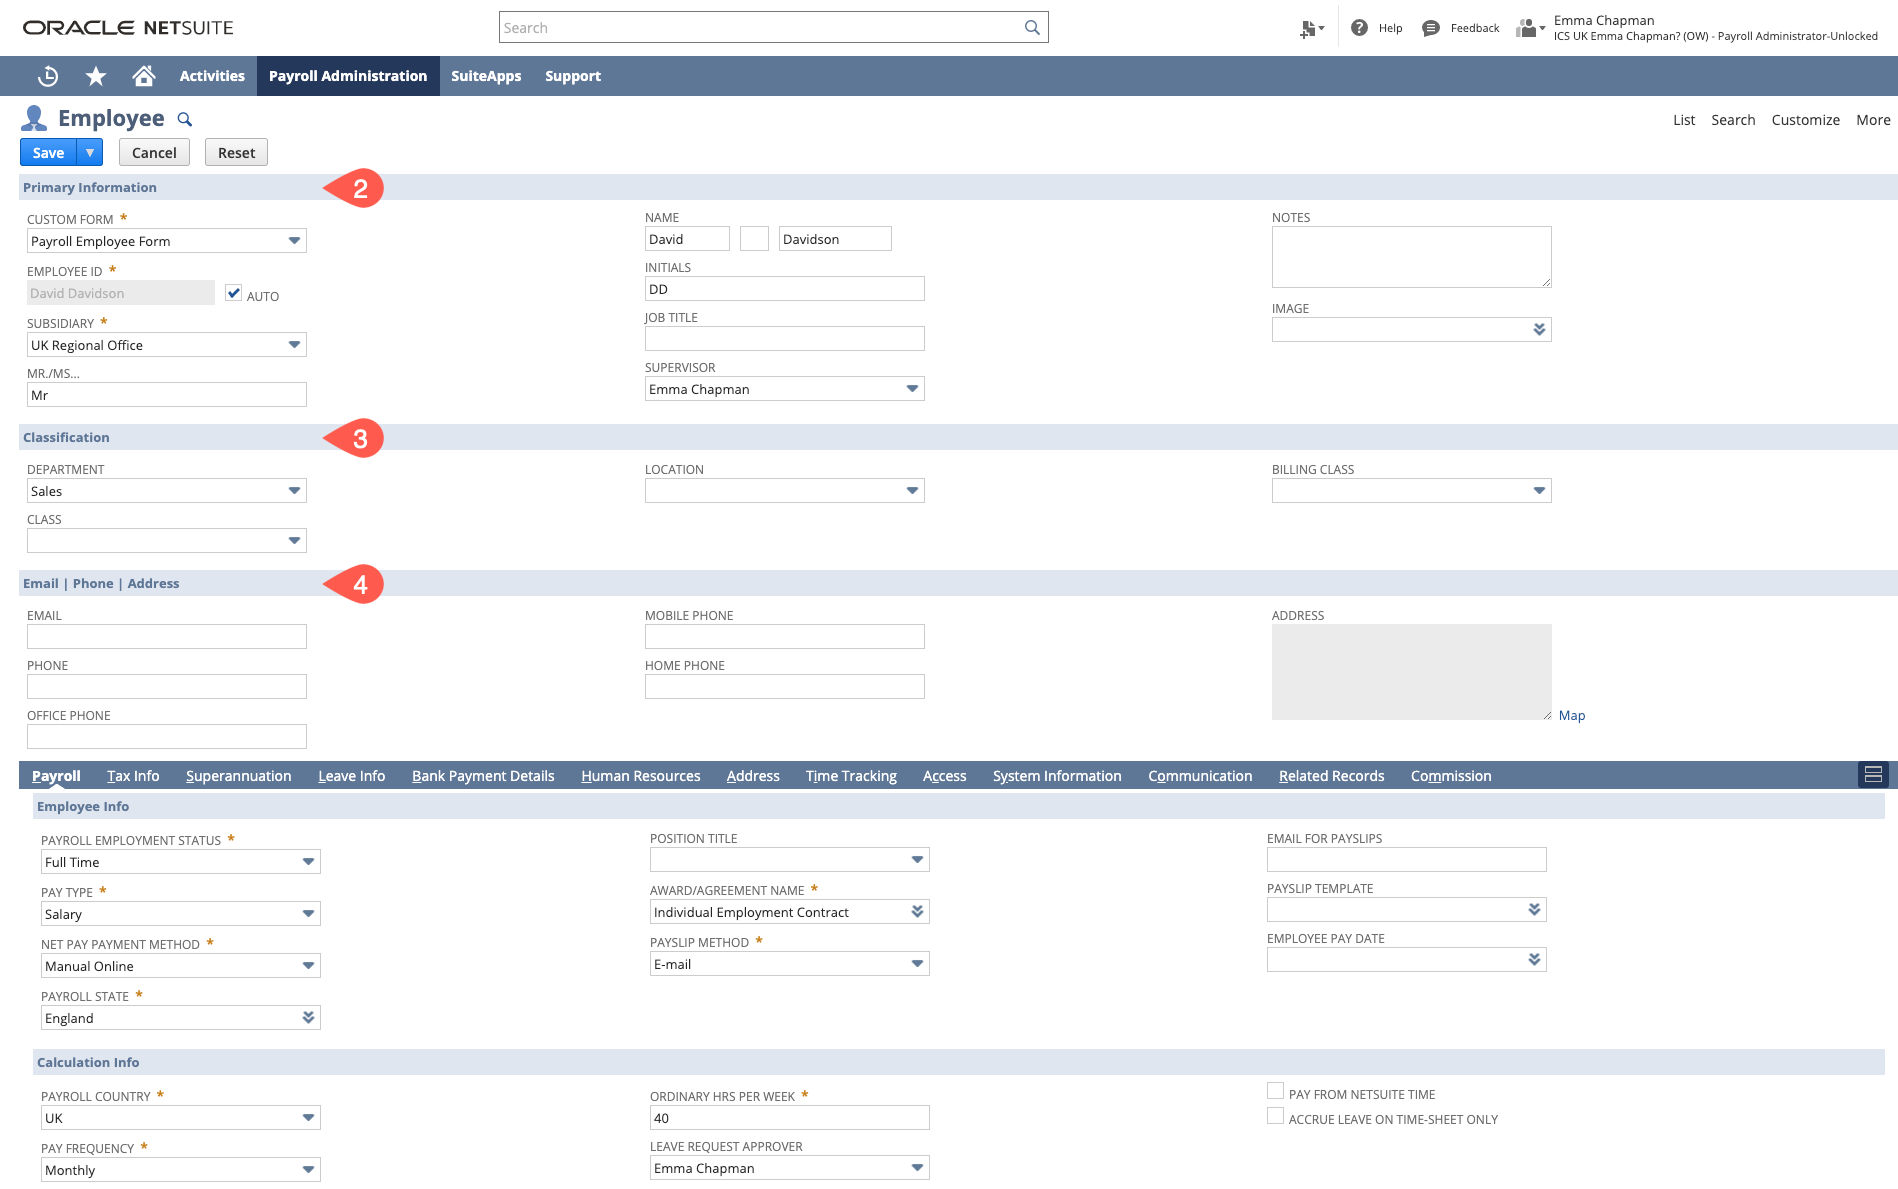
- At this stage you will want to complete the address fields - this is required for submission on an FPS to HMRC. To do this go to the Address Tab
- Click the Edit icon
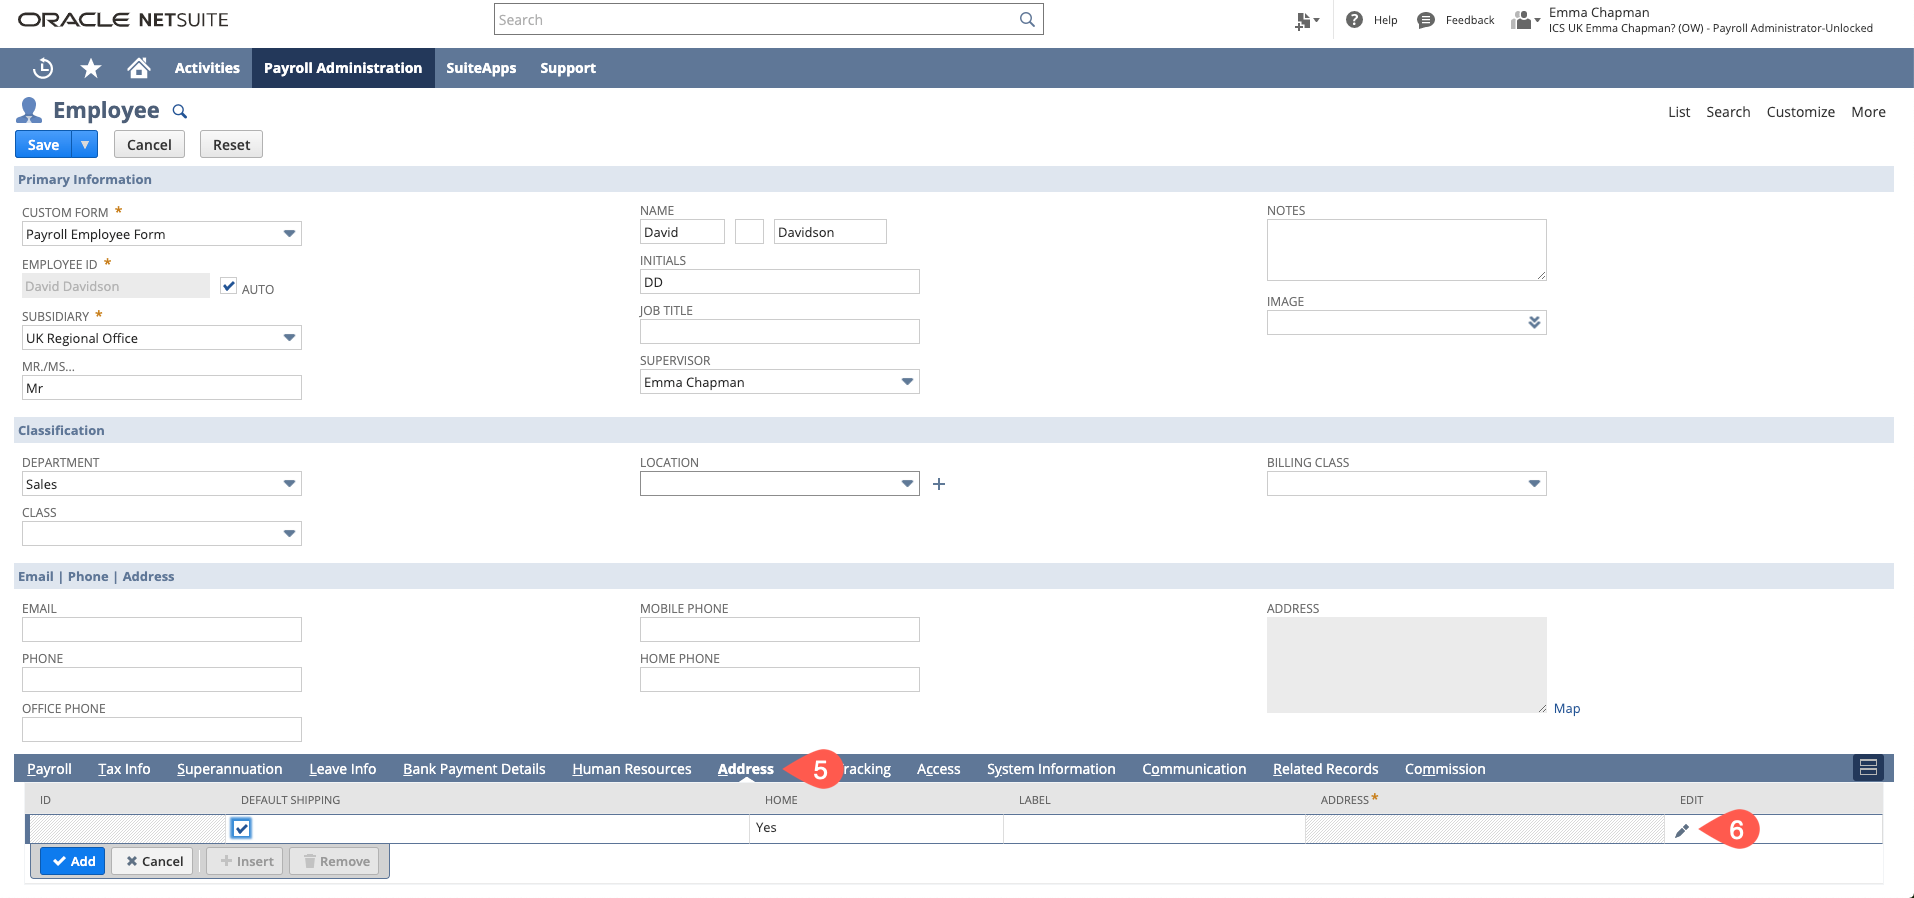
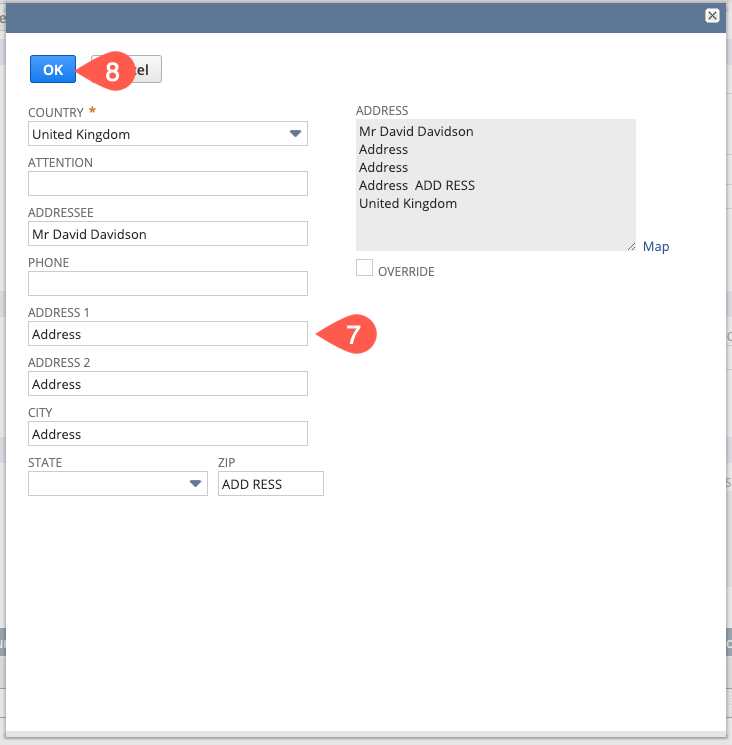
- A pop up will appear, enter in the address details
- Click OK
- This will take you back to the Employee Record - click SAVE on this
Creating an Employee Enrolment Record
After you have completed the basic information and the address on the employee record and saved it you will want to create the enrolment record. Information will pull through from this into the employee record, for example the Tax Code, Gender and NINO. An enrolment record should be created prior to the employee's first payrun. Please go to the UK Enrolment Guide for instruction on how to complete this.
Completing the Employee Record
Once you have completed the enrolment record you will want to go back to the employee record to complete this. Open the Employee Record in edit mode. You will need to complete the following tabs:
![]()
Payroll Tab
Most of the information here will default from your company's Payroll Configuration. Regardless, it's important to check that all fields are set correctly.

Employee Info
Payroll Employment Status - select the employee's employment status
Pay Type - select Salary (for employees who receive standard monthly salary or Wages for employees paid an hourly rate)
Net Pay Payment Method - select EFT Upload, Cheque, Cash or Manual Online
Payroll State - select the state for public holidays and tax. This field is also used in Leave Management
Award / Agreement Name - select their Award or Agreement - this is usually individual employment contract
Payslip Method - select how the employee should receive their payslip - email, print or online (in the ESS)
Email for Payslips - this does not default from the email field and is a personal email address where the employee wants their payslips sent to
Employee Pay Date - set this if the employee needs to be paid on a different cycle/pay date to other employees
Calculation Info
Payroll Country - defaults from the configuration, can be used as a filter on the pay run
Pay Frequency - select the employee's pay frequency - either Bi-Monthly, Fortnightly, Monthly, Weekly or Exclude from Payrun (see Excluding an Employee from Payroll for more info)
Leave Request Working Week - select the working week which best describes the hours for calculations on leave accruals. You can create new leave request working weeks for other situations not covered by those created by ICS
Ordinary Hrs Per Week - auto-populates from the leave request working week. This drives the leave accrual calculations
Leave Request Approver - select the employee that will approve any leave requests
Payroll Currency - leave blank unless the employee should be paid in a different currency to the currency in the jurisdiction they are in
Pay from NetSuite time - only applicable to Waged employees. Check this box if the employee is to be paid based on time logged (e.g. Timesheets) in NetSuite. Any timesheet for normal time will be ignored if this option is unchecked.
Accrue Leave on Time-sheet only - select this if you want to accrue leave based on the hours entered on timesheets, this may be if the employee works different hours per week. Usually this is used for casuals or part timers (on wages)
Pensions
Pension Entitlement - if this is not set up by workflow select the scheme that the employee will be entered into
Pension Start Date - do not fill this is, this is completed by workflow based on the pension entitlement, date of birth and pay
UK State Pension Age - pulled from the enrolment record based on date of birth and gender
Posting Info
Payroll Balance Sheet Account - select the account that the net pay will post to
Payroll Expense Allocation - only set this field if you wish to allocate the employee's payroll expenses to a different set of accounts than what is in the configuration
System Set Fields
Most of these fields update once pay components are created. You may need to enter the following:
Payroll ID - if you have an alternate identification number for the Employee then enter it here. See instructions here on Employee Payroll IDs - UK
Tax Info Tab
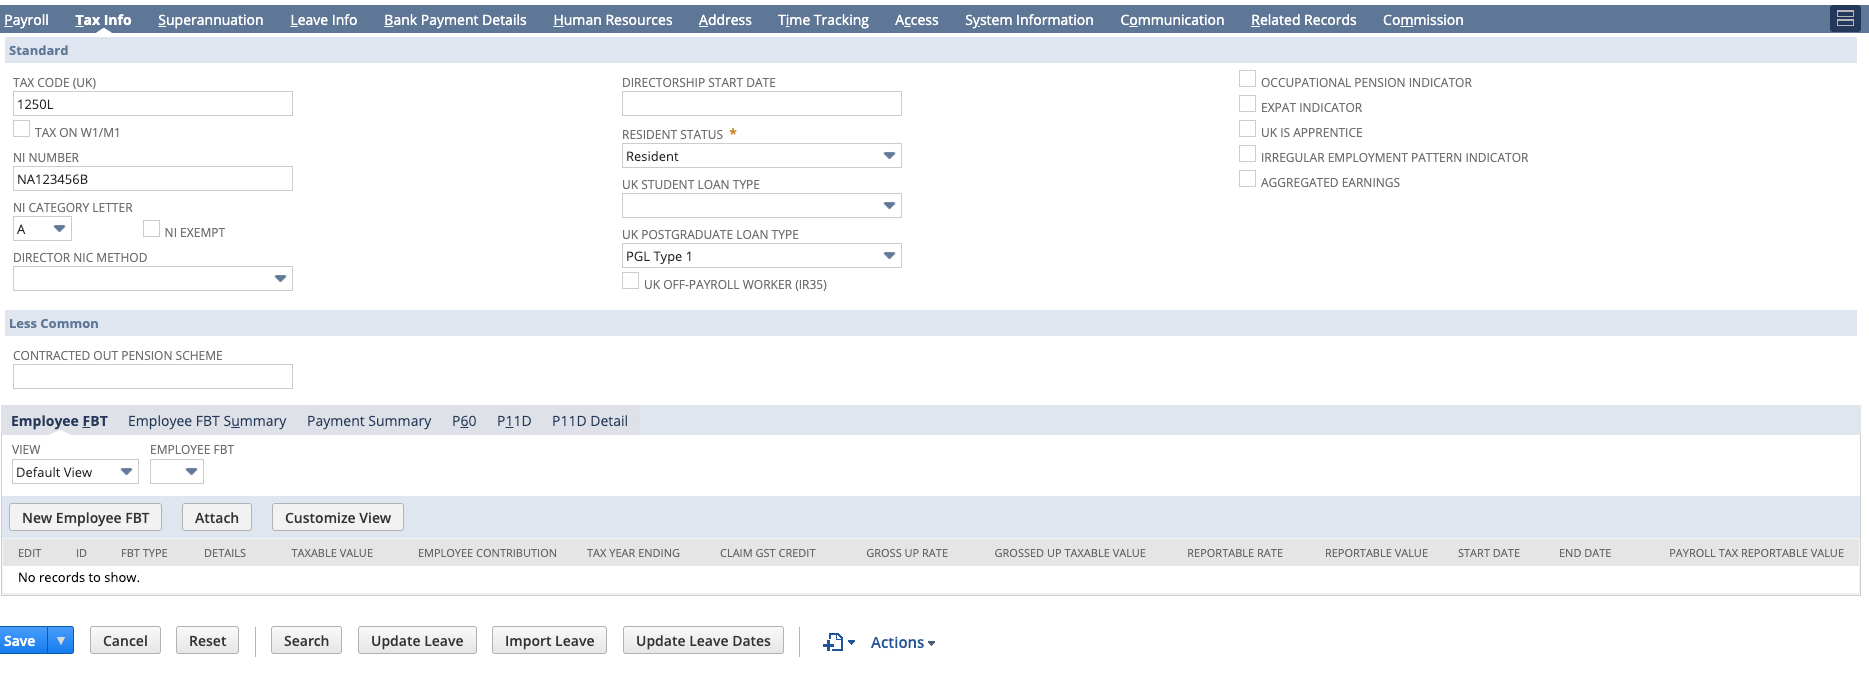
Most of these fields are updated from the enrolment record once it is created. You may need to enter the following:
Director NIC Method - AL or AN. Only select if employee is a Director and they need to have NICs contributions calculated as a director.
Directorship Start Date - The date that the employee became a director.
UK Off-Payroll Worker (IR35) - If checked Subject to Off-Payroll Worker 2020 Rules. An employee marked with this will not have student loan or postgraduate loan deductions made or reported, and are not entitled to statutory payments or pension auto-enrolment
Irregular Employment Pattern Indicator - check if the employee is paid on an irregular basis
Aggregated Earnings - If an employee has more than one job and if all their jobs are with you
Superannuation (Pensions) Tab
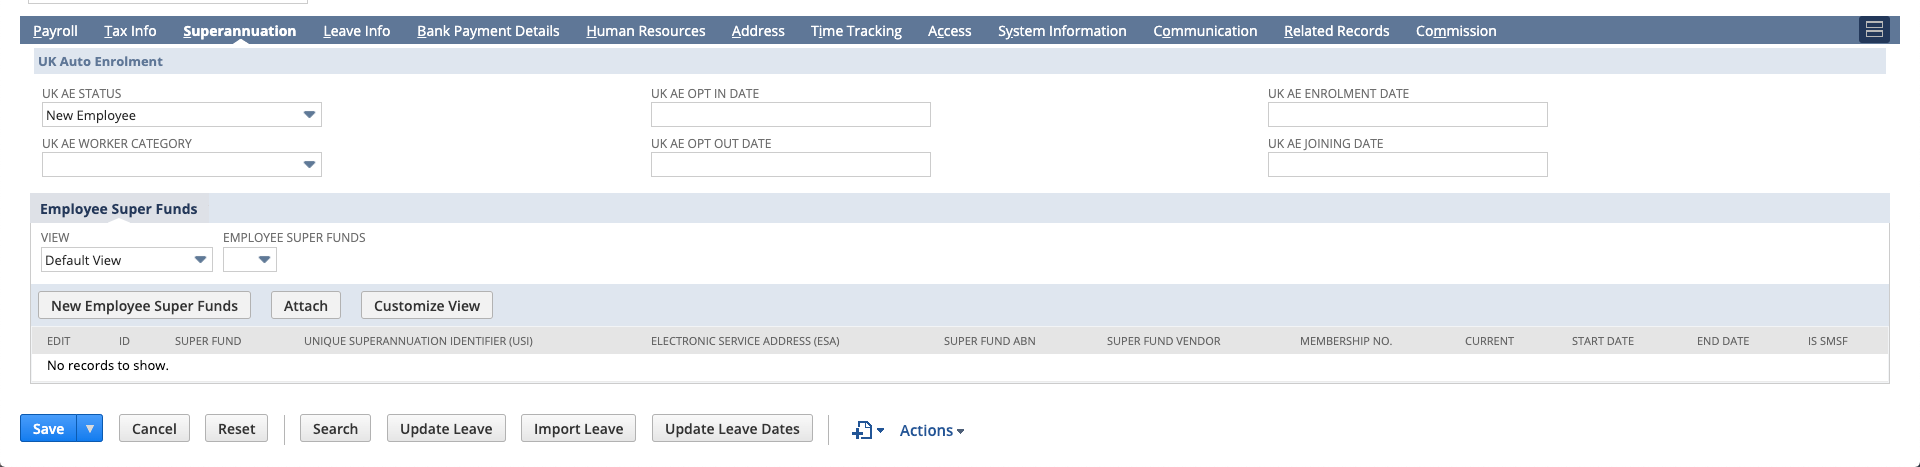
These fields do not need to be populated during employee set up unless you are transferring an employee from another system, for example, someone who has opted out/in.
Leave Info Tab
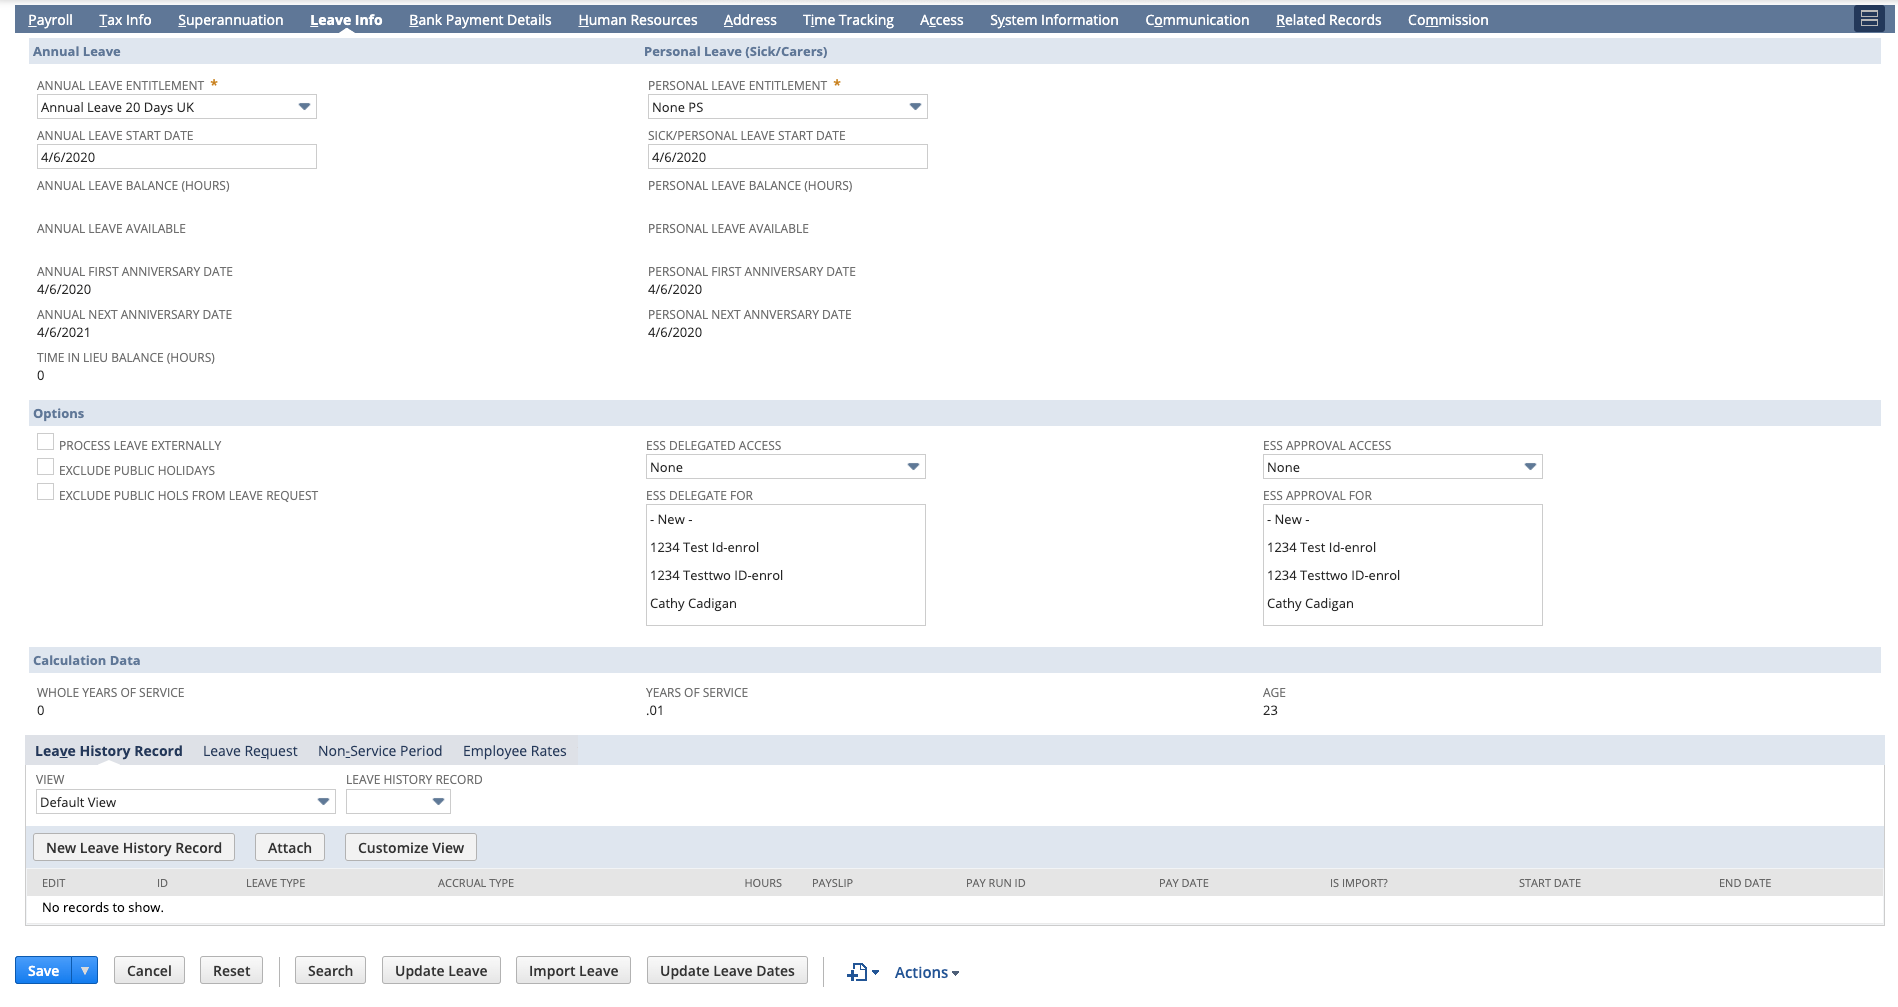
Annual Leave
The defaults for the following fields are pulled from the configuration. Select the correct option depending on the entitlements of the employee. Any non editable fields (e.g. the Annual Leave Balance) will be populated when the Leave History Records are created.
Annual Leave Entitlement - select the correct entitlement for this employee Leave Accrual Rates link
Personal Leave Entitlement - select the correct entitlement for this employee
Options
Process Leave Externally - leave accruals will not be calculated in ICS Payroll if this is selected
Exclude Public Holidays - mark this checkbox if you do not want timesheets for public holidays to be created in the pay run. Typically this is for casuals
Exclude Public Hols From Leave Request - mark this checkbox if you want to exclude public holidays in annual leave calculations
ESS Delegated Access - select an option if you want this employee to access the ESS on behalf of another employee(s)
ESS Delegate For - If ESS Delegated Access is set to Employee Defined, select the specific employees they should have access to
ESS Approval Access - select an option if you want this employee to approve leave on behalf of another employee(s)
ESS Approval For - If ESS Approval Access is set to Employee Defined, select the specific employees they can approve leave on behalf of for
ESS stands for Employee Self Service and is accessible using the Employee Centre role.
Calculation Data
Whole Years of Service - defaults from Hire Date (on HR tab) and is used for leave calculations
Years of Service - defaults from Hire Date (on HR tab) and is used for leave calculations
Age - defaults from the Date of Birth
Bank Payment Details Tab
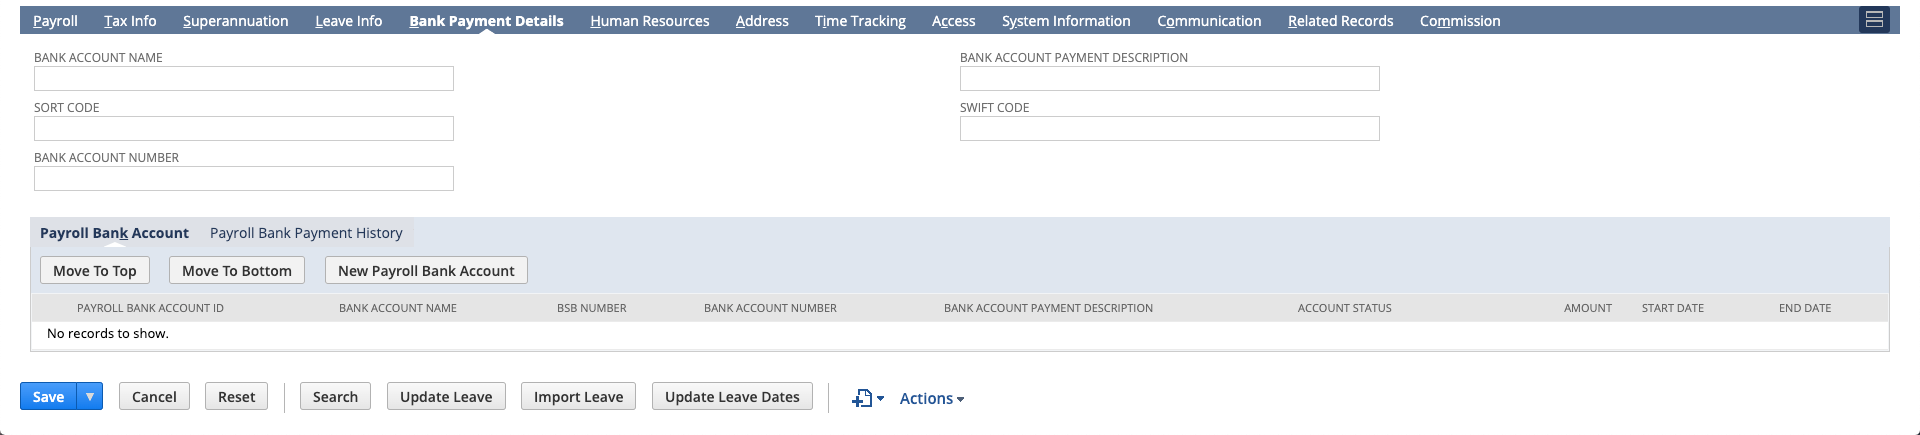
Bank Account Name - enter the employee's Bank Account Name.
BSB Number - enter their six digit sort code
Bank Account Number - enter their 8 digit Bank Account Number
Bank Account Payment Description - enter a description that will appear in the employees bank account, e.g.: COMPANY PAY. If this is a Building Society Account this is where the Roll number will be entered here
Swift Code - If required, enter the Swift code for the employee's bank account
When you save the employee, the Payroll Bank Account record will be created. If you did not enter any bank details before you saved then you can enter primary and/or secondary bank details using the New Payroll Bank Account button. For more information see Add Additional Bank Accounts.
The Start Date of the Payroll Bank Account will default to the Hire Date held on the employee record - ensure that this is correct. If the Payroll Bank Account Start Date is after the pay run period then the employee will not be included in the EFT.
Human Resources Tab

The key fields that need to be completed on this tab are auto-populated from the Enrolment Records. These are:
Hire Date
Birth Date
Gender
Complete the remaining fields as and if required.
You can now save the employee record.
Add Pay Components
Once you have created and saved the employee record you will need to crate the pay components that will determine what the employee will be paid.
Navigate to the Employee Record > Payroll Tab > Pay Component Sub Tab
You will need to select the correct button to click depending on what component you are creating:
Create Salary/Wages - Use the Salary/Wages Pay Component type to create either 'Base Salary' (for salaried employees) or 'Normal Time' (for waged employees)
Create Salary Sacrifice - Use this to create Salary Sacrifice pay components for example - Pensions and Childcare Vouchers
Create Deduction - Use this Pay Component type to create deductions to be subtracted from an employee's pay during the pay run for example Attachment of Earnings and Loan Repayments
Create Allowance - Use this Pay Component type to create allowances to be added to an employee's pay during the pay run for example On Call and First Aid allowances