/
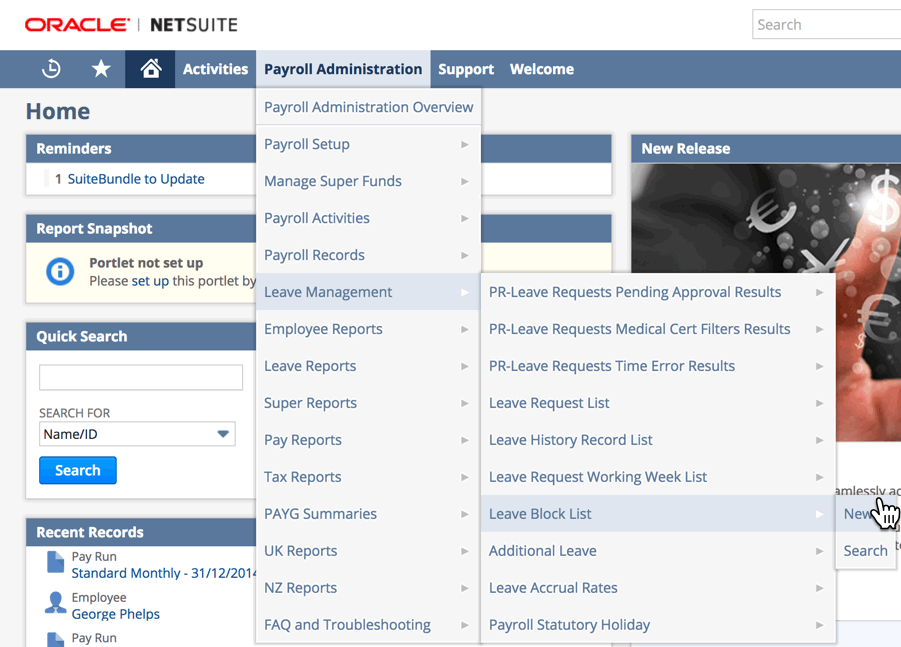
Creating a Leave Block
Creating a Leave Block
- Complete the relevant fields, namely:
- Name - Name of the event or non-state based public holiday
- Start Date - First day of Leave
- End Date - Last day of Leave
- Status - Generally create as "Approved" unless specific Supervisor approval is required.
Leave Type - Select the type of Leave for this Leave Block. Eg. Annual Leave for Xmas Closedown.
Note
If Leave type is not available in drop down. Go to the Pay Component Sub type and tick the box "Show in Leave Request" Then return to Leave Block and refresh if required. You can also create your own Pay Component Sub Type if the one you require does not exist e.g Leave Blackout.
To do this go to Payroll > Payroll Setup > Pay Component Sub type- Suppress Email - Generally ticked unless Employee notification is required
- Advance Date - If this Leave period is to be paid in advance, enter relevant pay period date for processing.
- Employee Filters - You can use filters to change the Employee list.
- Click Mark All to select all Employees, or only tick those you wish to include in this Leave Block.
- Click Save to complete
- If you receive any alerts, check and confirm where applicable.
Scheduled Creation
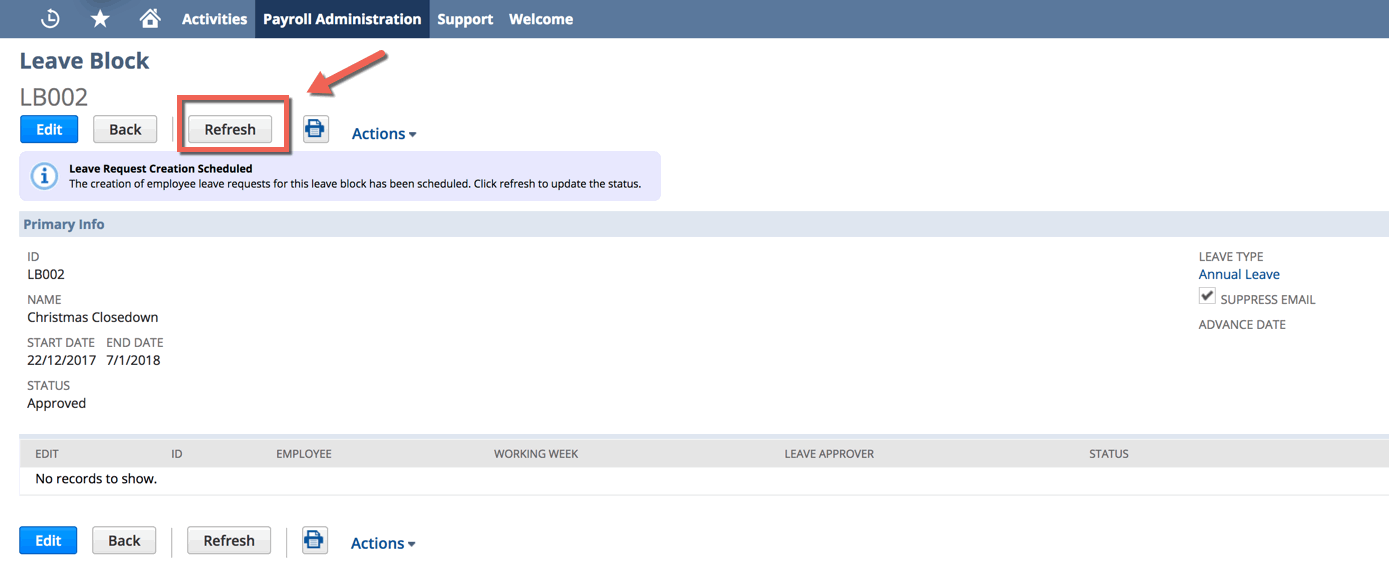
- Once saved you will be redirected to the Leave Block record.
- Individual Leave Request creation will occur as a scheduled process. Click Refresh to check current status
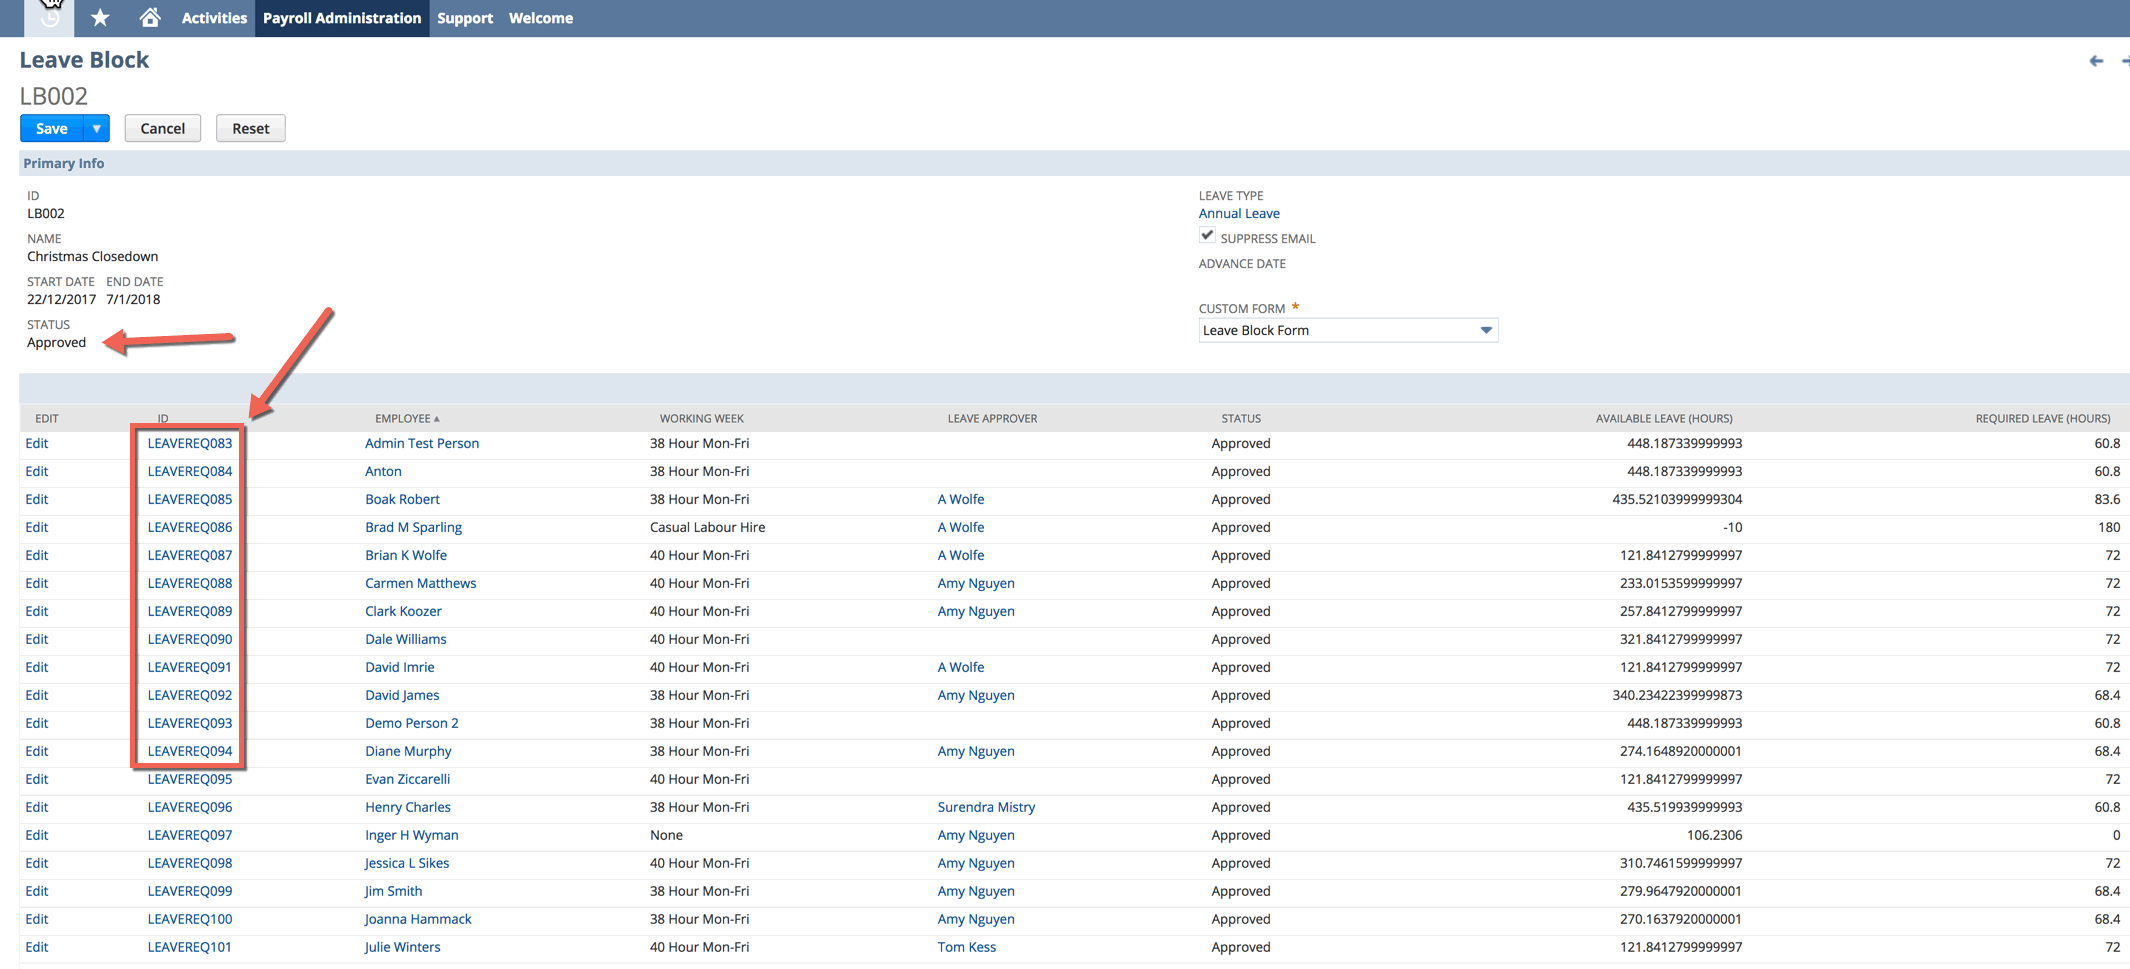
- Once complete, the information box will disappear and you will see a list of Leave Requests by employee
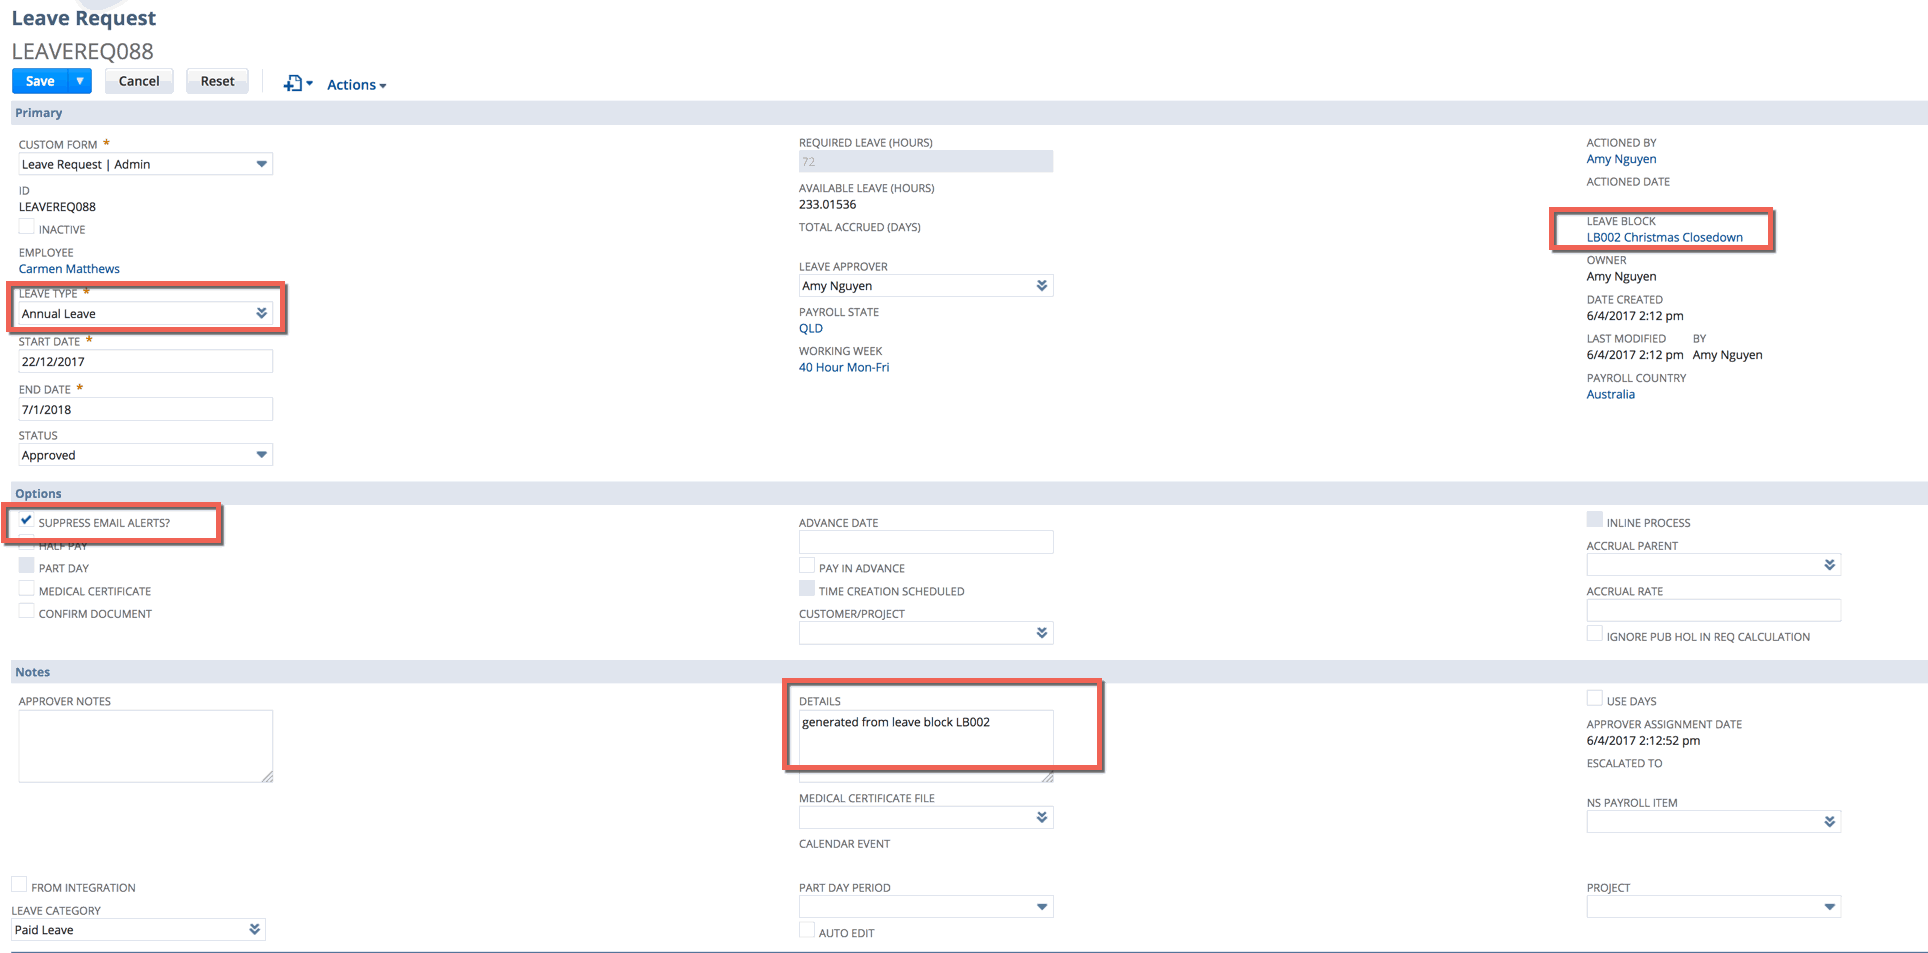
- Review individual Leave Requests if required for accuracy and to ensure time records have been created
Deleting Leave Blocks
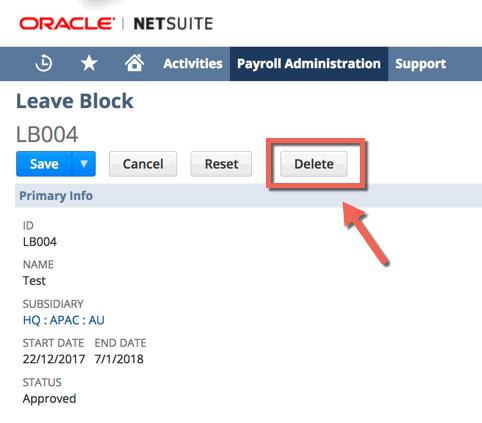
- If a Leave block was created incorrectly or is no longer required, you can edit the Leave Block record and click the Delete button
- Read any alerts and click OK
- The Leave Block Status will change to Scheduled Delete and once page is refreshed the record will be be gone.
Related content
Leave Management Guide
Leave Management Guide
Read with this
Leave Configuration
Leave Configuration
Read with this
Statutory Maternity Calculator
Statutory Maternity Calculator
More like this
Amending an Employee's Hours
Amending an Employee's Hours
More like this
Finalising a Financial Year (STP)
Finalising a Financial Year (STP)
More like this
Public Holiday Timesheets
Public Holiday Timesheets
More like this
