Creating New Salaries - CSV Import
Create a spreadsheet with necessary headings and save as a CSV
Internal ID Employee Name Pay Component Sub Type Quantity Rate Amount Start Date P&L Account The employee's NetSuite internal ID The employee's name If the employee is wages = Normal Time
If the employee is salary = Base Salary
The quantity
If "Normal Time" = number of hours
If "Base Salary" = 1
Hourly rate if "normal time"
Annual salary if "base salary"
Quantity * Rate The date the pay component started
The P&L Account If necessary you can add in a “back date to” date and this will set a date to back date the payment (Salary only)
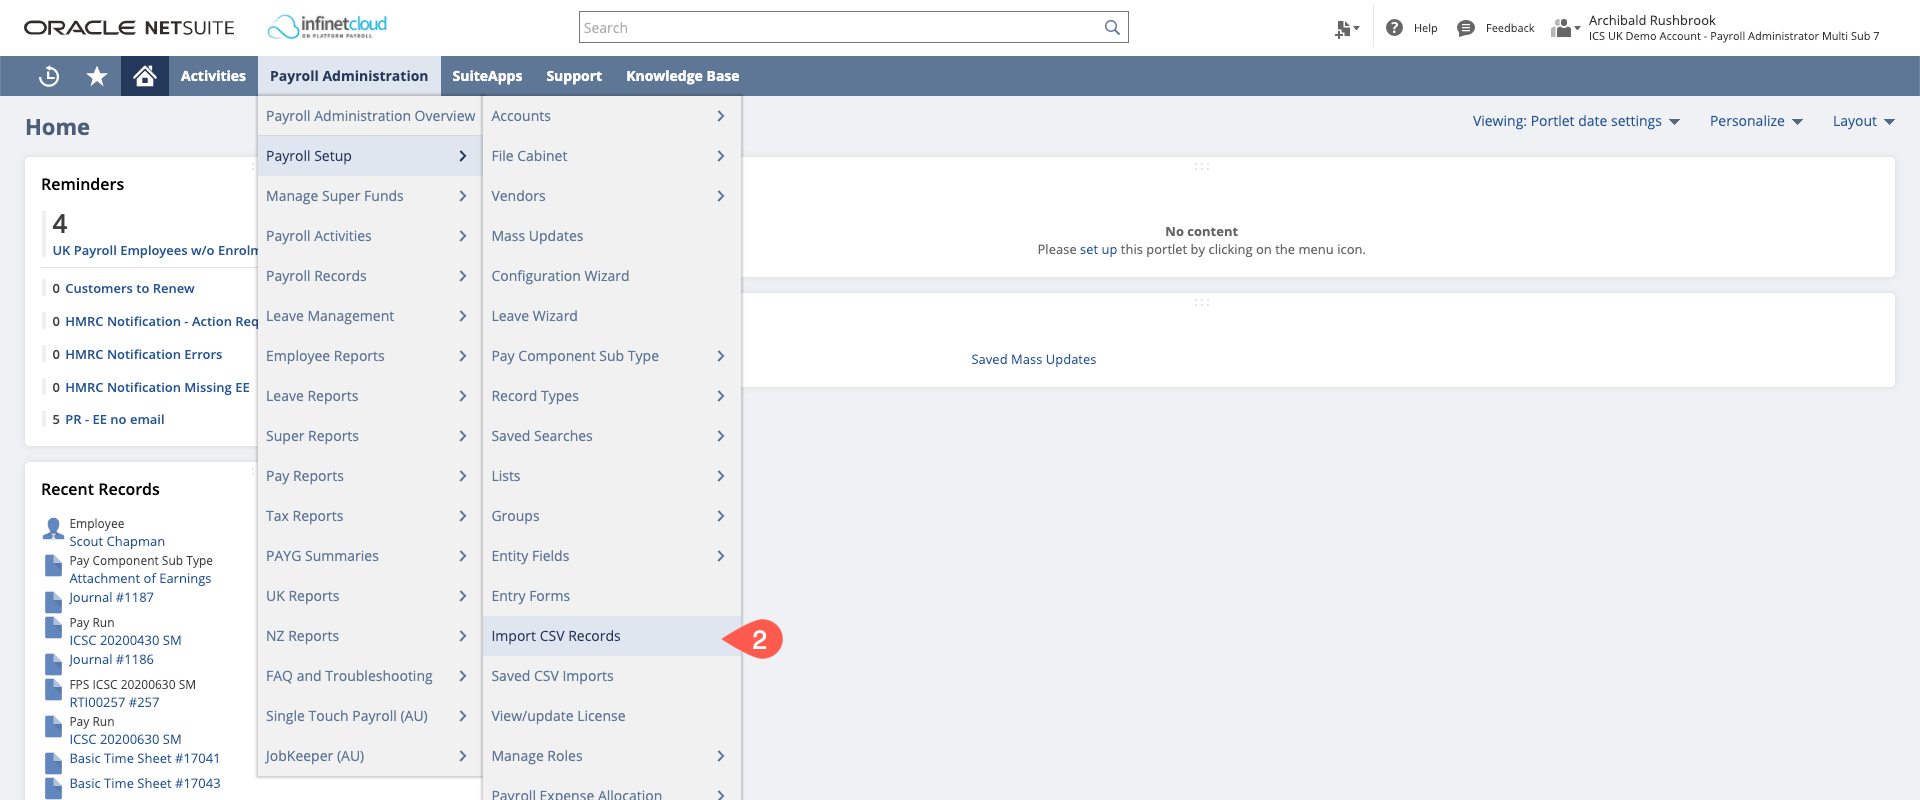
Go to Payroll Admin > Payroll Setup > Import CSV Records
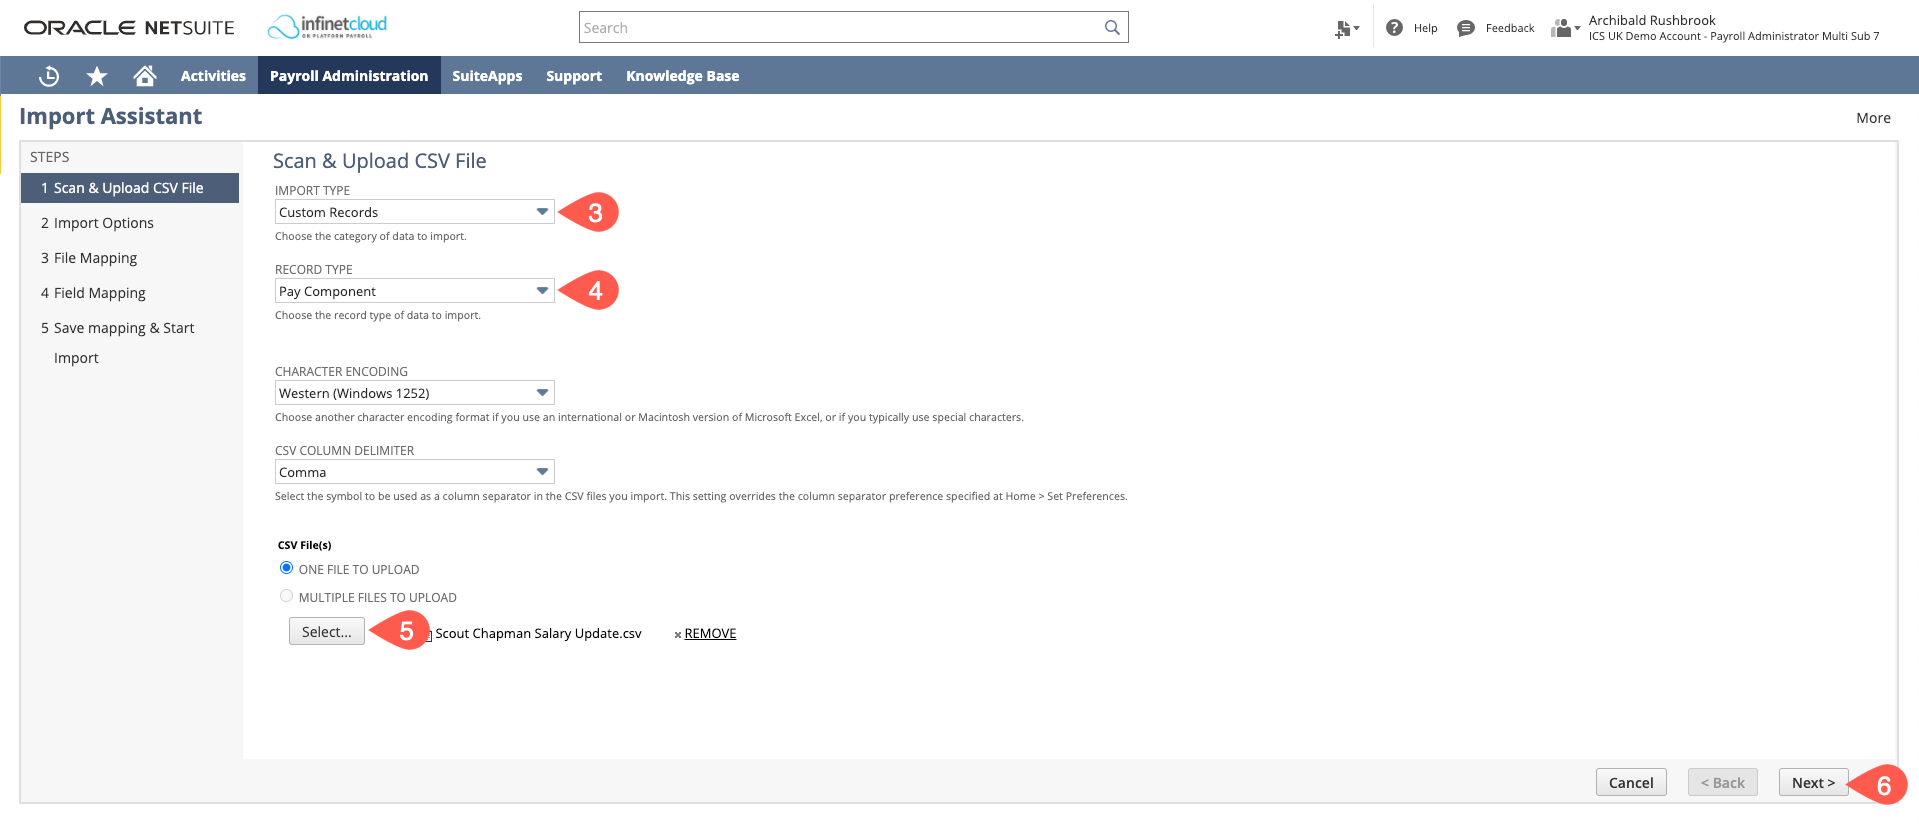
- Set the Import Type to "Custom Records"
- Set the Record Type to "Pay Component"
- Select your CSV file
- Click "Next"
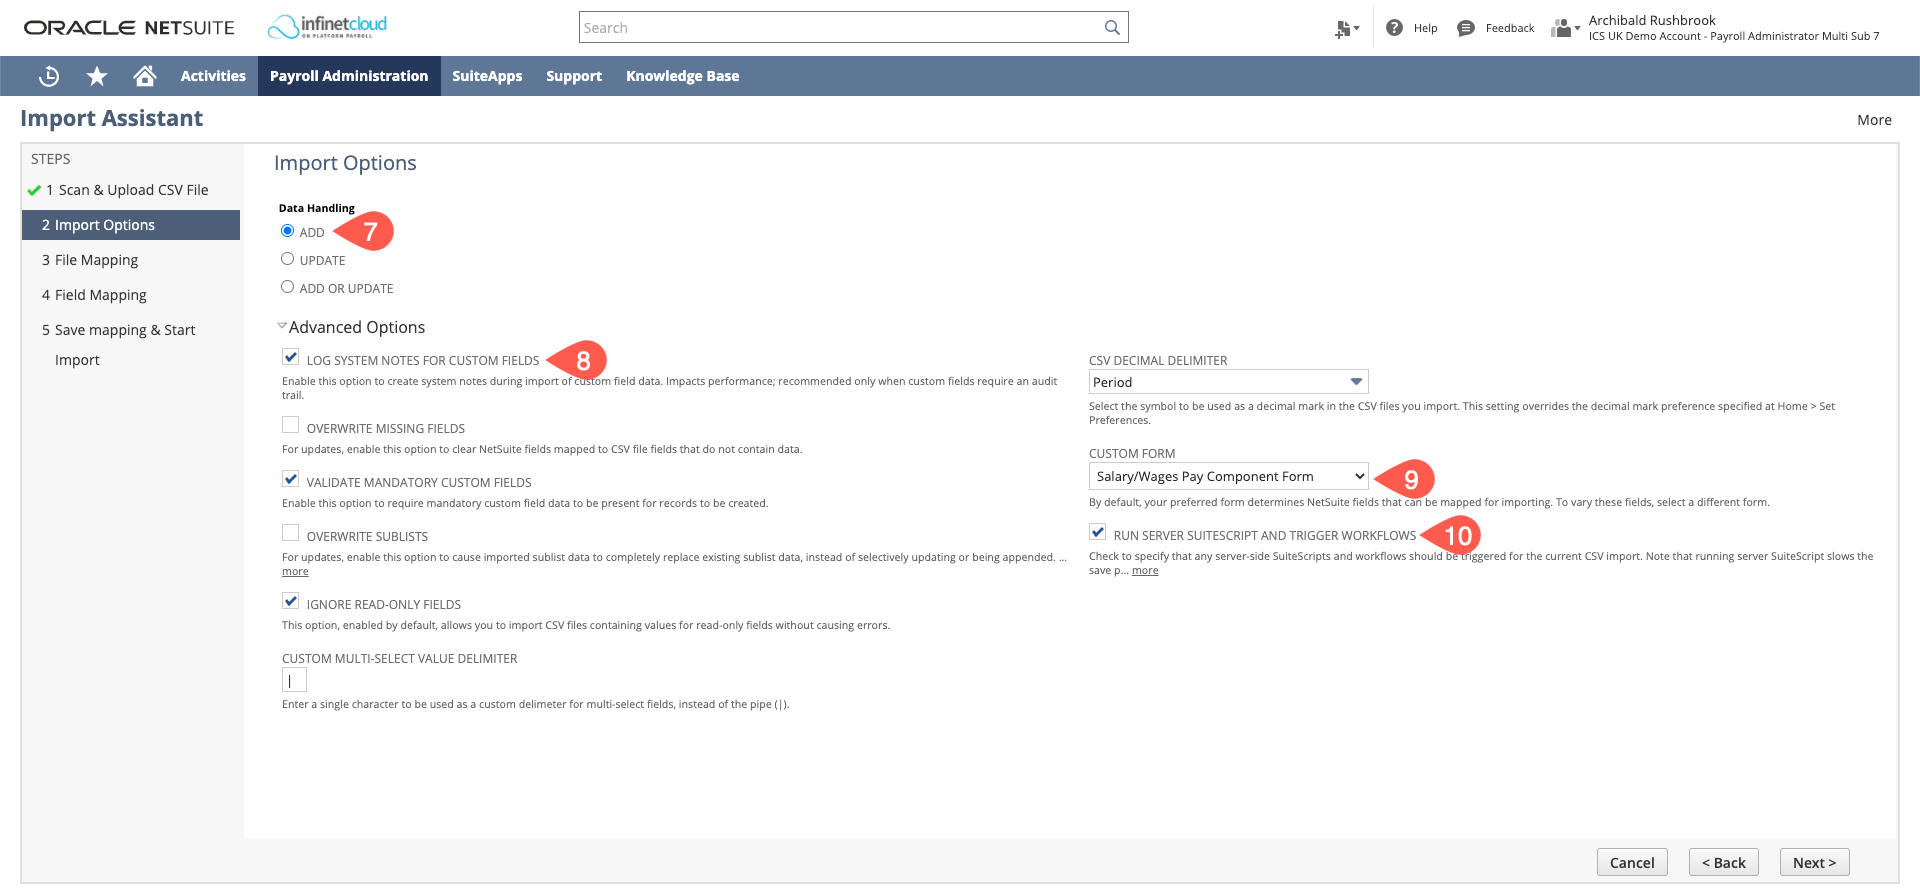
- Data Handling = ADD
- Open Advanced Options and ensure "Log System Notes for Custom Fields" is ticked
- As we are updating a base salary set the Custom Form to "Salary/Wages Pay Component Form"
- Ensure "Run Server Suitescript and Trigger Workflows" is ticked
Many of the fields will map automatically based on the headers matching the NetSuite Fields. Check that the fields are mapped correctly
To map to a line, make it active by clicking the line, arrows will appear on either side of it when it is active, then click on either the NetSuite field or CSV field to map it to the line
- You can hard code or edit the mapping by clicking the "edit" pencil on the line in question. You will need to hard code the P&L Account (unless you have it in your CSV), Pay Component Type, Pay Component Sub Type, UOM.
Pay Component Type = Salary/Wages
Pay Component Sub Type = Base Salary or Normal Time
UOM = Year (for Base Salary) or Hour (Normal Time) - By hard coding it will set the same value on each of the records you import.
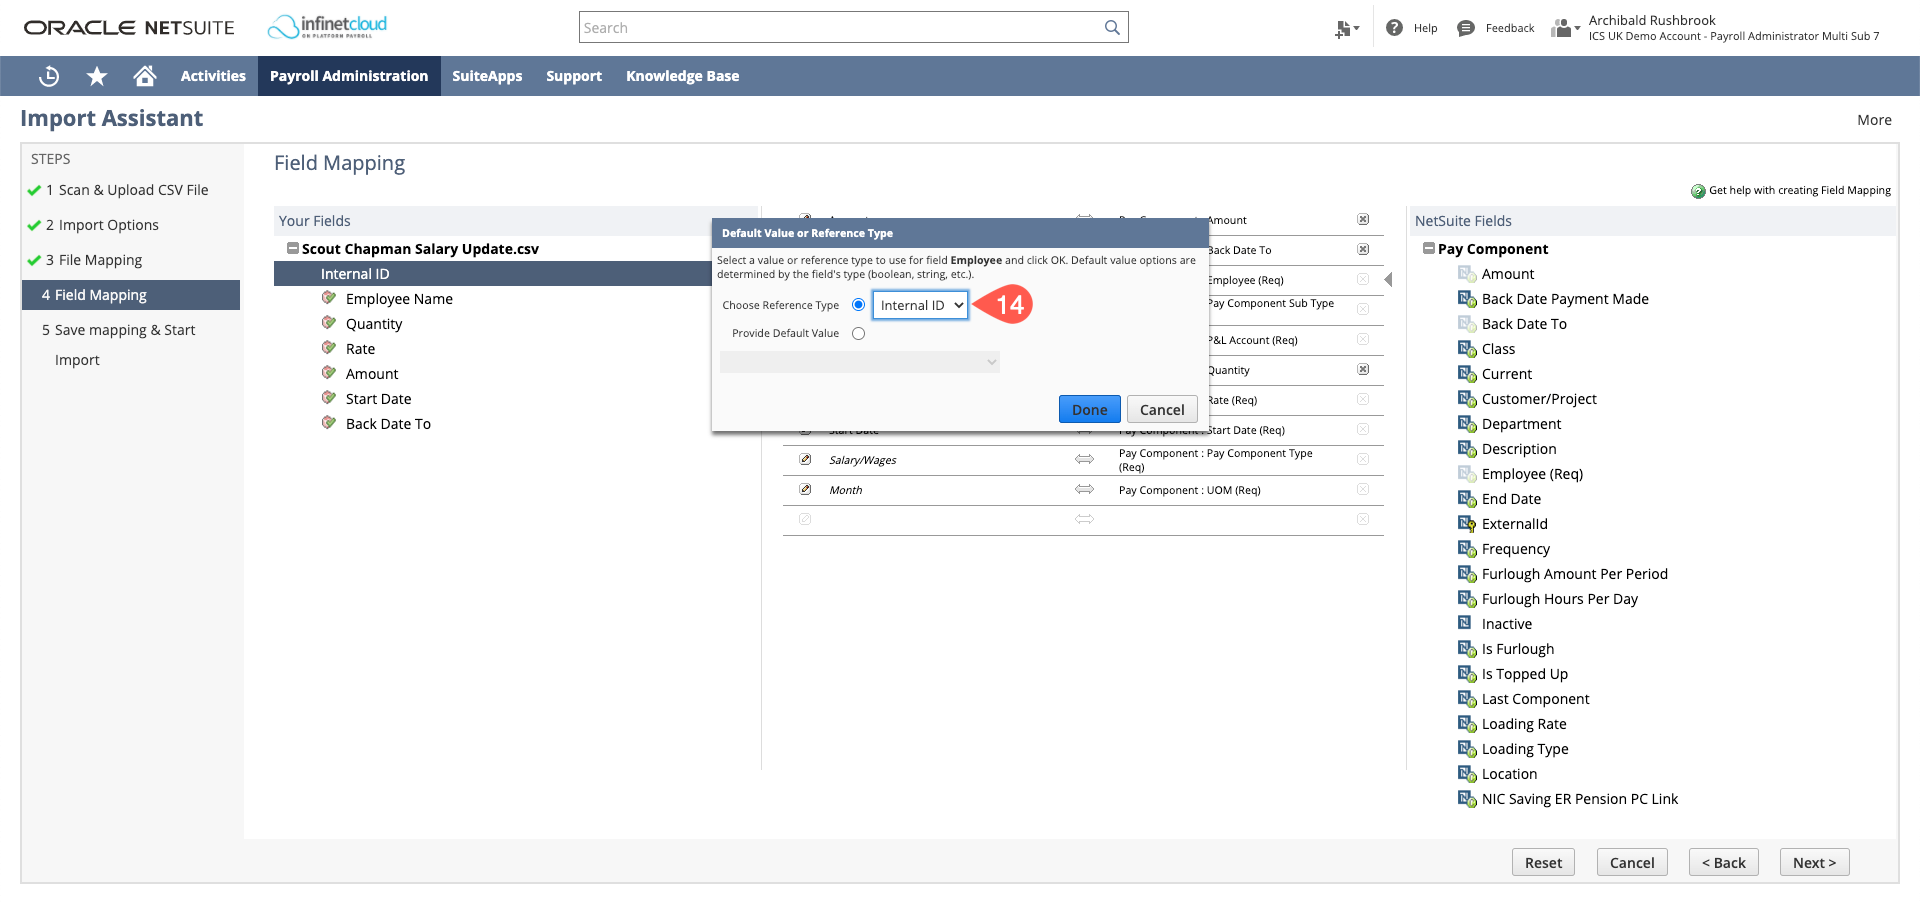
- Ensure that the Employee is mapping to the correct identifier by clicking the pencil on the line

- Set it to Internal ID/Name/External ID depending on what you have set on your spreadsheet. We always suggest using a unique identifier like the NetSuite Employee Record Internal ID rather than name. Name as the employee reference should be the last resort.
Once mapped click Next
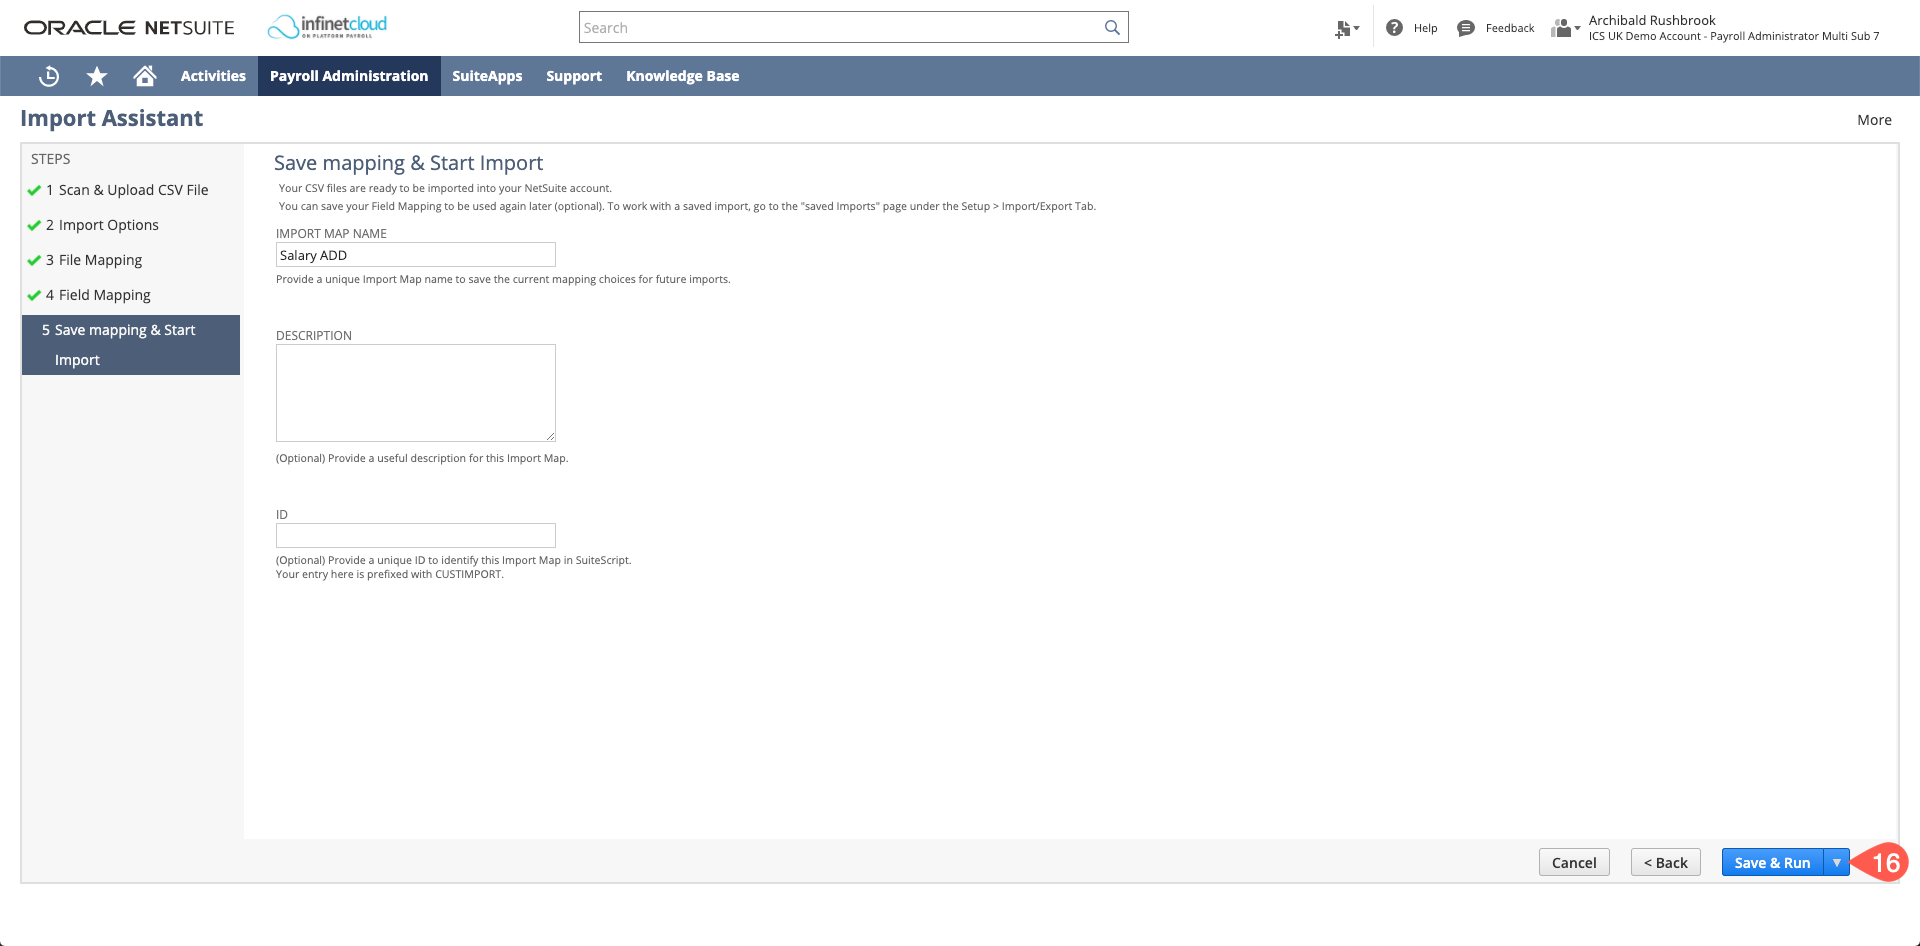
Save (remove the ID, rename) and run