Branch Setup Assistant (Configure STP)
Step 1: Select Branch
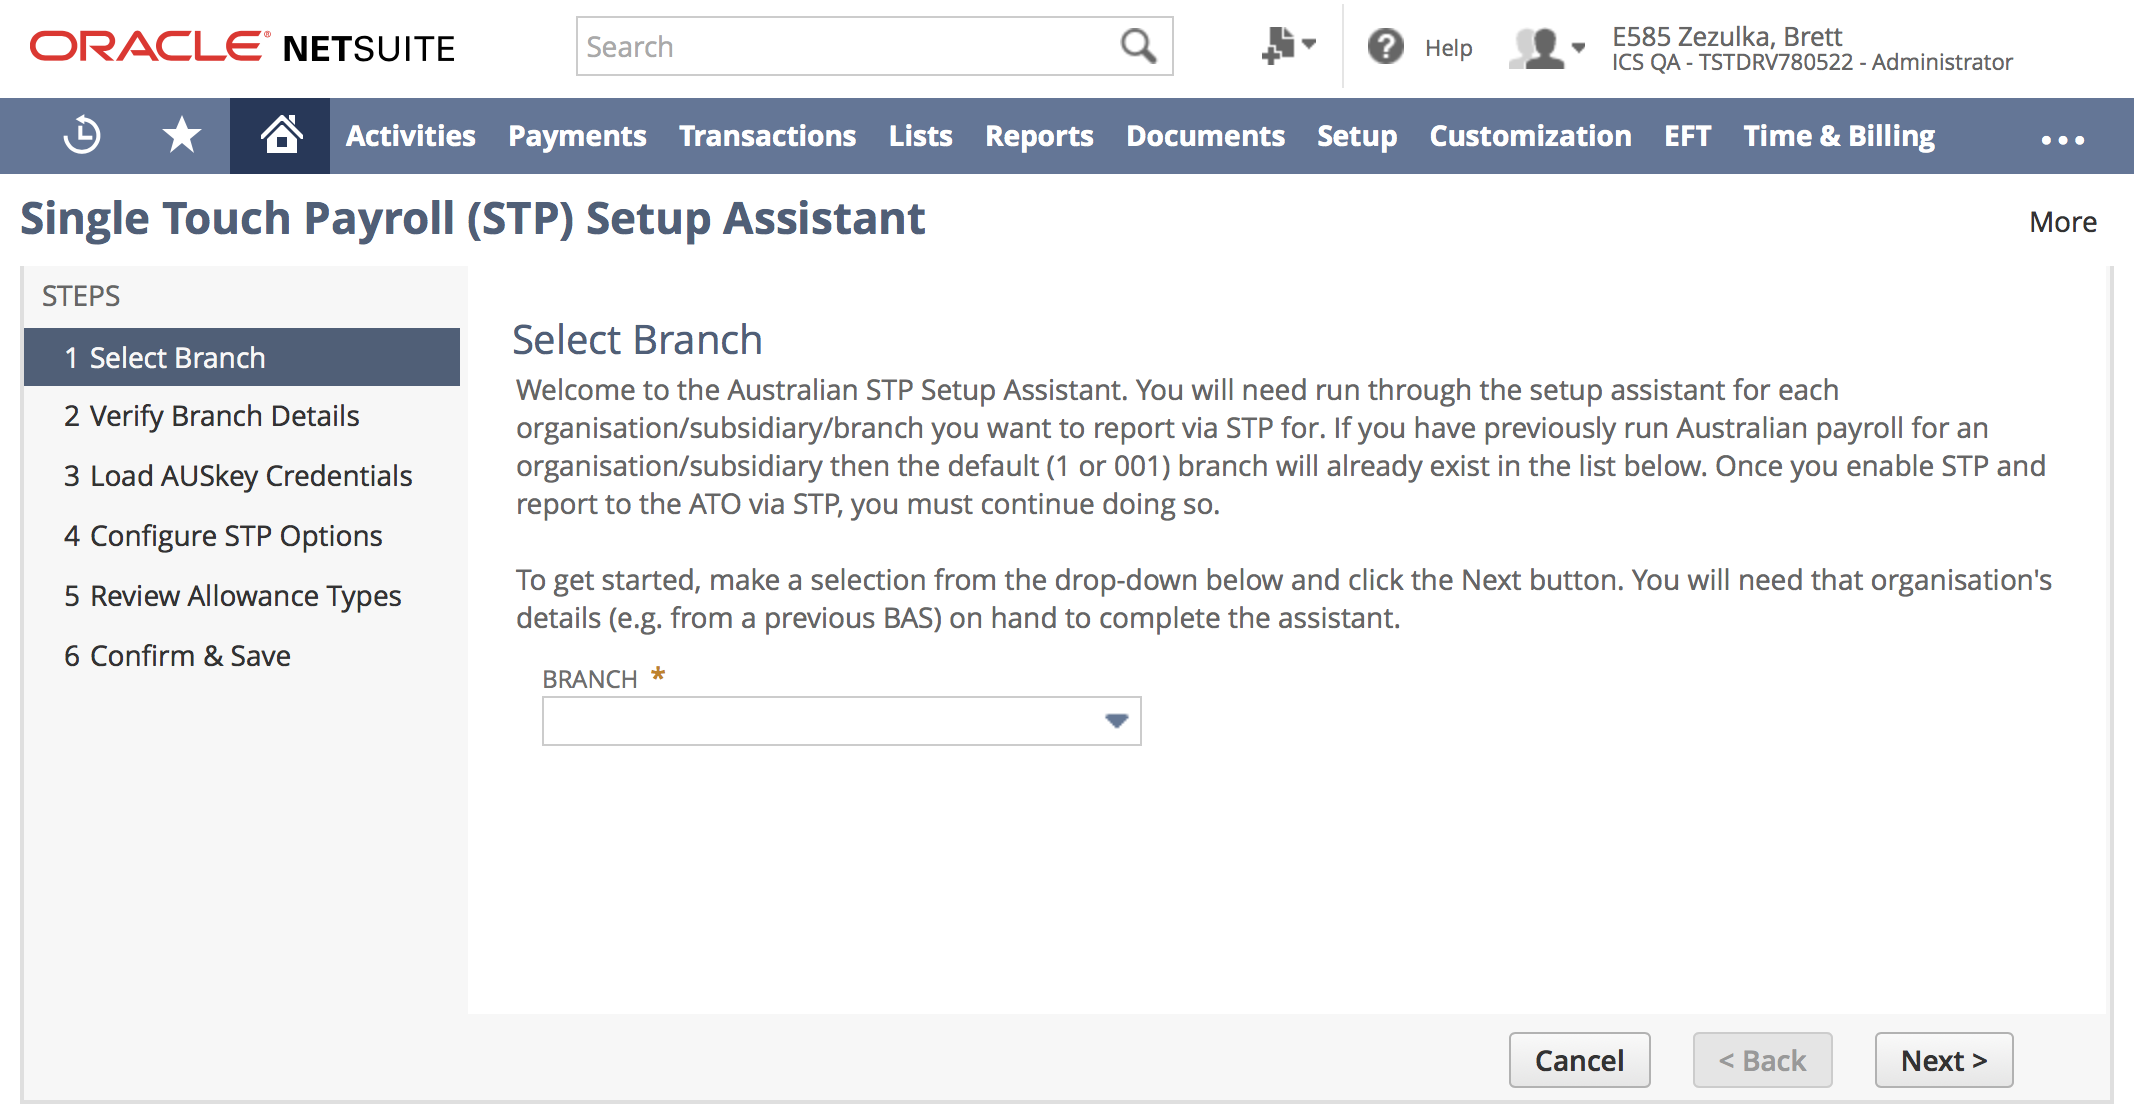
As per the on-screen instructions, select a branch that you would like to configure. You should find a branch for each Australian entity you've previously run Payroll for.
If you have multiple PAYG Branches registered with the ATO, then you will need to create the other (non 1/001) branches. To do so, just click the + icon, or select - New - from the the Branch dropdown.
Step 2: Verify Branch Details
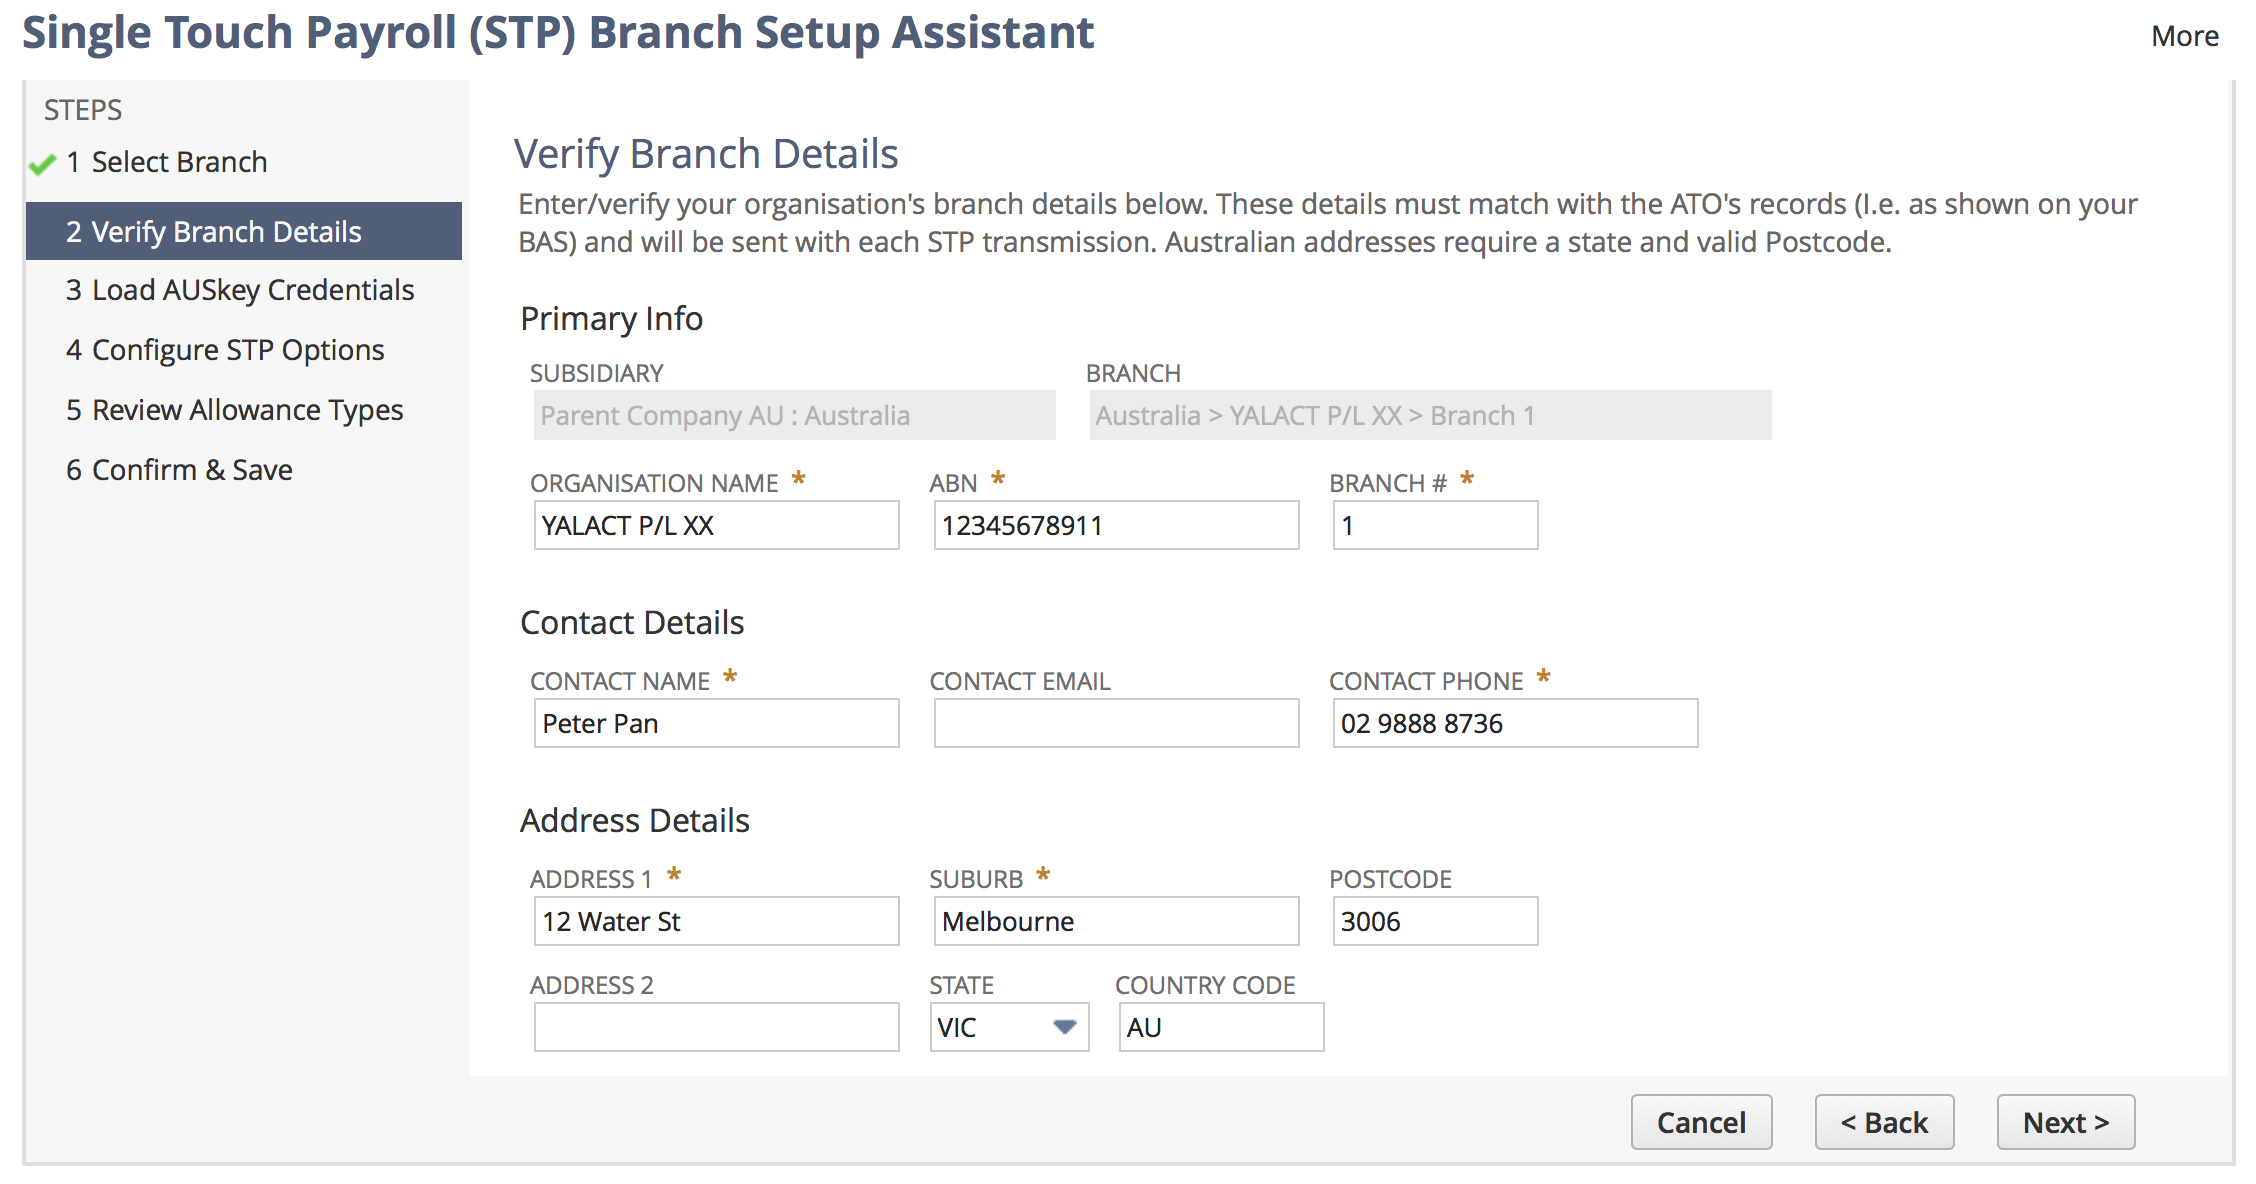
Enter the details exactly as they appears on your BAS. The form will validate any inputs you enter. Note that all designated mandatory fields are required, plus State, Postcode and Country Code for Australian addresses.
The phone number you enter in the Contact Phone field should include the relevant area code and can only include digits and spaces. For example, an acceptable format is: 02 9888 8736
If you need to enter a foreign (non-Australian) address, then you must leave the State and Postcode fields blank. The Country Code should be set to the country's code (e.g. NZ for New Zealand).
Step 3: Load AUSkey Credentials
If you've previously run the STP Setup Assistant then you may get the following message: Valid credentials exist and no action is required. Click "Next > " to continue. In this case, as per the instructions, just click the Next > button.
As per the on-screen instructions, you will be using Infinet Cloud's AUSkey to report via STP. To load these credentials, do the following:
- When you visit this step for the first time, you should be instructed to CLICK HERE to load signing credentials link. As per the instructions, click the link.
- A window will pop-up that looks like the below.
- Click the blue Save AUSkey Credentials button
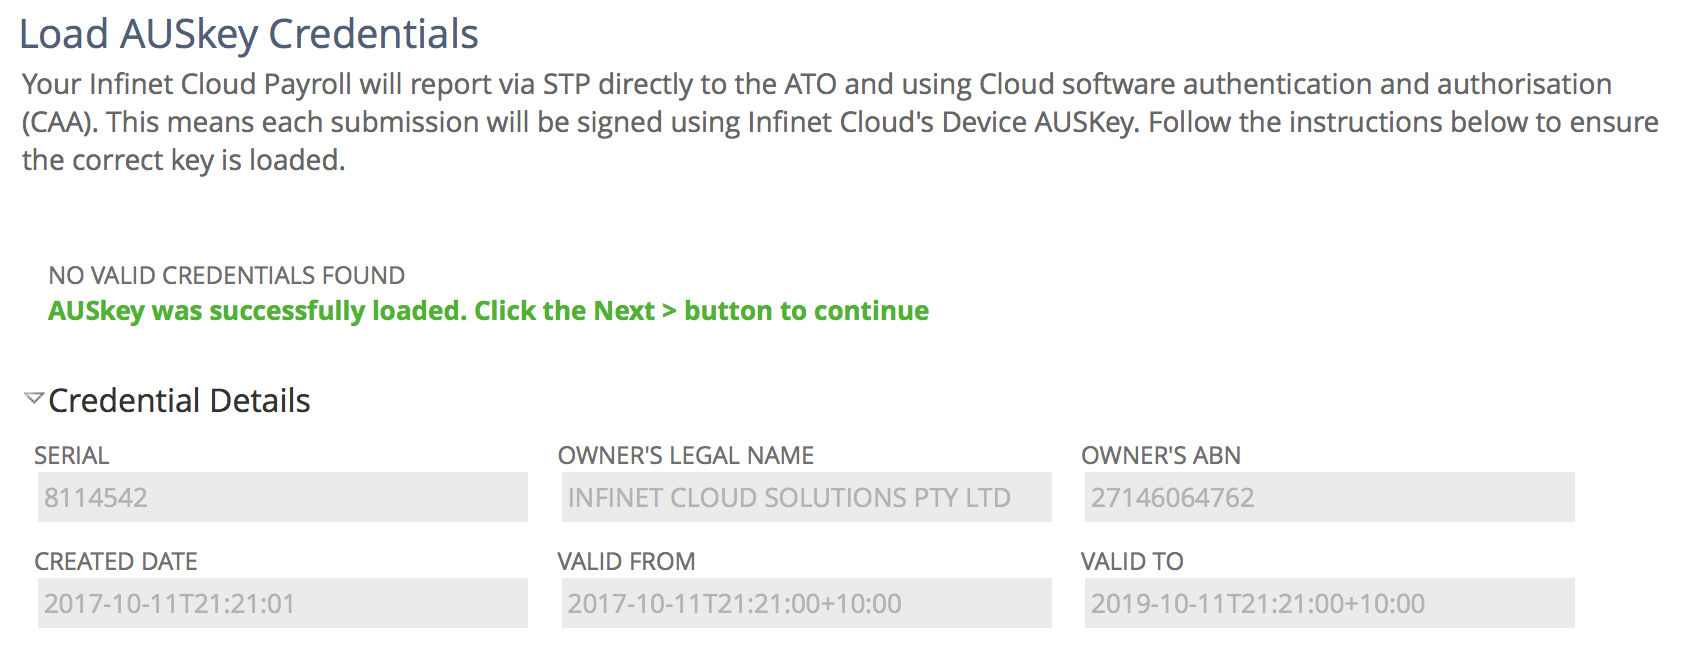
- The window should now close and you should be back in the Assistant and presented with a green message as per the below
- As per the instructions, click the Next > button to continue.
Step 4: Configure STP Options
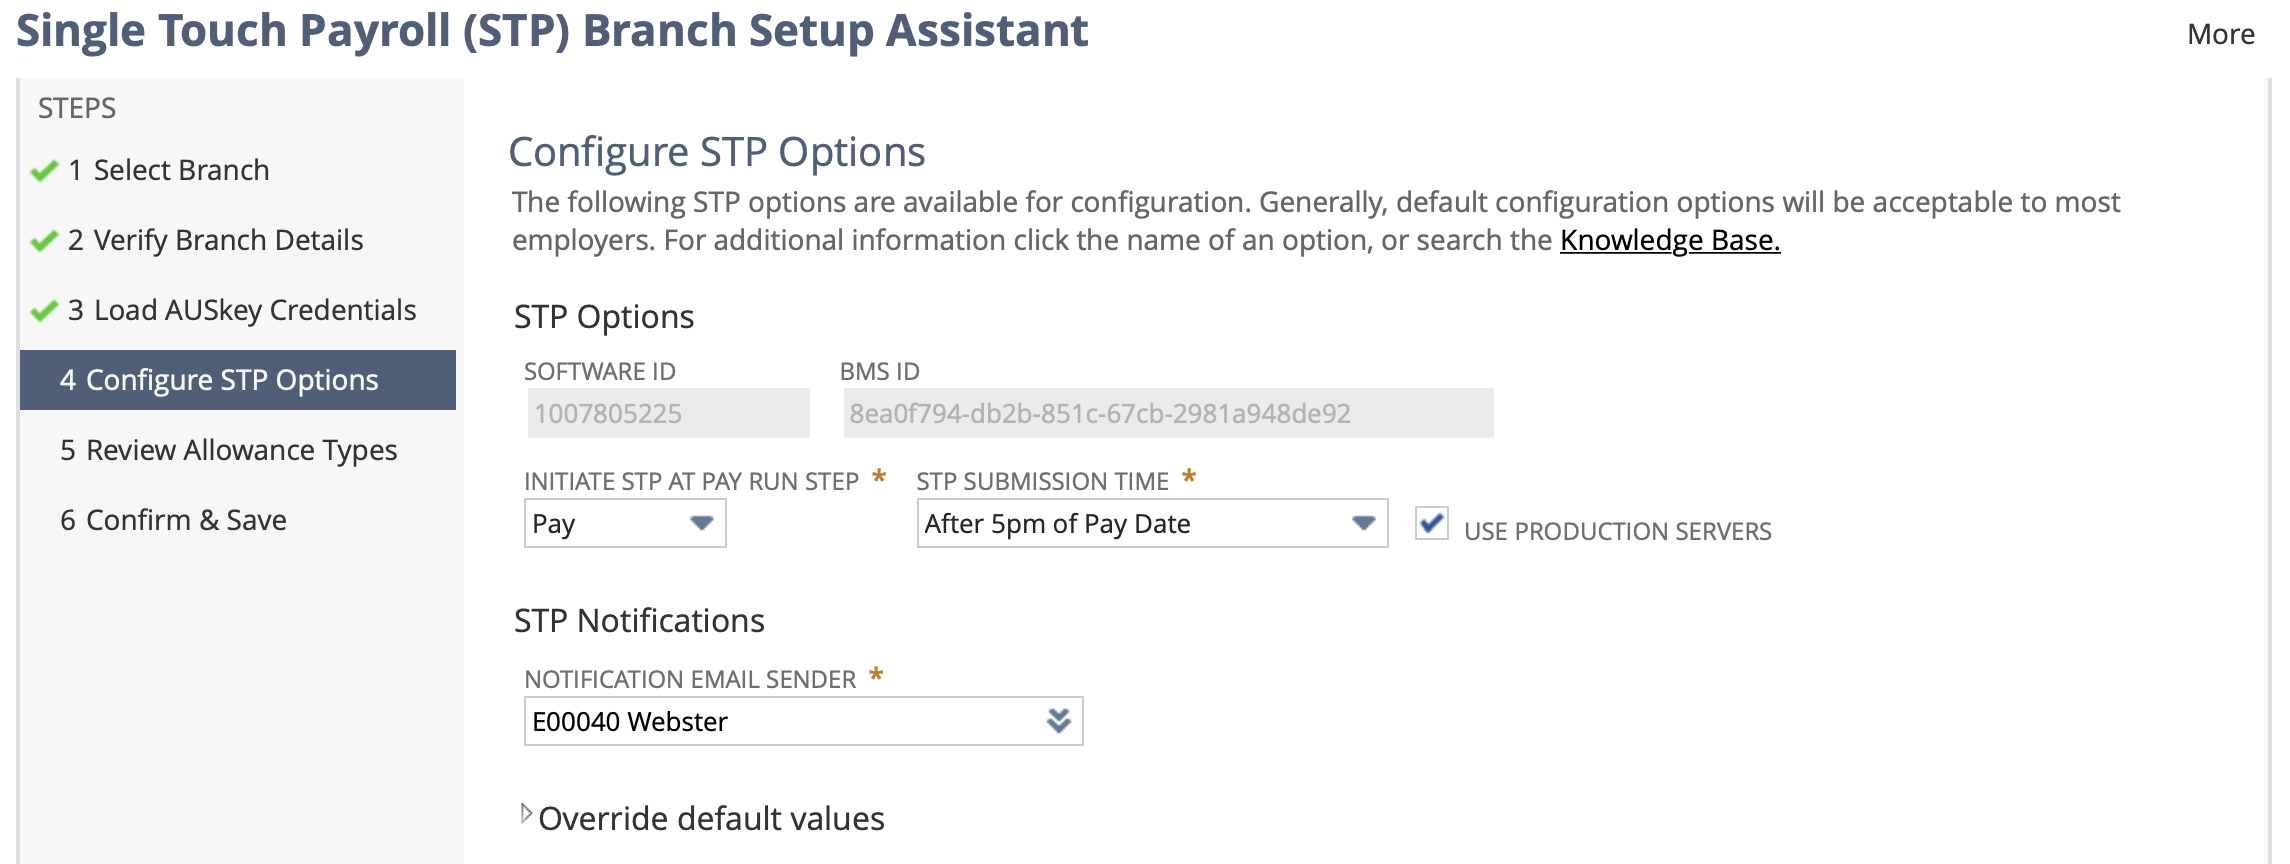
Complete the fields on this step as per the descriptions below.
STP Options
- Software ID - This is your unique Software ID that you must notify the ATO of. For more info, see Notify ATO of Infinet Cloud Payroll (STP). It cannot be changed.
- BMS ID - This is your unique Business Management Software ID that will be sent with each submission to the ATO. It cannot be changed and you do not need to do anything with it.
- Initiate STP at Pay Run Step - Identifies the Pay Run step after which the Report STP submit action will automatically be triggered. We recommend that you set this to Pay to ensure the Pay Run has truly been finalised prior reporting via STP. If you are using the One Step feature then set this to Approve.
- STP Submission Time - The time STP Pay Events will get scheduled to be submitted to the ATO. Each submission must happen on or before the Pay Date of a Pay run. We recommend setting this to as early as possible (i.e. morning of the Pay Date). NB - If you run payroll on the same day as the pay date then you would be best to set this to "After 5pm of the Pay Date" instead.
- Use Production Servers - This checkbox should be marked. Only unmark it if you know what you are doing, or are running on a Sandbox/Test environment.
- Use v2 Reporting - As of 1/6/2022 this checkbox should be marked. As per ATO guidelines, once you have started reporting via STP phase/version 2 then this cannot be disabled.
- Report Child Support Amounts - Can only be marked if v2 Reporting is enabled. If marked, the Child Support Deduction and Garnishee Amounts will be reported via STP v2.
STP Notifications
- Notification Email Sender - When the status of the EBMS submission changes, an email is sent to notify the person that created the Pay Event (Submit or Update). Set this field to the employee that you wish the notification emails to be sent from. For example: In the screenshot the employee called Payroll has been selected, all notification emails sent on change of Pay Event status will come from his email address. If you do not have a dedicated employee setup for payroll notifications (for example payroll@itscominghome.com) you can set the payroll officer's email address.
Override default values
These fields should be left blank unless you know what you're doing or have been instructed to complete them.
- Payee First Name Field - Enter a field ID to override which field Employee first names are sourced from.
- Payee Email Field - Enter a field ID to override which field Employee email addresses are sourced from.
- Payee Phone Field - Enter a field ID to override which field Employee phone numbers are sourced from.
- Payroll ID Field - Enter a field ID to override which field Employee Payroll IDs are sourced from.
Step 5: Review Allowance Types
Potential Error
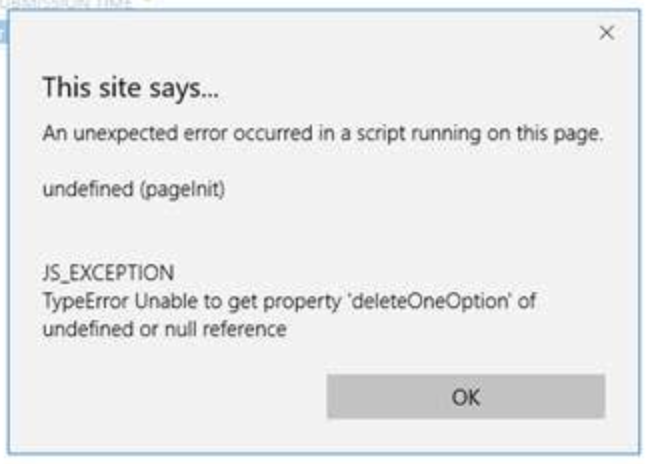
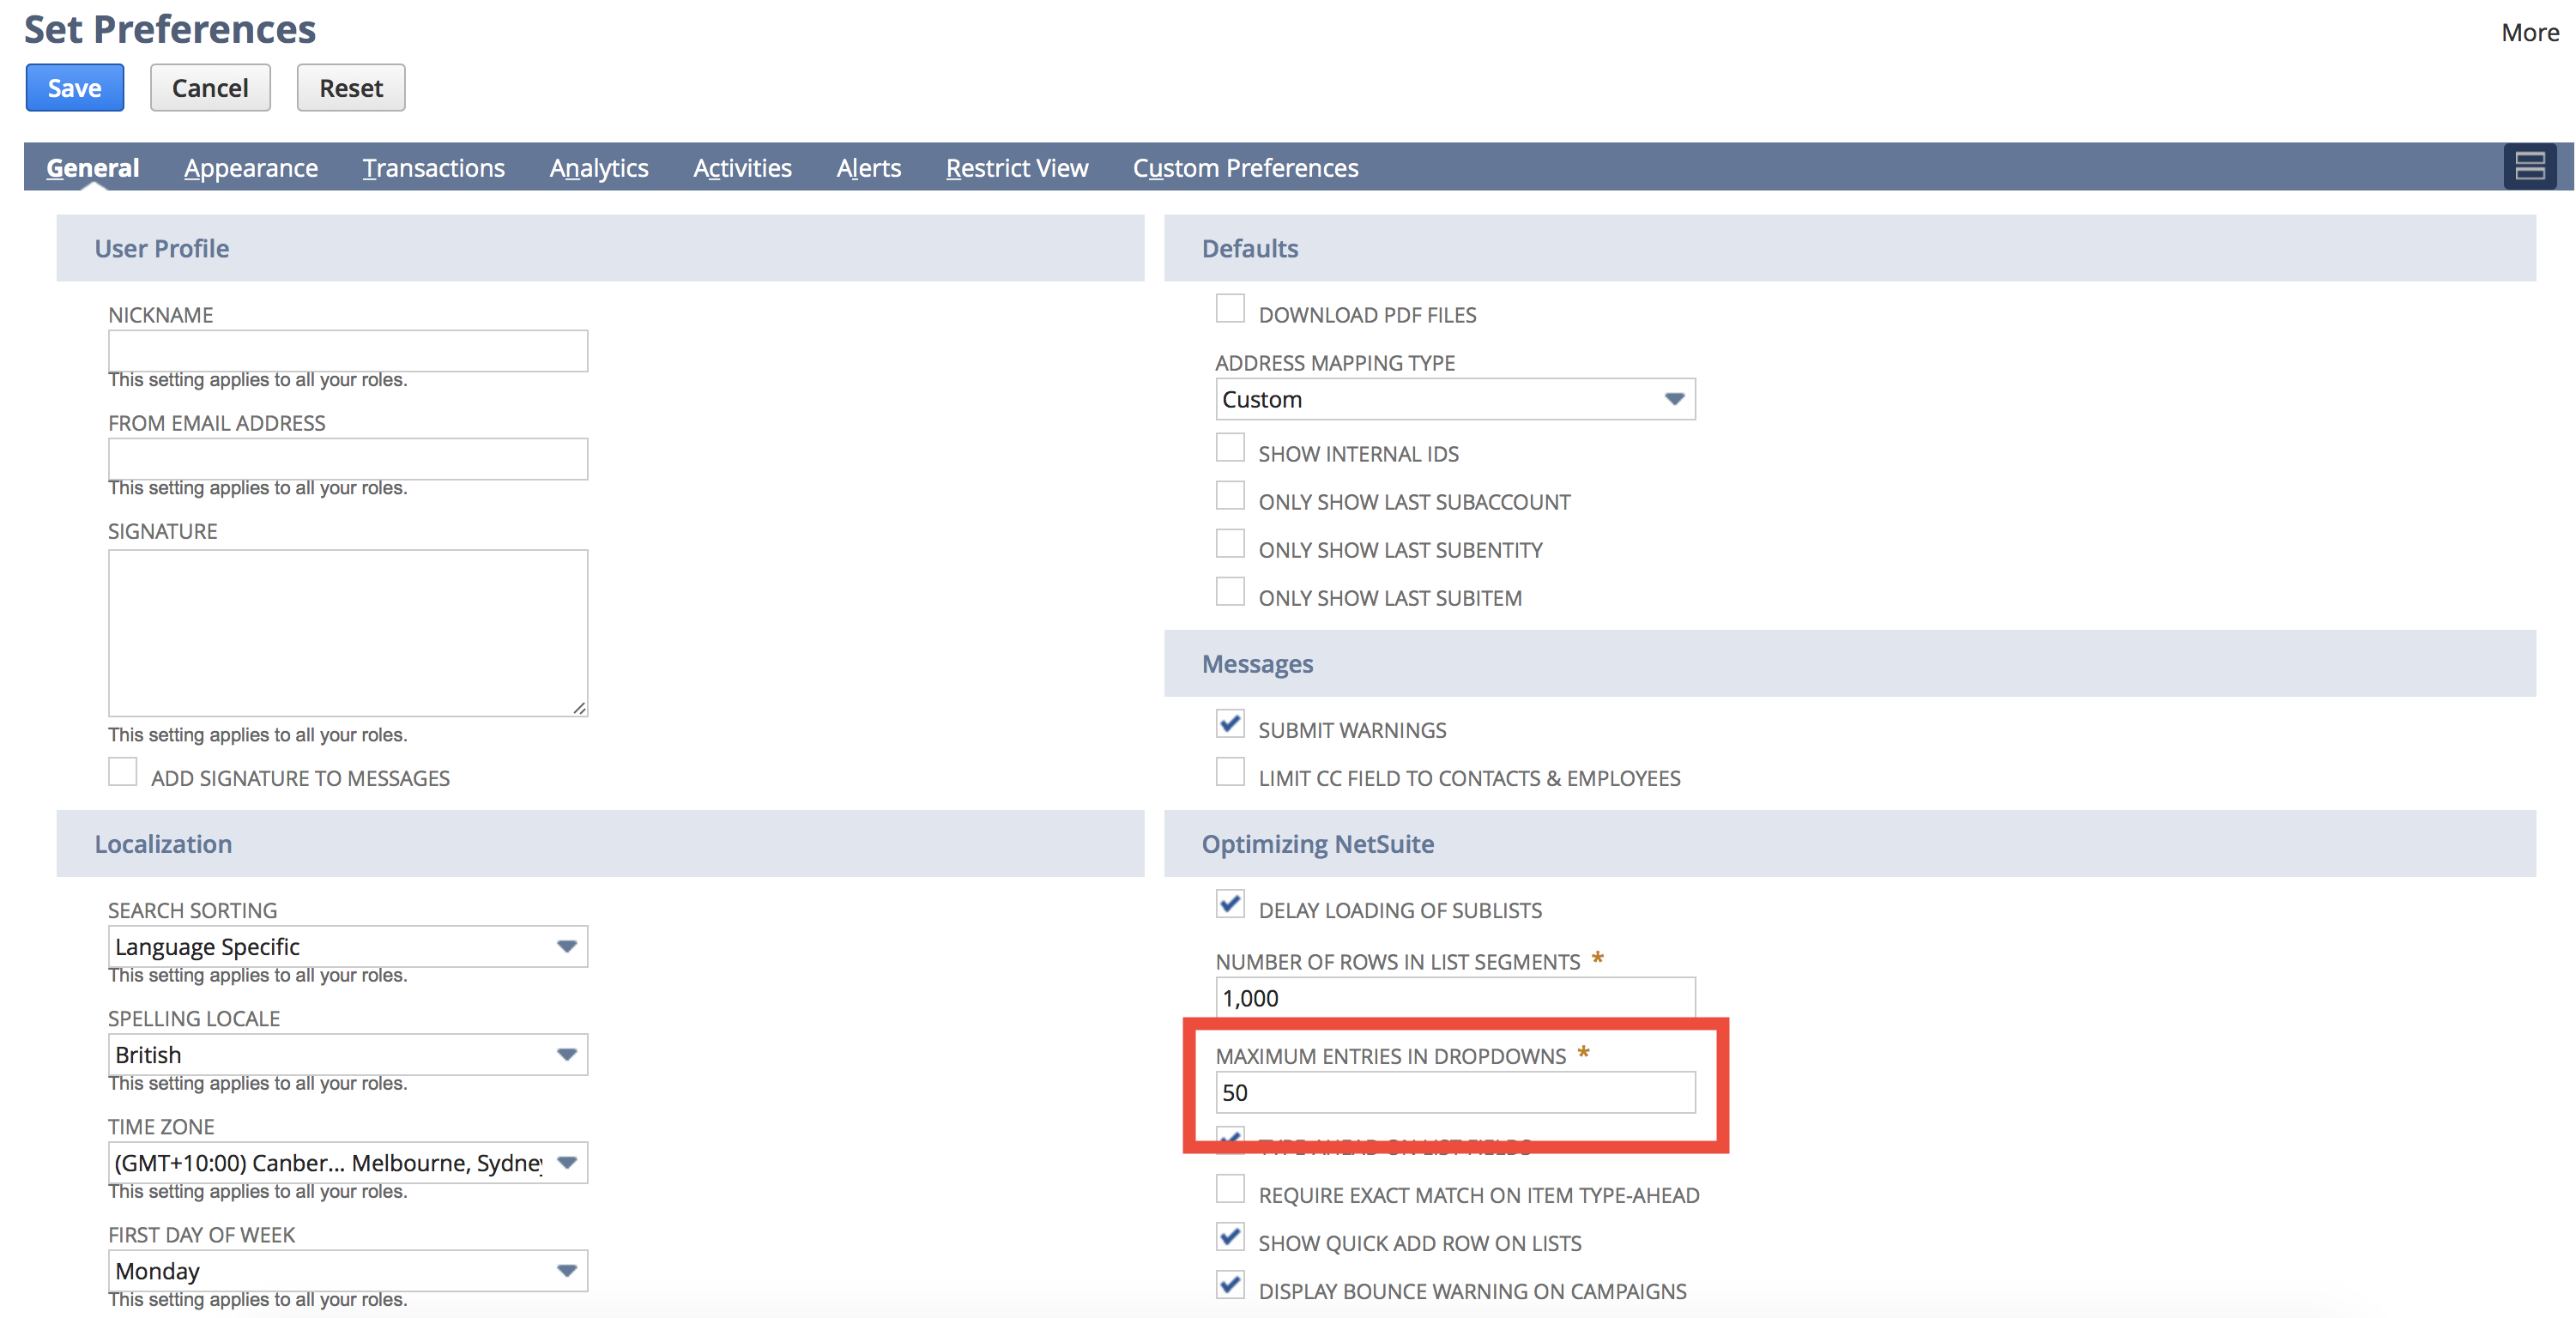
If you get JS_EXCEPTION or similar error on this page then it is because you have your user preferences set incorrectly. NetSuite experiences bugs when the Maximum Entries in Dropdown preference is set to 0 or similar. Under Home > Set Preferences, you should set this to a number like 50 and restart the Setup Assistant.
| Error Screenshot | Solution Screenshot |
|---|---|
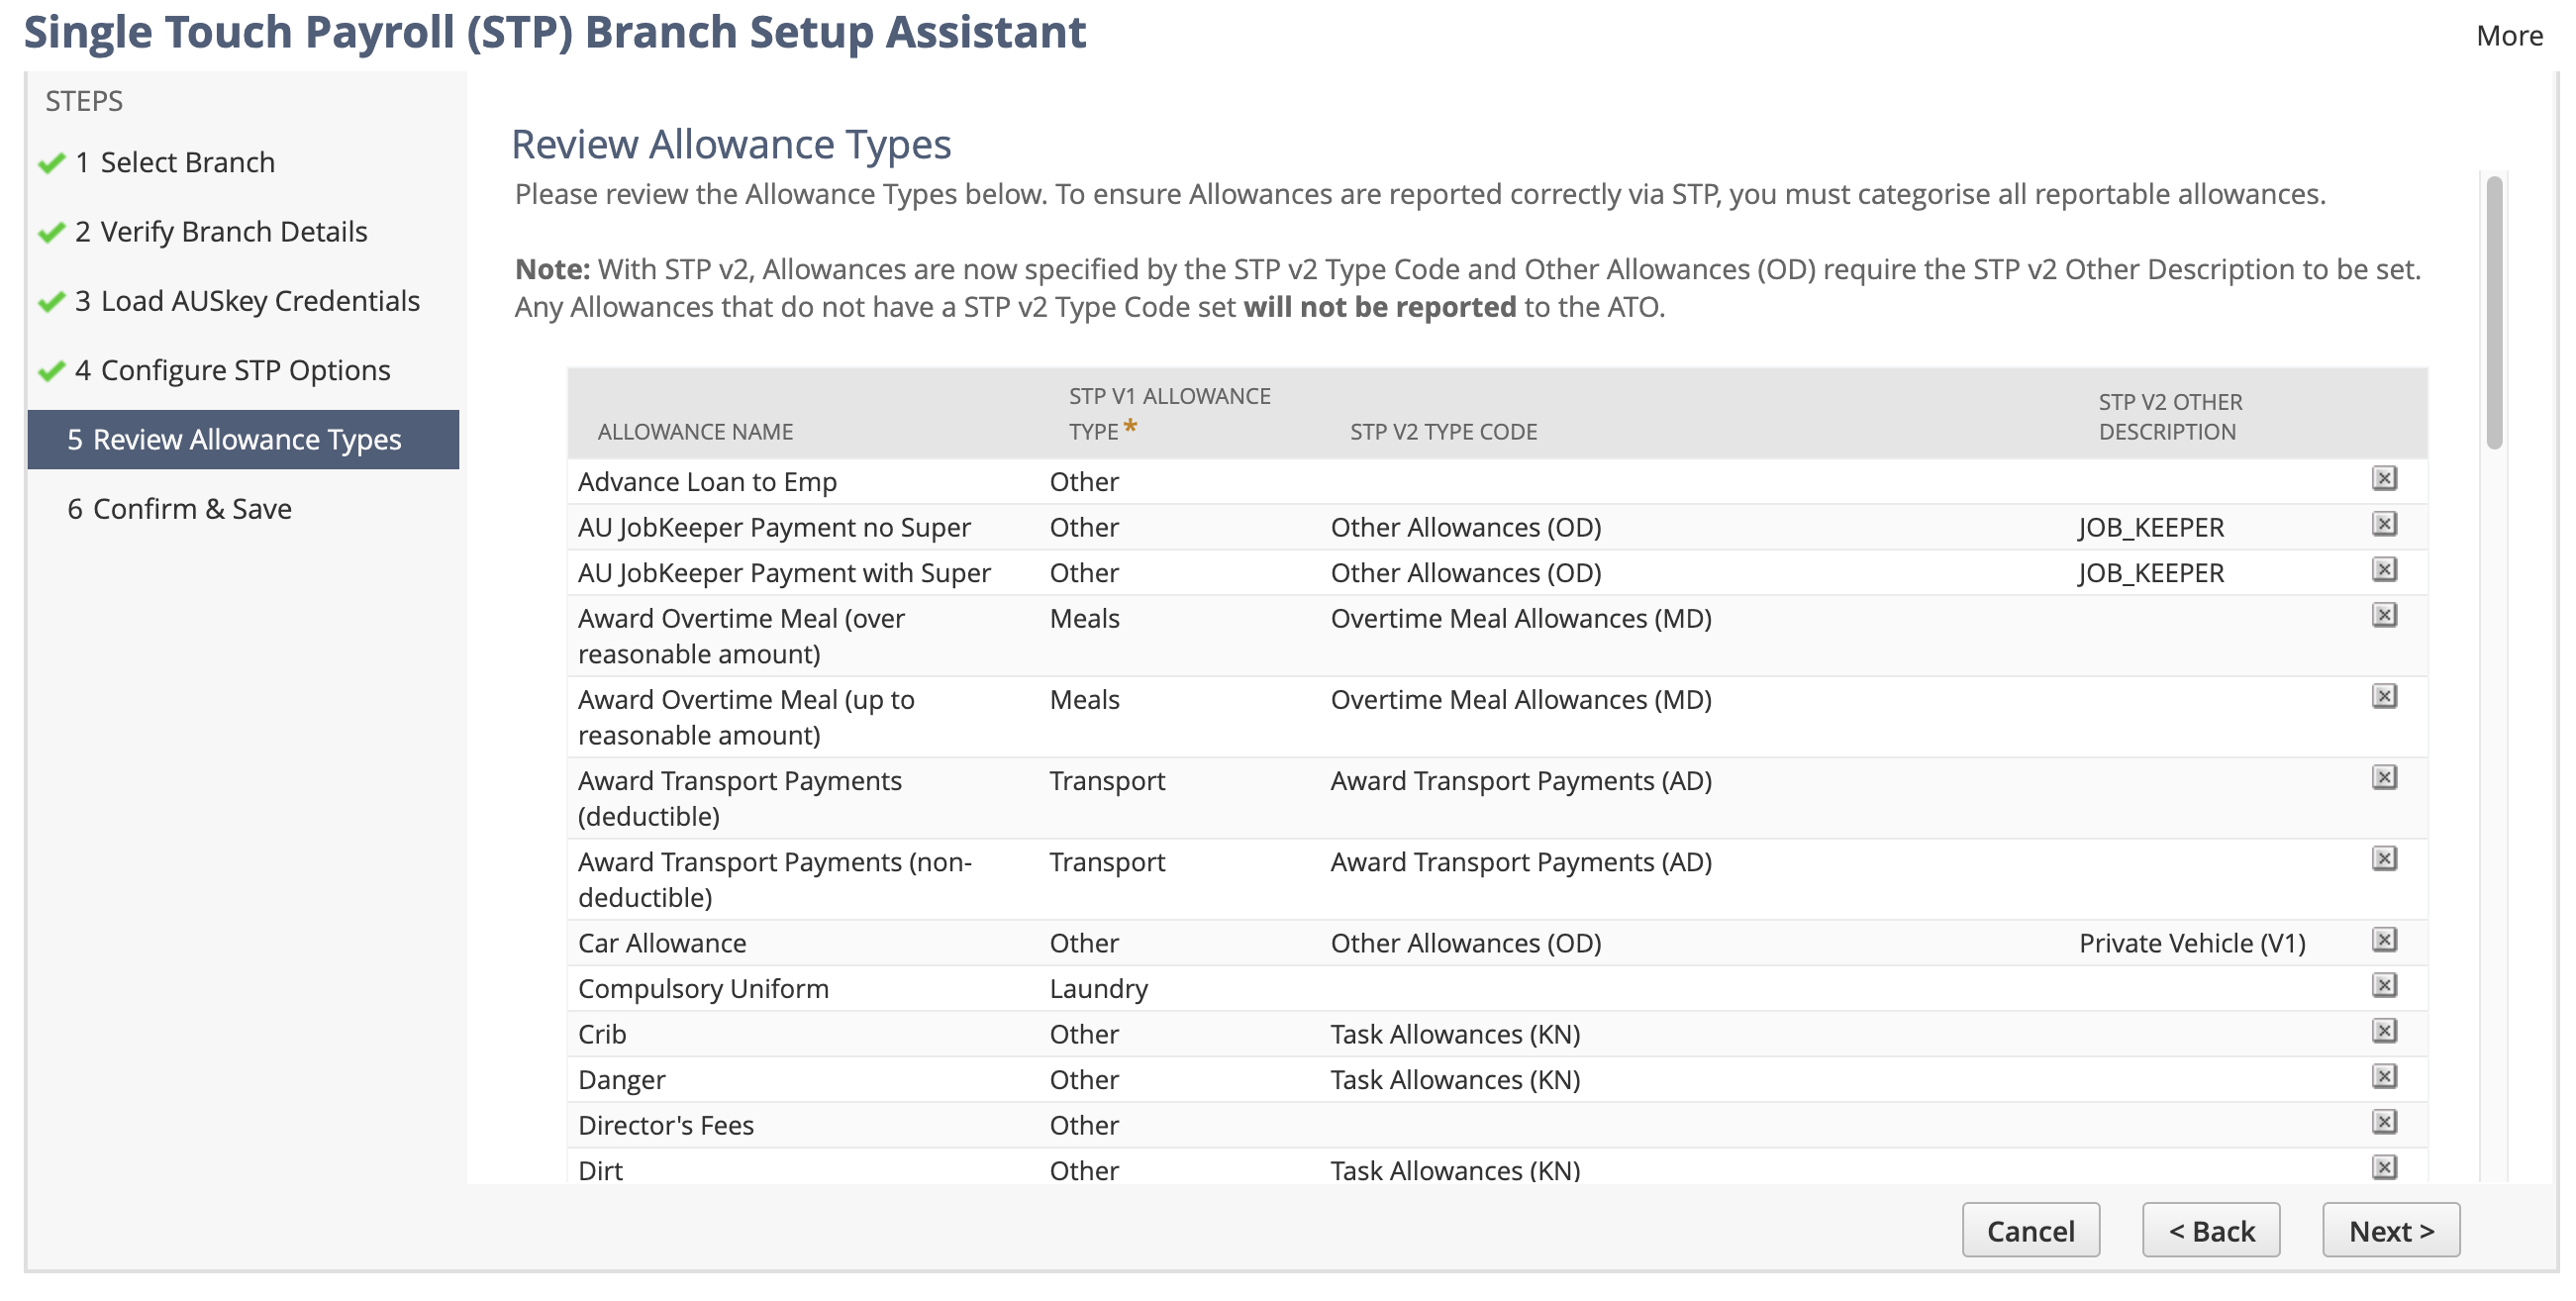
As per the on-screen instructions, review the Allowance Types and ensure that each line is setup correctly. Do not attempt to create any additional Allowance Types on this screen. Also, you cannot delete any Allowance Types here.
Note
Not all Allowance Types available in your account will be displayed. Only those that have been designated to appear in the Allowance Box on a Payment Summary or have been configured with a v1 Type or v2 Type Code will be listed.
Step 6: Confirm & Save
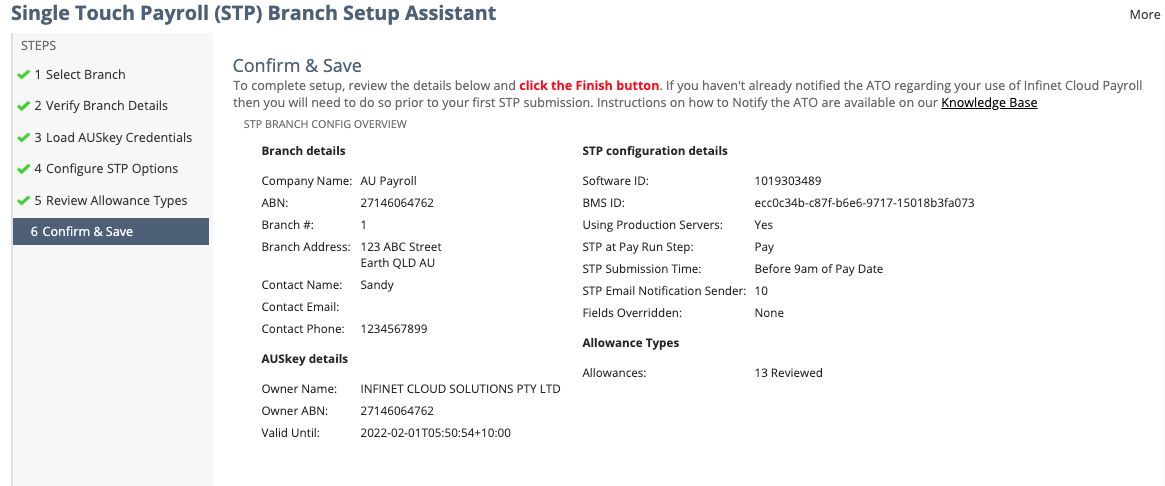
There is nothing to complete on this step. It provides a summary of what you have entered/configured. If the information displayed is correct then click the Finish button. If you note something that requires a change, then click < Back until you return to the step where you can make the change required.
Step 7: Finish
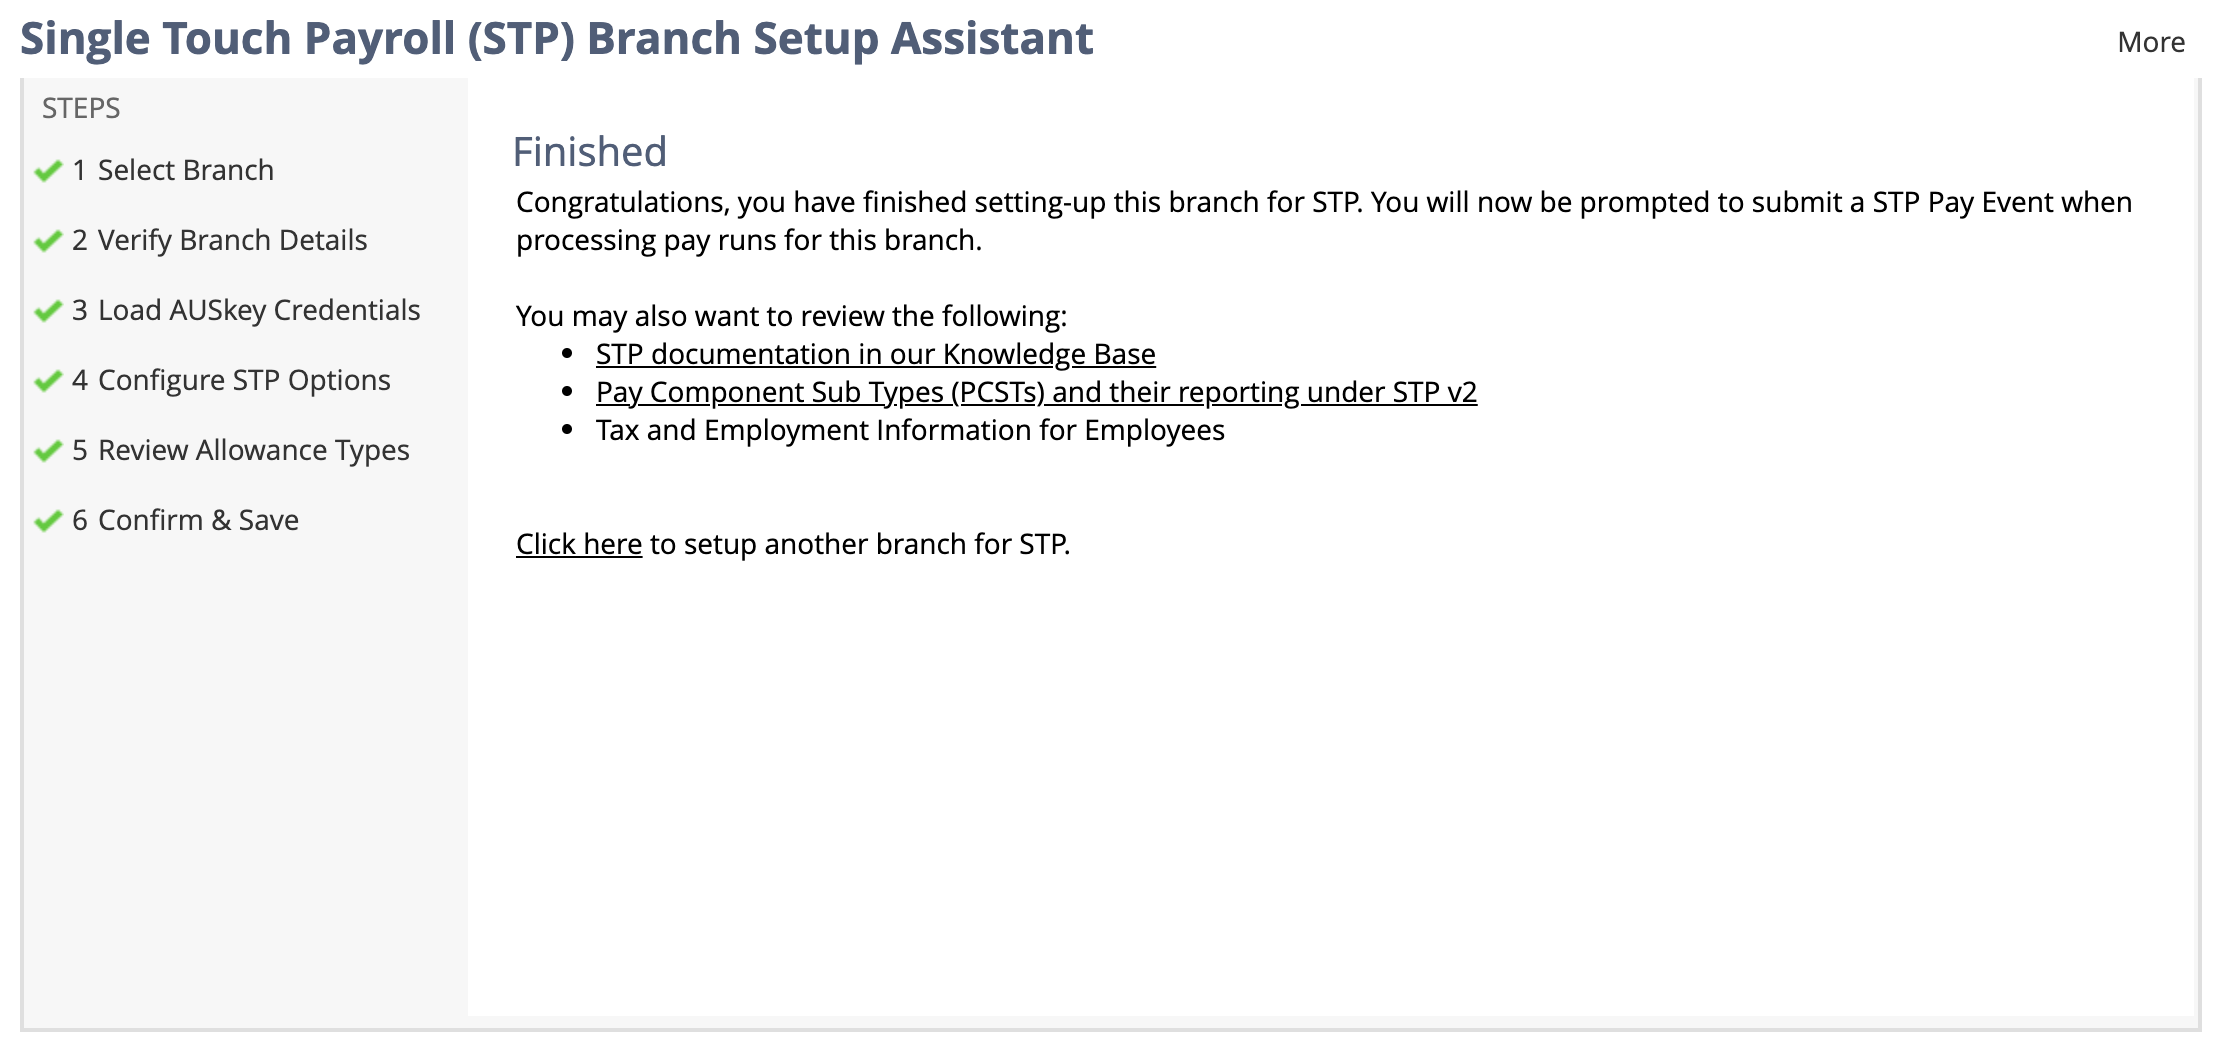
Once you have got to this screen then you have completed the setup wizard successfully.
