| In addition to the standard leave accrual types already set within the system you have the ability to create Custom Leave Accrual types. These accrual types can be set against select employees so that the system will apply the leave accrual as per the Leave Accrual Method selected. |
System Configuration
In order to begin setup the Custom leave accrual function needs to be activated in order for the sub tab to be visible on the employees leave info tab.
- Navigate to the Configuration Wizard using the menu: Payroll Administration > Payroll Setup > Configuration Wizard
- The Payroll Setup screen will display
- Make sure Update Existing is selected under Select Action
- Under Update Configuration, select the subsidiary you wish to configure - if you do not have multiple companies within your payroll system then your field will already be set

- Click the Next > button until you are at Step 4
- At Step 4 Payroll Preferences screen, mark the Use Custom Leave checkbox

- Click the Next > button through the remaining steps, until your configuration setup process is complete and you have all green ticks showing
Set Up Custom Leave Accrual Subtypes
In this part of the process there are two different pay component subtypes to set up and one Rate:
- Leave Taken
- Leave Accrual
- Leave Accrual Rate
Leave Taken
First, set up the Leave Taken type by following these steps:
- Navigate to Payroll Administration > Payroll Setup > Pay Component Sub Type
- Click on the New Pay Component Sub Type button.
- Set the Pay Component Type dropdown to Leave
- Set the Pay Component Category dropdown to Paid Leave
- Complete the following fields - you may also use the screenshot below as a guide:
- Name - enter a name (e.g. Purchased Leave)
- Rate - enter 1
- P&L Account - select the default Expense account
- Show in Employee Self Service - mark if you're using the ESS features and want to make this available for employees via the portal
- Allow Half Pay - mark if you want to allow the leave to be taken at Half Pay
- Payment Summary Location - set to Gross Payment Box

- Click the Save button
Leave Accrual
Now it's time to create the Leave Accrual sub type. You should already be at the list of Pay Component Sub Types from the previous steps.
- Click on the New Pay Component Sub Type button
- Set the Pay Component Type field to Leave
- Set the Pay Component Category - set to Paid Leave Accrual
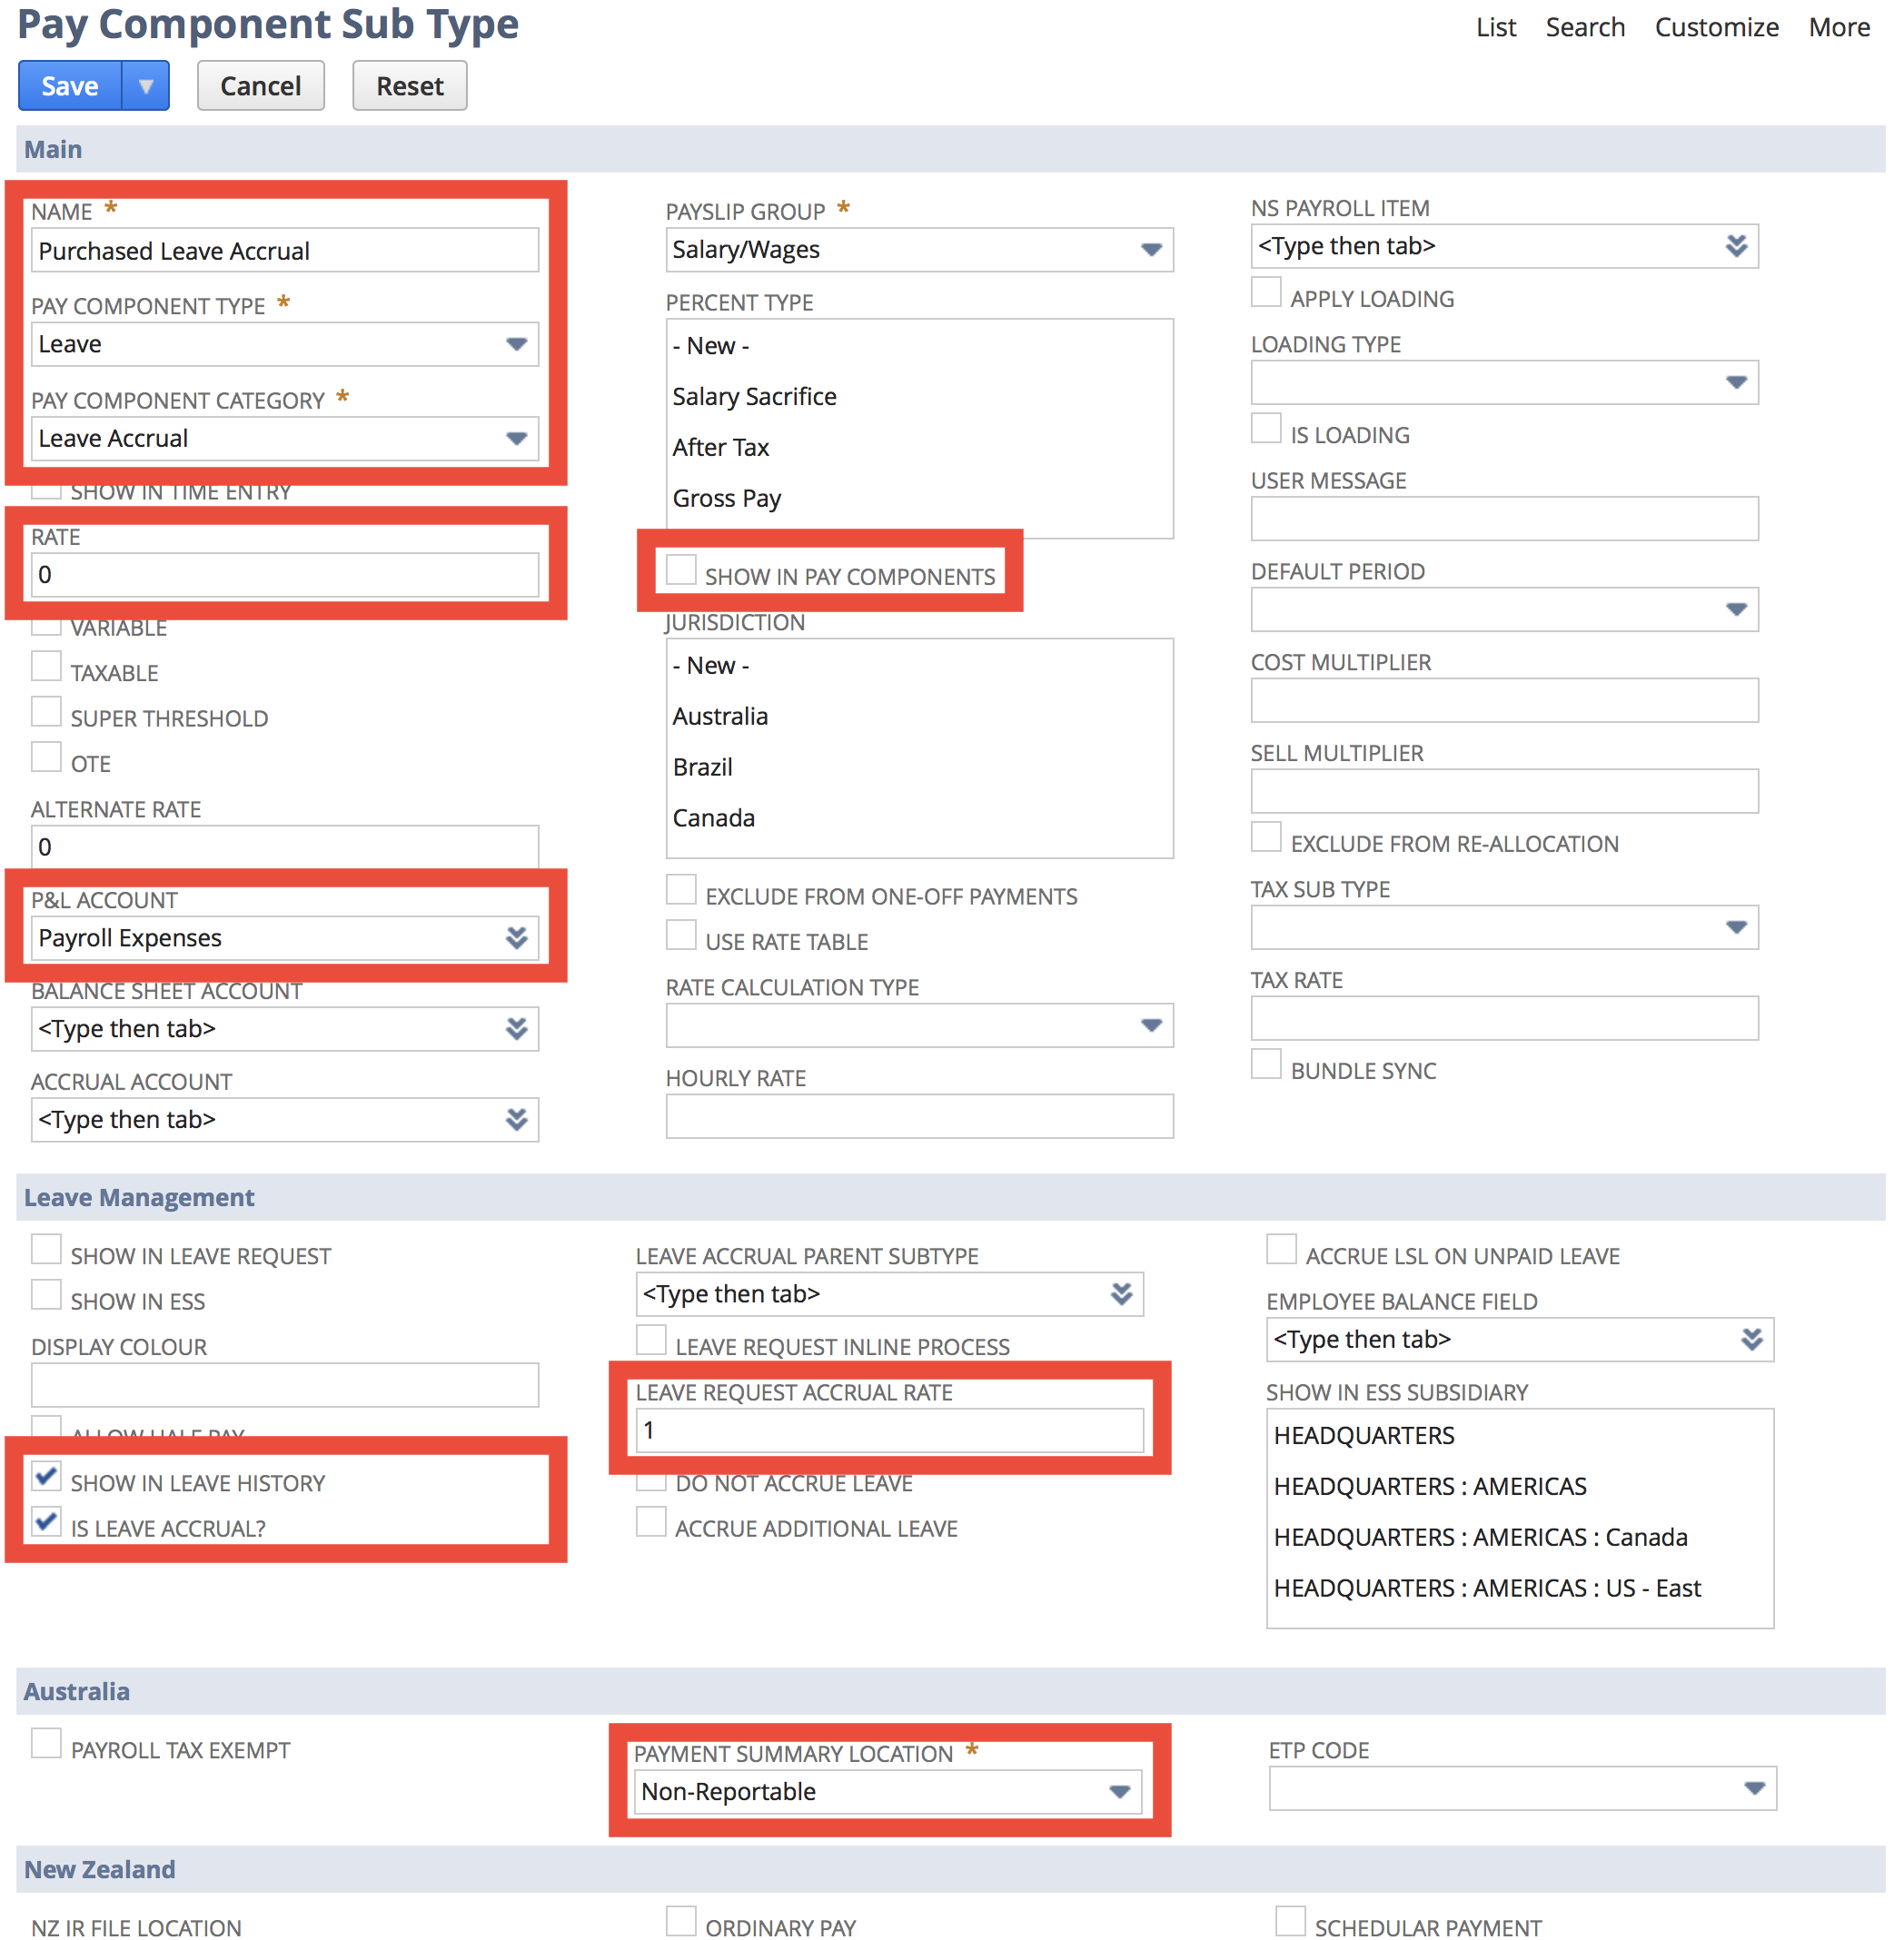
- Complete the following fields - you may also use the screenshot below as a guide:
- Name - enter a name (e.g. Purchased Leave Accrual)
- Pay Component Type - set to Leave
- Pay Component Category - set to Paid Leave Accrual
- Rate - enter 0
- P&L Account - select the default Expense account
- Show in Pay Components - unmark this checkbox
- Show in Employee Self Service - unmark this checkbox
- Allow Half Pay - unmark this checkbox
- Show in Leave History - mark this checkbox
- Is Leave Accrual? - mark this checkbox
- Leave Request Accrual Rate - set to 1
- Payment Summary Location - set to Non-Reportable

- Click the Save button
Leave Accrual Rate
To set up the Leave Accrual Rate sub type:
- Navigate to Payroll Administration > Leave Management > Leave Accrual Rates > New
- Complete the record as required - at a minimum, you need to complete the following fields - alternately you can reference the screenshot below:
- Name - enter a name (e.g. Purchased Leave Accrual 1 week)
- Leave Taken Type - set to the record you just created (e.g. Purchased Leave)
- Accrual Sub Type - set to the record you just created (e.g. Purchased Leave Accrual)
- Leave Accrual Method - set to Pay Run
- Accrual Type - set to Hours
- Hourly Accrual Rate - set to the number of weeks annual accrual divided by 52 (e.g. 1 / 52 = 0.01923)
- Decimal Hourly Accrual Rate - set to the same figure as Hourly Accrual Rate (e.g. 0.01923)
- Leave Available Type - set to As Accrued, or as required

- Click the Save button
Applying the Custom Leave Accrual Type to an Employee
This is the final part of the process where the Custom accrual type is set up on the employee record.
| Any Custom accrual type you create needs to be applied to each employee specifically. It is NOT an accrual that will automatically apply to everyone in a pay run. |
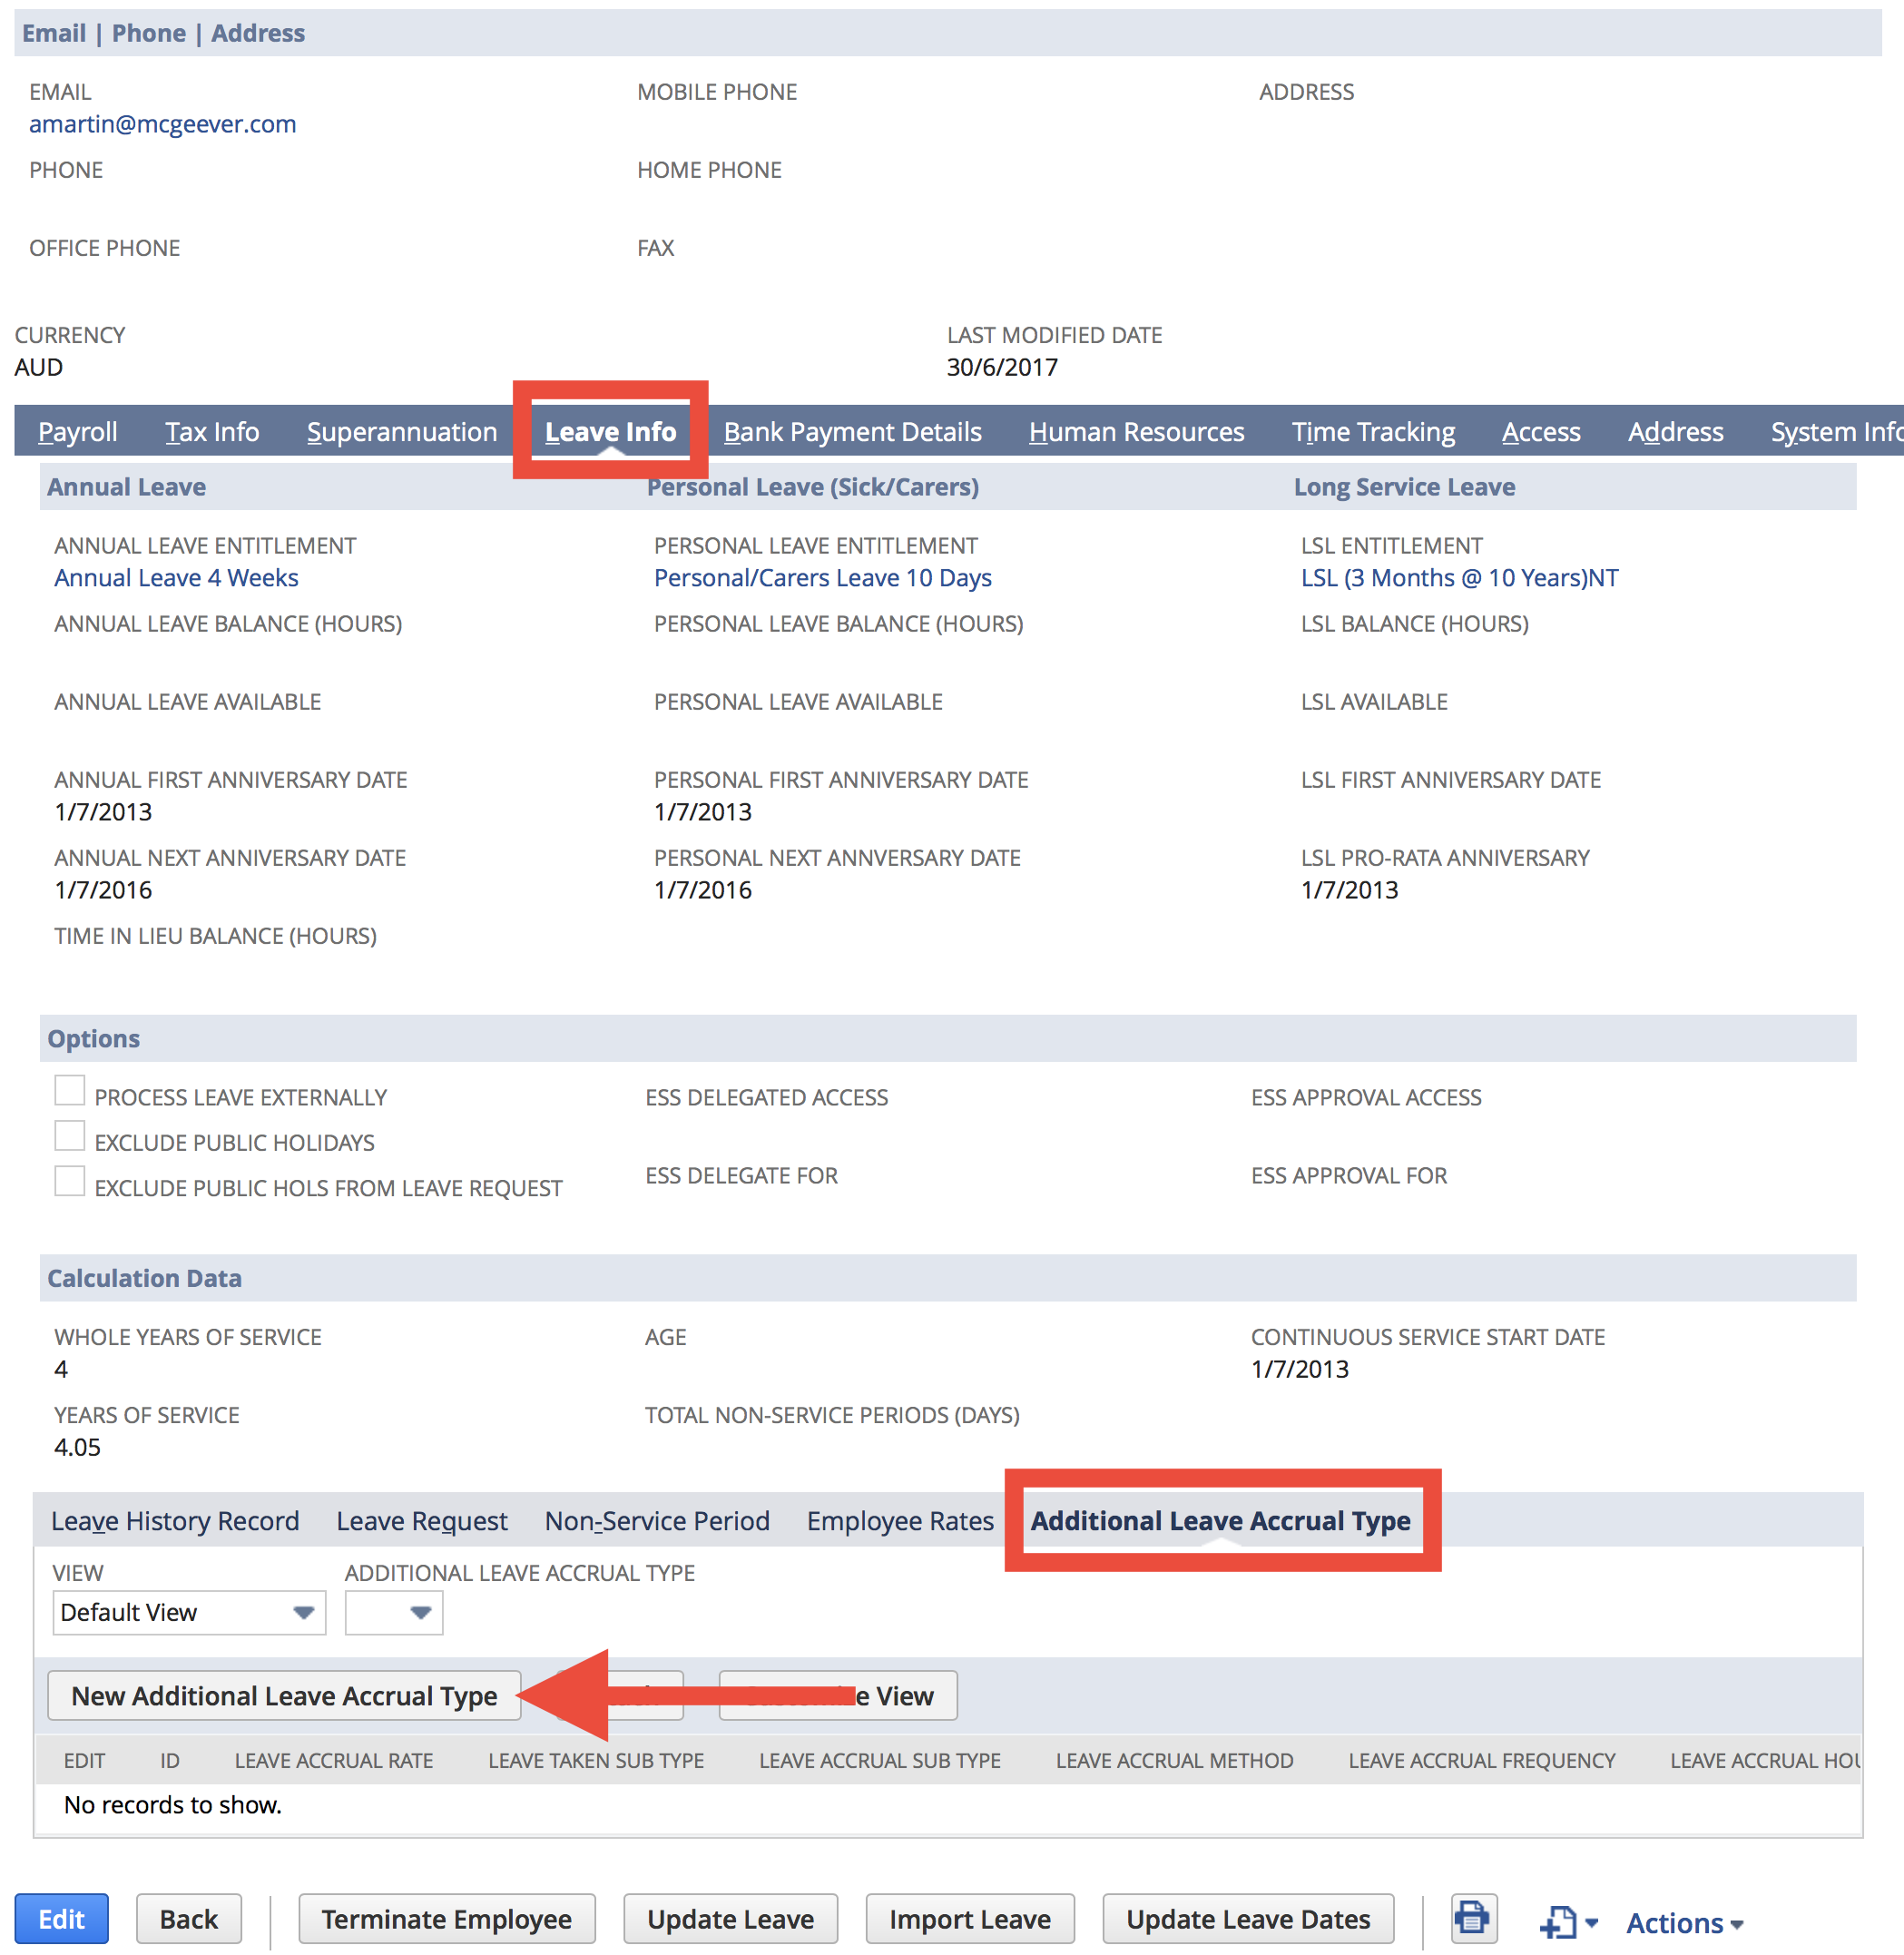
- Navigate to the Employee record in VIEW mode
- Click on the Leave Info tab
- Click on the Additional Leave Accrual Type sub tab
- Click on the New Additional Leave Accrual Type button

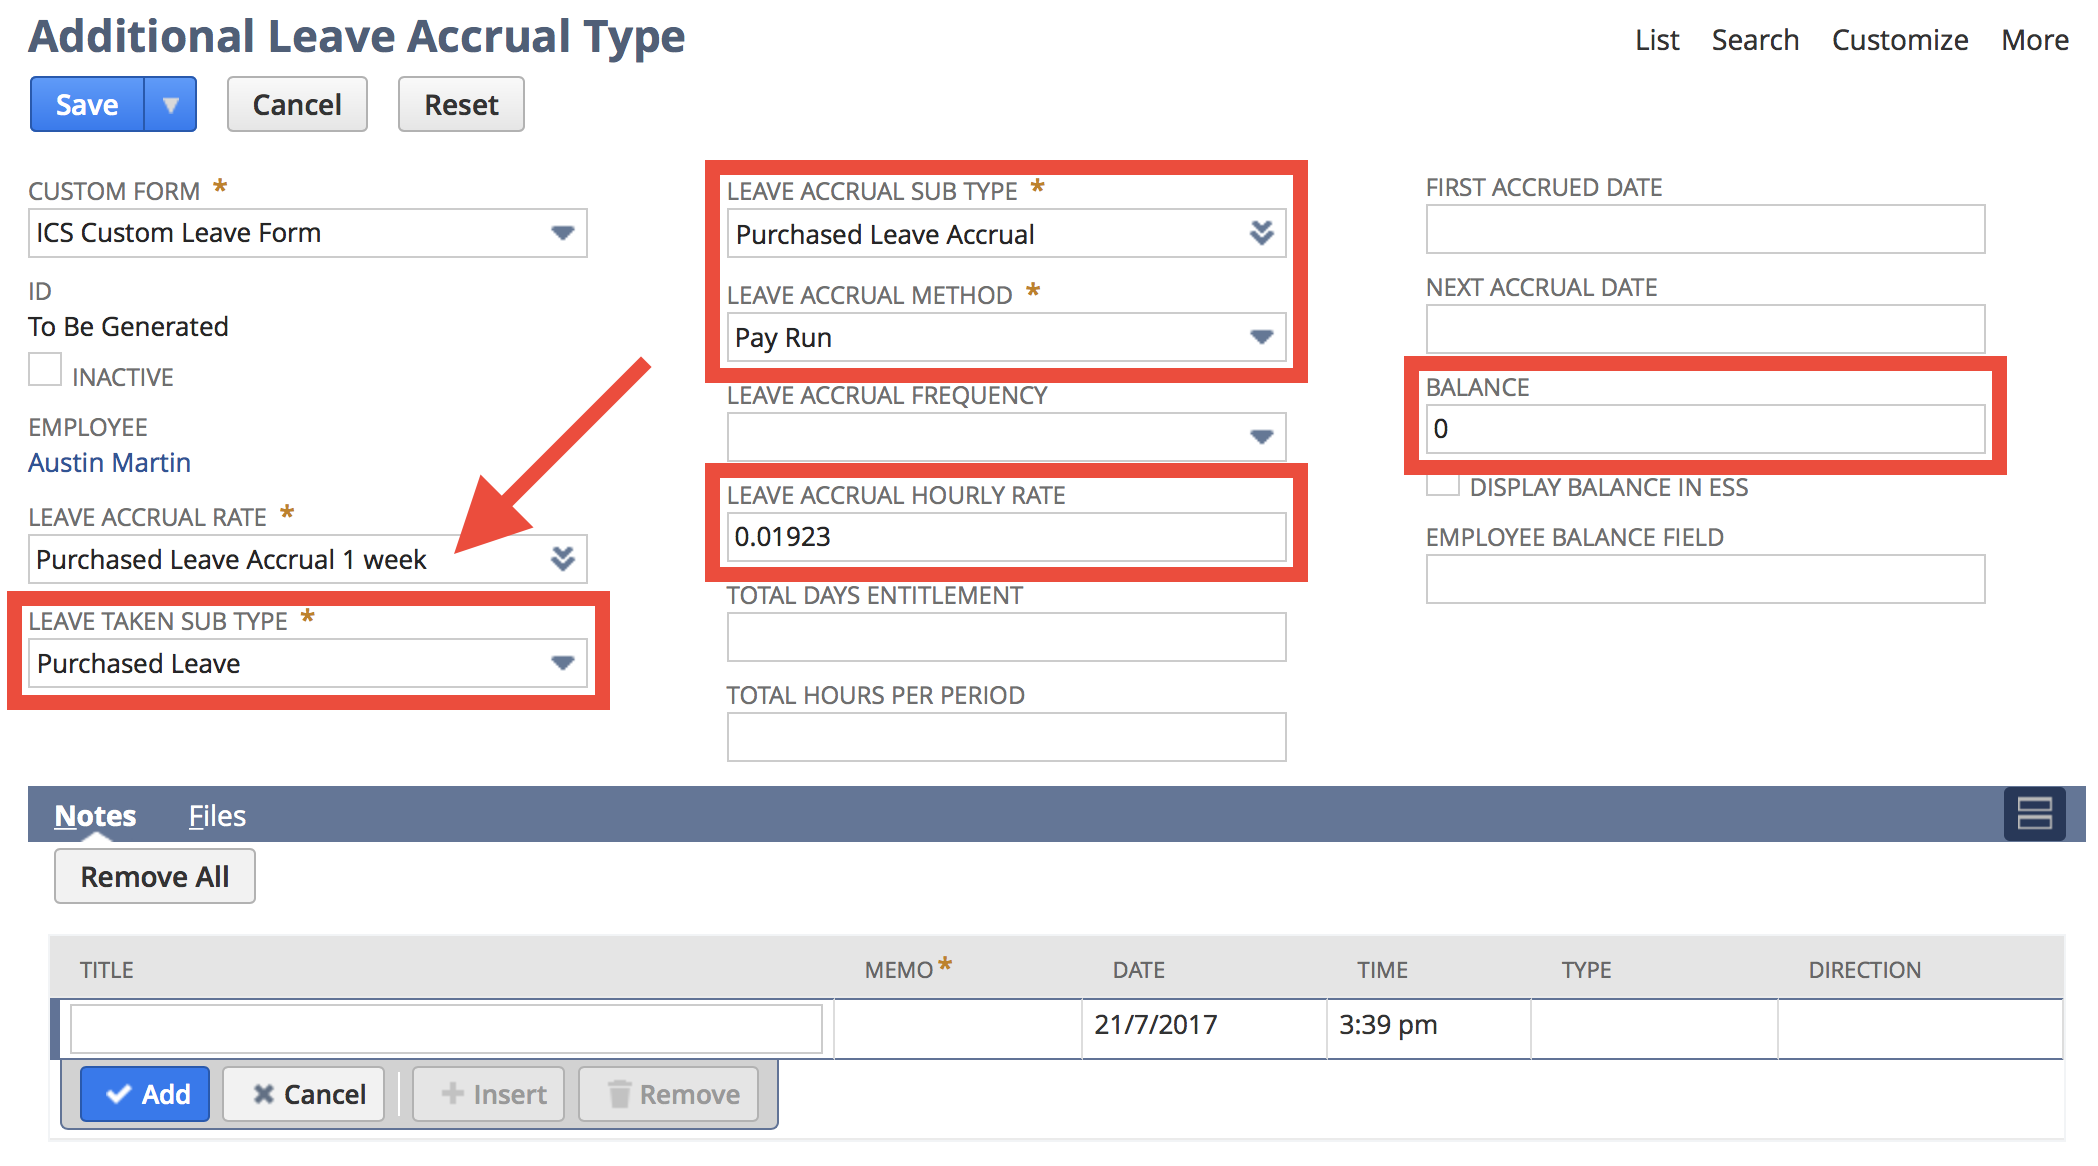
- First, complete the Leave Accrual Rate field, this will automatically populate the other fields
- Complete any other fields as required
- If you use ESS and would like to have this leave type available/showing then mark the Display Balance in ESS checkbox

- If the employee has a current balance that you wish to import you should do this via a Leave History Record. For more information see Manage Leave Balances - Leave History Records.
- Click the Save button
| It is good practice to enter a Note for future reference |
The Additional Leave Accrual Type Process is now completed and the system will accrue the leave type as per your specifications. Leave taken for this leave type is to be processed in the same manner as all other leave types. The New Leave History Record function can also be utilised to make any adjustments to the leave accrual balance.


