How to create and use custom email templates using standard NetSuite Scriptable Email Template for leave request notifications.
Overview
When using leave management, emails are sent on change of the leave request status (if the email suppress option has not been checked). The following table lists the status change and the emails sent.
| Status | Recipient | Action |
|---|---|---|
| Requested | Leave Request Approver | Email Informs Approver that a new leave request has been made and is pending their approval |
| Approved | Employee Requesting Leave | Email Informs Employee that their leave request has been approved |
| Cancelled | Employee Requesting Leave | Email Informs Employee that their leave request has been cancelled |
| Declined | Employee Requesting Leave | Email Informs Employee that their leave request has been declined. |
By default the system sends a standard subject and body, but this can be overridden using standard NetSuite email templates. Typical use cases for needing to modify the template include:
- Using a Single Sign On Solution and want to reference a different place to login.
- Adding additional employee or leave request fields to the emails to meet specific business requirement
To start using custom email templates you need to complete the following steps which are detailed below
- Create Custom Email Templates
- Update the Leave Configuration to use the email templates
Creating Leave Request Email Template
You can add replacement values in the subject and the body field usingEmail templates for use with Leave Request management are created using standard NetSuite Templates. A template must be associated with a record type that it will be merged with; then within the subject and body replacement fields can be specified (for more information on the templating markup search for "Working with Advanced Templates" in NetSuite help.
To create templates follow the steps below:
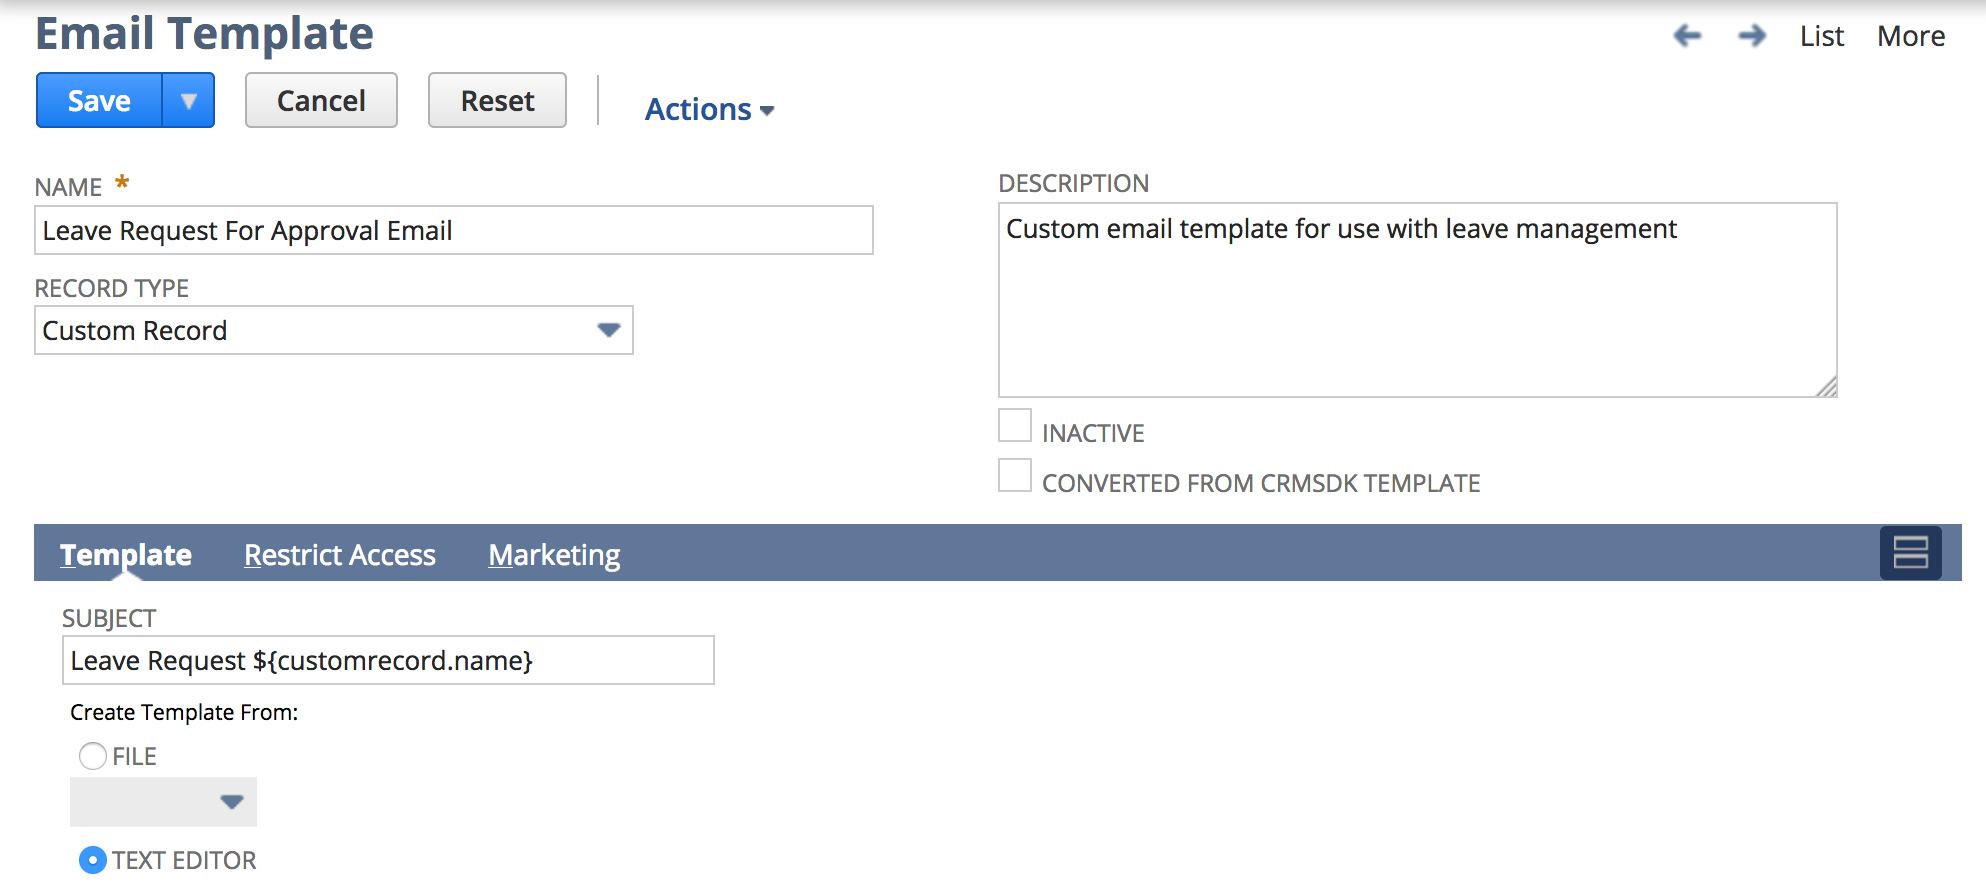
- Navigate to Documents > Template > Email Templates > New
- Set Name as you want the template name to appear for example Leave Request Approved Template"
- Set Record Type to "Custom Record"
- Set Subject for example "Leave Request Approved"
- Set Body with message you would like employees to see.
Example Templates
The following example templates recreate re-create the generic messages using the standard markup languageNetSuite Templating Markup.
| Tip | ||
|---|---|---|
| ||
To help creating custom templates you can use the field type / insert field drop down menus above the message body. Simply select either Employee or Leave Request in the field type drop down and this will refresh the insert field to include fields from the record which are inserted when selected. |
Subject: Leave Request ${customrecord.name}
| Code Block | ||
|---|---|---|
| ||
Dear ${employee.firstName},<br />
<br />
A leave request has been entered and is pending your approval the details are as follows:<br />
<br />
Employee: ${customrecord.custrecord_pr_lr_employee}<br />
Period: ${customrecord.custrecord_pr_lr_start} - ${customrecord.custrecord_pr_lr_end}<br />
Leave Type: ${customrecord.custrecord_pr_lr_leave_type}<br />
<br />
To approve or decline this request, please log into NetSuite<br />
<br /> |
Subject: Leave Request ${customrecord.name} ${customrecord.custrecord_pr_lr_status}
| Code Block | ||
|---|---|---|
| ||
Dear ${employee.firstName},<br />
<br />
Your request for ${customrecord.custrecord_pr_lr_leave_type} for the period ${customrecord.custrecord_pr_lr_start} - ${customrecord.custrecord_pr_lr_end} has been ${customrecord.custrecord_pr_lr_status}.<br /> |
Configuring Leave Setup To Use Templates
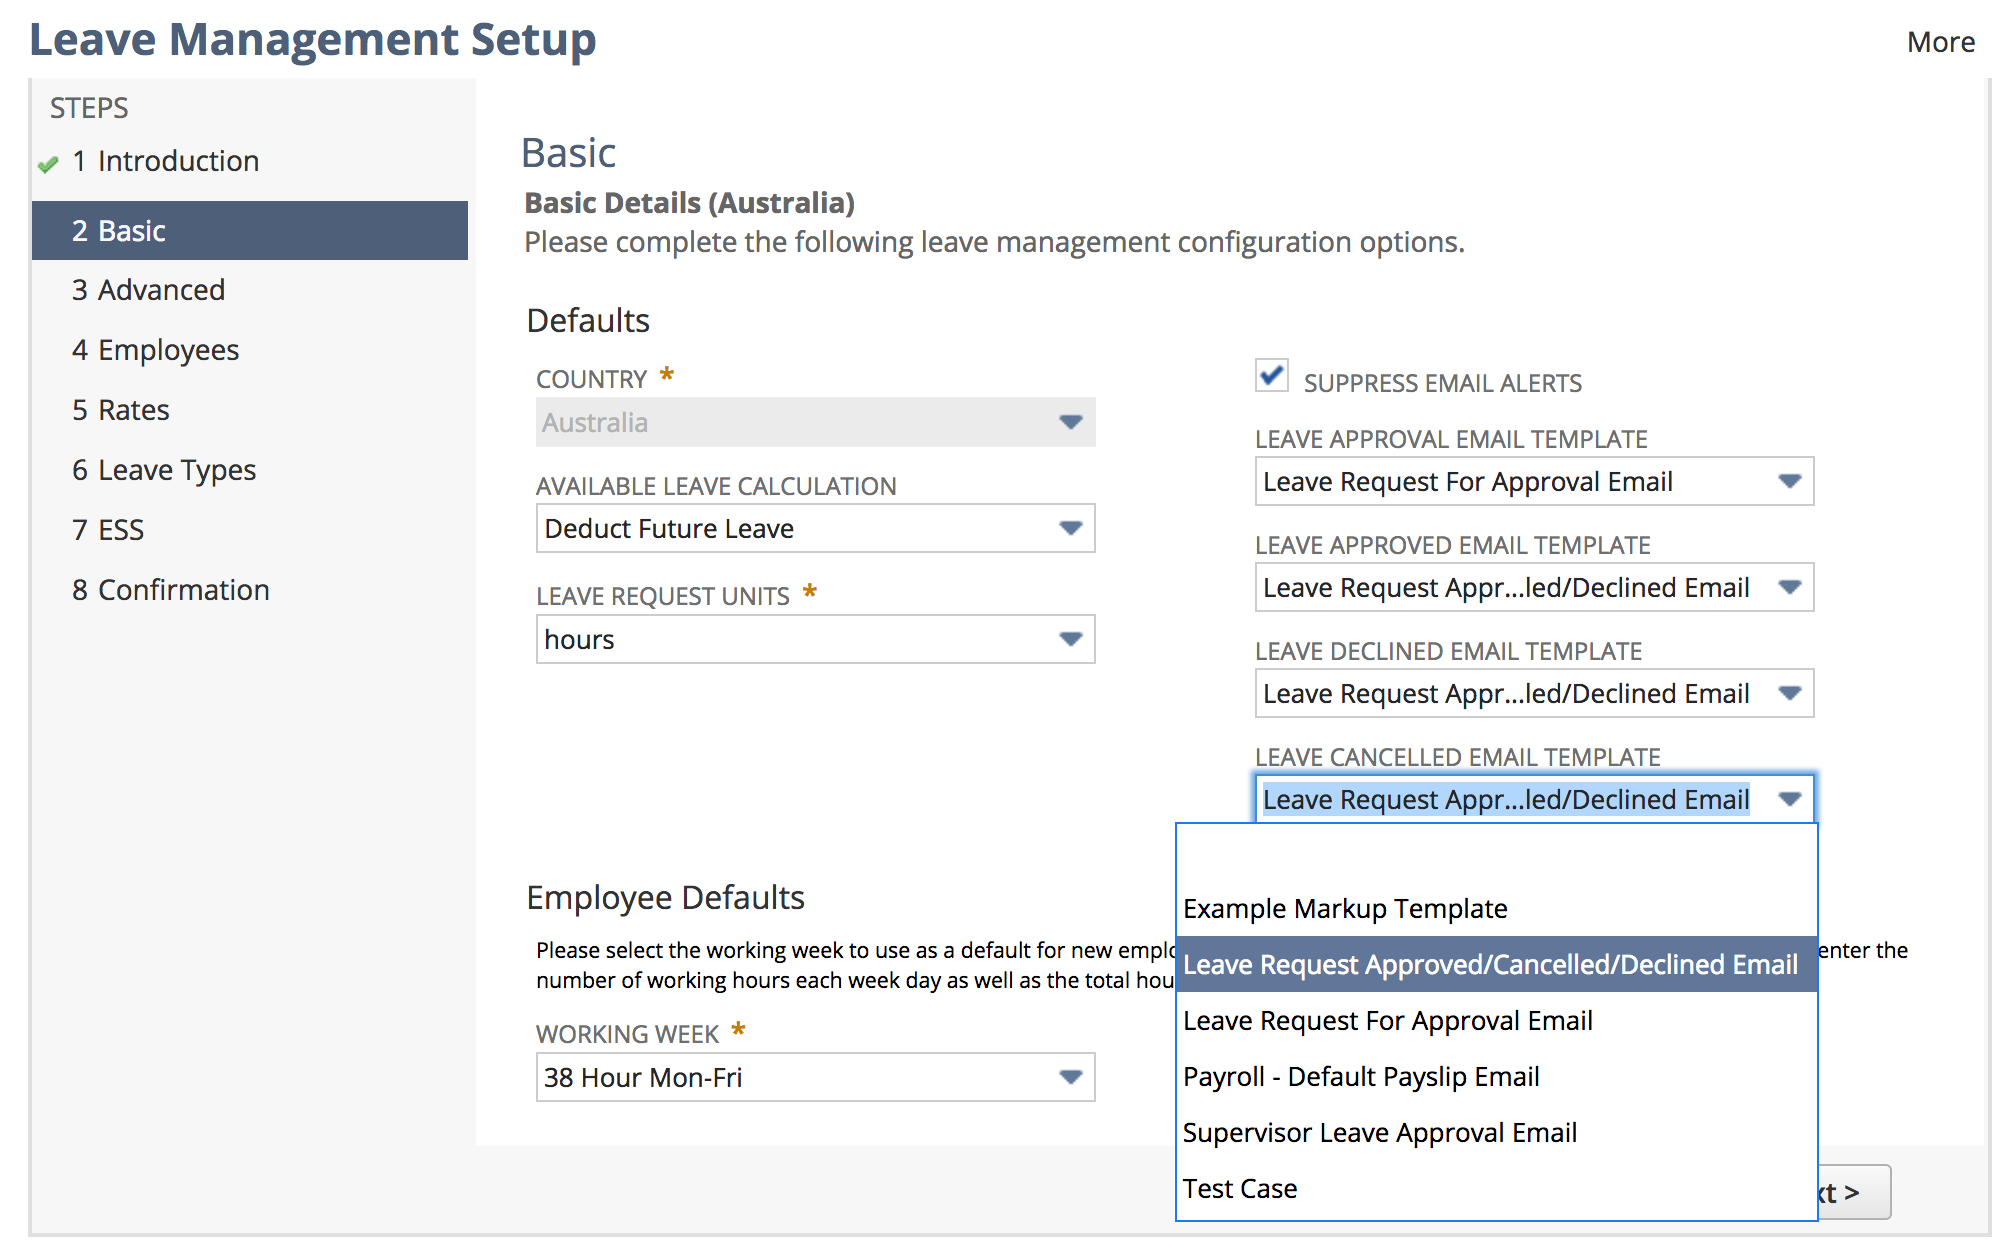
To configure leave to use the custom email templates, populate the template fields in the setup wizard by following these steps:
- Navigate to Payroll Administration > Payroll Setup > Leave Wizard.
- Go to Step 2: Basic and select your custom templates for the actions you wish to override the default email.
- Proceed through each step and complete the Setup Assistant.
| Warning | ||
|---|---|---|
| ||
| Please be aware that the fields you add to the template will appear in the messages tab when sent so avoid sensitive data that you don't want other employees to see. |
| Table of Contents |
|---|